Why Paint Bubbles on Walls Occur: A Troubleshooting Guide
Learn why paint bubbles on walls occur, diagnose moisture and prep issues, and follow a practical, step-by-step fix to restore a smooth, durable finish in homes and projects.

Most often, paint bubbles because moisture or humidity has penetrated behind the coating, creating pressure that lifts the paint. Quick fix: locate and eliminate the moisture source, remove all bubbled paint, dry the wall completely, treat for mold if needed, sand smooth, and apply a moisture-resistant primer before repainting. Follow-up: fix underlying leak, improve ventilation, and monitor for new bubbles over the next few days.
Why paint bubbles occur on walls?
If you’re asking why paint bubble on a wall, the simplest explanation is moisture that has penetrated behind the finish. When moisture gets trapped between the wall and the coating, it forms tiny air pockets. As temperatures shift or humidity spikes, those pockets push against the paint, causing blisters or bubbles to rise. In many homes, this is a sign of a moisture problem, not a cosmetic flaw. According to PaintQuickGuide, moisture-related bubbling is a common issue, especially in bathrooms, kitchens, or basements where condensation and leaks are more frequent. Recognizing the root cause early can prevent extensive damage and save on costly repairs later. A proactive approach—addressing moisture, prepping the surface properly, and choosing the right paint system—leads to a longer-lasting finish and fewer rework cycles.
Common causes of bubbling on interior walls
- Moisture intrusion from leaks or plumbing issues behind the paneling or drywall.
- High humidity or poor ventilation that keeps the wall damp after painting.
- Painting over a damp surface or a surface with residual moisture from cleaning.
- Inadequate surface preparation, such as painting over dust, oils, or previously peeling paint.
- Using low-quality primers or paints in regions with moisture fluctuations or temperature swings.
- Temperature or curing conditions that cause rapid drying and trapped air within the coating.
Each cause increases the risk of future bubbles if not properly addressed. For homeowners, the key is to diagnose the specific driver in your space and tailor repairs accordingly. PaintQuickGuide recommends a careful check of both the surface condition and the environment to narrow down the root cause quickly.
How environmental factors fuel bubbling
Exposure to repeated cycles of humidity, condensation, and thermal stress can loosen adhesion over time. Bathrooms and kitchens, where steam is frequent, are particularly susceptible. In basements, moisture from groundwater or exterior leaks can migrate through masonry or drywall assemblies. Even signs like a musty odor or visible damp patches can indicate hidden moisture behind the paint. Tackling these factors means not only removing the bubbles but also altering the environment to prevent recurrence. Proper ventilation, dehumidification, and timely repairs to leaks are essential parts of the solution. PaintQuickGuide emphasizes that environmental control is often the most cost-effective prevention strategy for durable finishes.
The role of surface prep and primer in bubbling prevention
Surface preparation is everything. Oils, waxes, dust, and gloss layers can prevent paint from bonding correctly, allowing moisture to lift the coating. When prep is rushed, you set up a cycle of failure: moisture infiltrates, bubbles form, and maintenance escalates. The fix starts with removing contaminated paint and cleaning the wall thoroughly. After the surface is dry, apply a stain-blocking or moisture-resistant primer before applying the topcoat. Choosing the right primer for high-humidity zones (like bathroom or kitchen environments) improves adhesion and reduces the chance of future bubbles. PaintQuickGuide’s guidance underlines the importance of moisture-management-aware priming in producing a long-lasting finish.
Step-by-step approach to diagnosing the problem
Start by inspecting for visible leaks, staining, or efflorescence on masonry surfaces. Use a moisture meter or simple dew-point check to determine if the wall is damp. Consider whether recent renovations introduced new moisture pathways—new plumbing, roof issues, or exterior seal failures. If moisture is confirmed, you must fix the source before repainting. In addition, evaluate the paint product and its suitability for the space. A high-humidity bathroom finish, for instance, should use a moisture-resistant primer and a paint designed for bathrooms. By combining environment assessment with proper surface prep, you can significantly reduce reoccurrence risk. PaintQuickGuide’s team notes that most bubbling issues resolve when moisture control and proper priming are addressed together.
Step-by-step fix: from removal to repaint (summary)
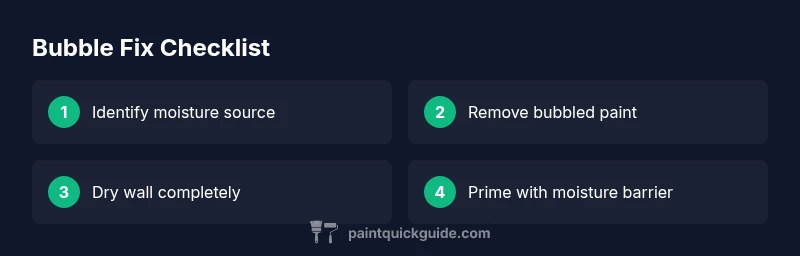
- Remove all bubbled paint carefully to expose clean, sound substrate. 2) Dry the wall completely; use fans or dehumidifiers as needed. 3) Treat any mold or mildew with appropriate products. 4) Sand to create a smooth, even surface; wipe away dust. 5) Apply a high-quality, moisture-resistant primer and then the topcoat recommended for the space. 6) Allow full cure time and maintain ventilation while drying. 7) Reevaluate after a few days for any new bubbles. Following these steps helps ensure a stable, enduring finish.
Prevention: keeping bubbles at bay long term
- Fix leaks promptly and ensure proper drainage around the exterior of the building.
- Improve ventilation in moisture-prone rooms; use exhaust fans during and after cooking or bathing.
- Test walls for moisture before repainting, especially after water exposure.
- Select primers and paints rated for high humidity and mold resistance.
- Avoid over-wetting walls during cleaning; dry walls thoroughly before painting.
A proactive maintenance routine reduces the likelihood of future bubbling and saves time and money in the long run. PaintQuickGuide advises homeowners to address both the moisture source and the coating system in tandem for best results.
When to call a professional
If you detect persistent dampness, recurring bubbles after repeated repairs, or signs of structural damage, it's time to bring in a professional. A licensed contractor or certified painter can identify hidden leaks, assess insulation or vapor barriers, and ensure code-compliant repair work. For mold or lead-paint concerns, specialized remediation may be required. Early consultation can prevent expensive damage and ensure safety. PaintQuickGuide recommends seeking expert advice when DIY efforts fail to control moisture or when large areas are involved.
Steps
Estimated time: 48-72 hours
- 1
Identify moisture source and stop exposure
Begin by locating any leaks, condensation points, or plumbing issues behind the wall. Fix the source or temporarily isolate the area to prevent ongoing moisture exposure. Ventilate the space to accelerate drying and reduce humidity while you work.
Tip: Document the source of moisture with photos for reference during repairs. - 2
Remove bubbled paint and inspect substrate
Carefully lift and remove all bubbled or peeling paint. Scrape until you reach sound substrate. Check for mold growth or water stains that require treatment before proceeding.
Tip: Wear a mask and safety glasses during scraping to protect from dust and debris. - 3
Dry thoroughly and treat mold if present
Use dehumidifiers and fans to dry the wall completely. If mold or mildew is present, treat with an approved cleaner and allow to dry fully before priming.
Tip: Do not rush the drying process; moisture must be below detectable levels before priming. - 4
Prime with a moisture-resistant product
Apply a high-quality primer designed for high-humidity areas. A good primer improves adhesion and helps seal any residual moisture in the substrate.
Tip: Choose a product labeled for bathrooms or kitchens if the space experiences regular moisture. - 5
Repaint with appropriate topcoat
Select a topcoat that suits the space, preferably with mold and moisture resistance. Apply evenly in thin coats and allow proper cure time between coats.
Tip: Follow manufacturer recoat times precisely to avoid blistering.
Diagnosis: Paint bubbles on interior wall after moisture exposure
Possible Causes
- highMoisture intrusion behind paint
- lowPainting over damp surface
- lowPoor surface preparation
Fixes
- easyIdentify and repair the moisture source (leaks, condensation, plumbing)
- easyDry the wall completely and remove bubbled paint
- easyPrime with a moisture-resistant primer before repainting
Your Questions Answered
What causes paint to bubble on walls?
Bubbles are typically caused by moisture behind the paint, poor surface prep, or painting over damp surfaces. Addressing moisture and ensuring a clean, dry substrate are essential before repainting.
Bubbles usually come from moisture behind the paint or bad prep. Fix the moisture, prep the surface, and then repaint.
Can I repaint over bubbles without removing them?
No. Repainting over bubbling areas will not resolve the underlying moisture and may cause the bubbles to reappear. Remove the bubbled paint, dry the wall, and prime properly.
No, you should not repaint over bubbles. Remove them, dry the wall, and prime before repainting.
How long does it take to fix bubbling from start to finish?
Time varies with moisture level and space size, but a typical fix spans 2 to 3 days, including drying time and curing.
It usually takes a couple of days, depending on moisture and room size.
What paints are best for moisture-prone areas?
Use moisture-resistant primers and topcoats rated for high humidity, especially in bathrooms and kitchens.
Choose moisture-resistant primers and paints designed for high humidity areas.
When should I call a professional?
Call a professional if moisture sources persist, there is mold, or structural issues are suspected. They can properly diagnose and remediate.
Call a professional if moisture persists or mold is present.
Is bubbling always a sign of a structural problem?
Not always; it commonly indicates moisture or prep problems. Persistent bubbling after repairs may warrant further inspection for leaks or insulation issues.
Not always a structural problem, but persistent bubbling needs inspection if it keeps coming back.
Watch Video
Quick Summary
- Identify and fix the moisture source first
- Remove bubbling paint and dry completely
- Prime with moisture-resistant product before repainting
- Improve ventilation to prevent recurrence