Why Is Paint Bubbling on Walls? A Practical Troubleshooting Guide
Urgent troubleshooting guide from PaintQuickGuide on why paint bubbles on walls, including moisture, prep faults, and coating issues. Learn quick checks and a practical step-by-step fix.

Paint bubbling on walls is typically caused by trapped moisture, surface prep failures, or using incompatible paints. The quickest fix is to identify and stop moisture, strip bubbled paint, let the wall dry completely, priming with a compatible sealer, and repaint with the correct coatings and technique. If moisture persists, seek professional assessment to prevent recurrence.
why is paint bubbling on wall
If you’ve ever asked yourself, why is paint bubbling on wall, you’re likely confronting a moisture or prep problem beneath the surface. Bubbling happens when water or solvents migrate behind the paint film and cause blistering, or when the surface beneath the paint wasn’t properly prepared. In many homes, interior walls are exposed to humidity, leaks, or rapid temperature changes that trap moisture behind a fresh coat. Additionally, using the wrong primer or paint over an existing glossy or waxy surface can trap air and moisture, creating blisters as the coating cures. For homeowners, recognizing the early signs—small bubbles, wrinkling, or soft edges—lets you intervene before the problem spreads. PaintQuickGuide recommends treating bubbling paint as a warning signal rather than a cosmetic issue; you’re addressing the underlying moisture or prep failure to prevent a repeat.
In practice, the question of why is paint bubbling on wall often points to three culprits: moisture intrusion (from plumbing, roof leaks, or high humidity), inadequate surface preparation (dust, oil, wax, or glossy coatings left on the substrate), and product incompatibility (top coats that don’t adhere well to the underlying layer). Addressing these factors quickly reduces the risk of mold growth, wood rot, or wall damage. Owners in damp climates should pay extra attention to ventilation and source control to ensure long-term repair success.
Quick checks you can do before you repaint
Before you repaint, run through a set of quick checks to pinpoint why bubbling happened and how to prevent a recurrence. Start with moisture indicators: look for water stains, damp spots, or kitchen/bathroom humidity that never seems to drop. Inspect for plumbing leaks, roof or window gaps, or condensation on cold surfaces. If you have access to a hygrometer or moisture meter, measure the wall’s moisture level in several spots; consistently high readings can confirm an active moisture issue. Review the previous paint job: was a glossy finish or oil-based primer used on a non-porous surface? Was the surface properly cleaned and dried? For homes built before 1978, consider lead paint hazards and test where applicable. Finally, check ventilation: poor air movement traps humidity and slows drying. By validating moisture, surface preparation, and coating compatibility, you can determine the root cause and plan a durable repair.
Surface prep pitfalls that cause bubbling
Surface prep sets the stage for a successful repaint. Bubbling often traces back to residues like dust, oil, wax, silicone, or residual EU- or factory-applied sealers that block adhesion. Sanding over a glossy surface without dulling it can leave a slick layer that prevents bonding, while painting on a damp or recently washed wall traps moisture under the film. Even cleaning agents with residues can create a barrier. In addition, using a porous surface without a proper primer on top can trap moisture inside the wall. When you encounter bubbling, inspect whether the substrate was properly dried after cleaning, whether the old paint is flaking or peeling, and whether a compatible primer was used. Choosing the right primer—ideally a bonding or stain-blocking type compatible with both the substrate and the new paint—helps create a uniform surface that resists future bubbling. The takeaway is to remove contaminants, ensure dry times are respected, and select coatings designed for the substrate.
For anyone wondering, the root cause of bubbling often comes down to surface prep, moisture, or coating incompatibility. The failure to address even one of these can compromise the entire project and lead to repeated bubbling after repainting.
Diagnosing moisture sources: interior vs exterior
Moisture sources can be internal or external, and their identification shapes your remediation plan. Internal sources include leaks from plumbing lines (pipes behind walls), rising damp from leaking fixtures, or high indoor humidity from poor ventilation in kitchens and bathrooms. Exterior sources include roof leaks, damaged flashing, cracked siding, or inadequate drainage that lets water seep behind the painted surface. Condensation from temperature differentials, especially on cold walls, can also condense on the wall’s surface and create bubbles as the paint film traps moisture. If you spot bubbling near windows, bathrooms, or basements, inspect for leaks and moisture accumulation patterns. A systematic approach—inspect plumbing and roof components, check attic vents, test humidity, and monitor moisture over several days—helps confirm the source. Once you identify the moisture, you can address it with fixes that stop the intrusion before you repaint.
Choosing the right paint and primer to prevent bubbling
Prevention starts with selecting the right products for the substrate and the environment. If moisture is a problem, use a moisture-resistant primer or a bonding primer designed to stick to challenging surfaces. For drywall and plaster, a stain-blocking primer helps prevent bleed-through and seals in moisture that could cause bubbling. In kitchens and bathrooms, pick paints with mold and mildew resistance and a finish that tolerates humidity and temperature swings. For masonry or concrete, use a breathable, elastomeric coating that moves with the substrate rather than cracking as it flexes. Always follow the manufacturer’s recommendations for dry times between coats, and ensure the previous layer is fully dry before applying a new one. Pair primers with topcoats that have good adhesion properties and appropriate sheen for the room’s conditions. The right combination of primer and paint significantly reduces the likelihood of future bubbling and keeps walls looking smooth.
Remember, always test a small area first to confirm adhesion and drying behavior before committing to a full-room project.
Repair plan after you find bubbling: a practical roadmap
When bubbling is detected, you need a disciplined repair plan. Start by removing all bubbled paint down to a sound substrate using a putty knife or scraper. Sand the edge of the remaining paint to blend, then clean the surface to remove dust and residues. Drying is critical; ensure the wall is completely dry—consider using a dehumidifier or fan to speed the process. If you suspect mold or mildew, treat with an appropriate mold cleaner and ensure proper ventilation. Apply a bonding or stain-blocking primer to seal the surface and improve adhesion. Finally, repaint with a compatible paint system, applying thin, even coats and allowing full drying between coats. If the bubbling reappears after these steps, the moisture source is not controlled and may require professional assessment for plumbing, roof, or structural issues. A methodical, patient approach prevents a quick return of bubbles and prolongs the life of your finish.
Safety and when to call a pro
Safety comes first when dealing with bubbling paint, especially on older homes. If you find peeling or bubbling near electrical outlets, behind walls, or in areas with suspected lead paint, stop sanding and scraping and consult a licensed professional. Lead paint requires specialized containment and removal methods to prevent health risks. In cases of extensive moisture damage, mold growth, or structural concerns (like ceiling leaks or standing water behind walls), a contractor should evaluate the home’s envelope, insulation, and drainage. When in doubt, professional help can save time, reduce costly mistakes, and ensure compliance with local regulations. Quick action combined with expert evaluation can prevent complicated and expensive repairs later.
Preventing future bubbling: maintenance tips
To minimize future bubbling, keep humidity levels stable and ensure good ventilation in moisture-prone rooms. Use exhaust fans in bathrooms and kitchens, and consider a dehumidifier in damp basements or crawlspaces. Inspect plumbing fixtures and roof areas regularly for leaks, and address any moisture intrusion promptly. Clean walls with a mild cleaner to remove oils and contaminants before painting, and always apply the recommended drying times between coats. Store paint and primers in a dry place to maintain product integrity. Finally, spot-test new paint in a small area before wide application to confirm adhesion and drying behavior. These proactive steps help preserve your home's surfaces and prevent the recurrence of bubbling.
Summary: quick actions to take now
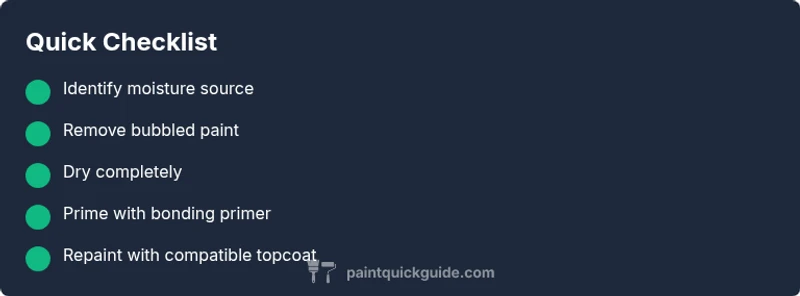
- Pinpoint moisture sources and fix leaks before repainting.
- Remove bubbled paint, dry thoroughly, and prepare the surface.
- Use a bonding primer and compatible topcoat suited to the substrate.
- Ventilate during curing and monitor humidity to avoid future issues.
- If in doubt, consult a professional to assess hidden moisture or lead paint hazards.
Steps
Estimated time: 6-12 hours total active work (plus drying time between coats)
- 1
Identify moisture source
Inspect for leaks, check humidity, and note any recent water exposure. Fix the leak or reduce moisture before continuing.
Tip: Document findings with photos in case you need a pro later. - 2
Remove bubbled paint
Carefully scrape away all bubbled sections down to sound material. Do not leave loose edges behind.
Tip: Wear a mask to avoid inhaling dust. - 3
Dry the surface completely
Ventilate the area and use fans/dehumidifiers until the wall is fully dry, typically 24–72 hours depending on conditions.
Tip: Check moisture with a meter if available. - 4
Treat mold or mildew
If you see mold, clean with an appropriate solution and allow to dry completely before priming.
Tip: Never skip mold treatment; it weakens adhesion and health risk increases. - 5
Prime with a bonding primer
Apply a primer designed for adhesion on the specific substrate; allow it to dry fully per manufacturer guidelines.
Tip: Choose a sealant with moisture resistance if humidity remains high. - 6
Repaint in thin, even coats
Use compatible topcoat and primer; apply in light layers and let each coat dry completely before the next.
Tip: Avoid heavy coats that trap moisture. - 7
Evaluate and vent
After painting, ensure good ventilation to aid drying and monitor for any signs of new bubbling over the next few weeks.
Tip: Keep windows open or use a fan to promote air movement.
Diagnosis: Visible bubbling or blistering under fresh paint on interior walls
Possible Causes
- highMoisture intrusion from leaks or high humidity
- mediumInadequate surface preparation (dust, oils, wax, or gloss)
- lowIncompatible primer/paint on substrate
- lowEnvironmental conditions (rapid drying or temperature swings)
Fixes
- easyIdentify and stop moisture source (plumbing, roof, or humidity)
- easyStrip bubbled paint to sound substrate and dry completely
- easyUse a bonding or stain-blocking primer suitable for the surface
- easyRepaint with compatible paint and follow proper cure times
Your Questions Answered
Why is paint bubbling on interior walls?
Bubbling usually signals moisture intrusion, poor surface prep, or paint incompatibility. Investigate leaks, humidity, and substrate compatibility before repainting.
Bubbling usually means moisture or prep problems behind the paint; check for leaks and humidity before repainting.
How can I fix bubbling paint on drywall?
Strip the bubbled areas, dry the wall completely, apply a bonding primer, and repaint with a moisture-resistant system suitable for drywall.
Strip the bubbles, dry the wall, prime it, and repaint with compatible products.
Can lead paint cause bubbling?
Yes, if your home is pre-1978, test for lead and follow proper removal protocols. Do not sand lead-based paint without professional containment.
Lead paint may be involved if the house is old; test and proceed safely with guidance from pros.
Is sanding bubbling paint safe?
Sanding can create hazardous dust, especially if lead paint is present. Use appropriate PPE and avoid sanding in lead-paint areas; consider professional removal.
Be cautious sanding; if lead could be present, don’t sand—call a professional.
How long does it take to finish after bubbling issues are fixed?
Drying times depend on primer, paint, and humidity. Plan for several days including curing time between coats and final drying.
Expect a few days for curing and drying, depending on products and humidity.
When should I hire a professional?
If bubbling covers large areas, if moisture continues after fixes, or if you suspect mold or structural issues, hire a licensed contractor or a water/moisture specialist.
Call a pro if the problem is widespread or moisture keeps returning.
Watch Video
Quick Summary
- Diagnose moisture sources before painting
- Prepare the surface thoroughly for optimal adhesion
- Use the right primer for the substrate
- Fix leaks and control humidity to prevent recurrence
- When in doubt, consult a professional