Paint is Peeling Off Walls: Troubleshooting Guide
Urgent, practical troubleshooting for peeling paint on walls. Learn causes, diagnostics, fixes, step-by-step methods, and prevention to restore a flawless home finish.

Peeling paint on walls usually signals moisture or adhesion issues. Start by locating leaks, drying the area, and removing loose paint before priming and repainting with a moisture-ready system. For a lasting result, address underlying humidity, proper prep, and compatible primers. According to PaintQuickGuide Analysis, early moisture control dramatically reduces peeling recurrence.
Why paint is peeling off walls: common causes
Peeling occurs when the bond between old paint and the wall weakens, usually due to moisture, improper surface preparation, or incompatible paint systems. If you notice paint is peeling off walls, it’s often your first sign that something deeper is happening behind the scenes. According to PaintQuickGuide, moisture intrusion is the most common driver of peeling on interior walls, followed by poor prep and age-related deterioration.
Moisture is sneaky. It can come from leaks in roofs or plumbing, condensation in bathrooms, or high indoor humidity during cold months. When water sits behind a painted surface, the substrate expands and contracts, causing the paint film to lose adhesion and bubble, peel, or spider across the wall. If you live in a humid climate, your walls may also accumulate mildew or mold, which weakens surface coatings and creates unsightly peeling patches.
Poor surface preparation is another frequent culprit. Skipping thorough cleaning, sanding, or priming leaves the substrate with contaminants or a mismatch of porosity, so the new paint cannot properly bond. Similarly, applying a latex paint directly over oil-based paint without a compatible primer will almost guarantee peeling down the line. Lastly, aging or shifting substrates—such as drywall joints—can develop hairline cracks that the paint cannot bridge.
To prevent future peeling, start with a clear diagnosis: fix moisture, prepare the surface, and use compatible products. PaintQuickGuide’s recommendations emphasize moisture control and correct primer-paint pairing as essential steps to resilient finishes.
How to inspect and confirm the root cause
Thorough inspection is the key to a durable repair. Start by assessing the area: is the peeling only in damp rooms (bathrooms, kitchens) or scattered across several rooms? Look for signs of water damage behind the paint, such as staining, soft drywall, or bubbling under wallpaper. If you can access the wall from the other side (for example, an adjacent room or attic), examine for unseen moisture sources—roof leaks, plumbing lines, or attic condensation. Use a moisture meter to gauge surface moisture; readings above 14-16% typically indicate a lingering moisture problem that must be addressed before repainting.
Next, evaluate the paint system. Identify the existing paint type (oil-based vs. latex) and check whether a proper primer was used. If the previous coat was oil-based and the new coat is latex without a compatible primer, peeling is likely. Inspect for contaminants such as dust, grease, or chalky powder on the wall; such residues can prevent adhesion. Finally, observe for structural issues, including cracks at joints, misaligned drywall, or poor ventilation, which can worsen peeling over time. Document findings with photos to guide repairs and help when contacting a contractor.
With a clear map of moisture, surface condition, and system compatibility, you can tailor the repair plan: fix moisture first, then re-sand, prime, and repaint with the appropriate products. This approach reduces the risk of repeat peeling and creates a durable, smooth finish. PaintQuickGuide’s team recommends verifying the root cause before painting again.
Fixes by scenario: moisture, surface prep, and system compatibility
There isn’t a one-size-fits-all fix for peeling paint—most repairs fall into three practical scenarios. Understanding which scenario applies will save you time and money.
-
Moisture-heavy environments: Repair begins with eliminating the moisture source. Fix leaks, improve drainage, and run a dehumidifier or increase ventilation. After flushing the area dry, remove all loose paint and drying patches. Rebuild with a moisture-resistant primer and topcoat designed for bathrooms or kitchens.
-
Inadequate surface prep: If the wall was not properly cleaned, sanded, or primed, adhesion will fail. Clean the surface with a mild degreaser, rinse, and dry. Sand glossy surfaces to a dull finish, wipe away dust, and apply a high-adhesion primer before repainting.
-
Incompatible paint system: When switching between water-based and oil-based paints, a compatible primer is mandatory. Use an oil-based primer on oily or glossy surfaces, or choose a latex primer if you’re applying latex over existing latex. Apply two coats of the chosen finish with ample drying time between coats.
Avoid common mistakes such as painting over damp patches, skipping sanding, or rushing the drying process. If you’re unsure, consult a professional to confirm primer compatibility and moisture stability.
Step-by-step repair workflow (overview)
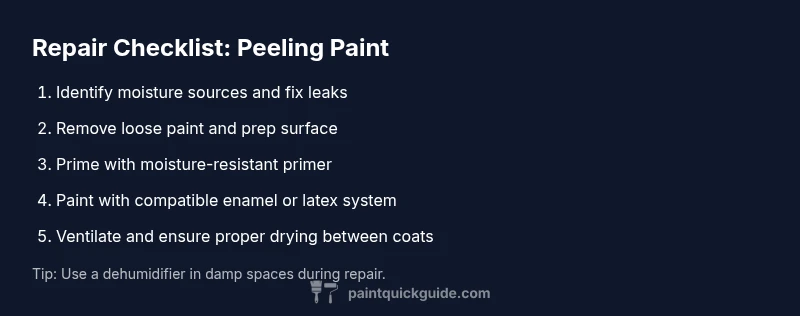
This section outlines a practical workflow you can follow in a weekend. It pairs with the more detailed STEP-BY-STEP block below. Begin by isolating the area to protect floors and furniture. Remove loose paint with a putty knife or scraper, taking care not to gouge the wall. Lightly sand edges to feather the finish, then vacuum and wipe with a damp cloth to remove dust. If moisture is present, address the cause before proceeding. Prime with a moisture-blocking primer, ensuring the surface is completely dry before painting. Finally, apply two coats of the correct finish, allowing full curing time between coats. Inspect for any remaining weak spots and touch up as needed. Document results with photos to track improvements and inform future maintenance.
Prevention: how to maintain a durable finish
Prevention boils down to moisture control, proper prep, and mindful maintenance. Keep humidity levels stable—ideally under 50-60%—in living spaces, bathrooms, and basements. Use exhaust fans when cooking or showering, and fix leaks promptly. Before painting, follow a rigorous prep protocol: clean, sand, and prime with a product compatible with the chosen topcoat. Select the right system for the environment: enamel or satin paints with moisture resistance for bathrooms; latex paints with good coverage for living areas. Apply coats in suitable temperatures, typically between 50-85°F (10-29°C), and avoid painting during periods of high humidity or rapid temperature swings. Finally, store paint properly, label cans, and keep leftover primer and coating out of reach of children and pets. With these practices, peeling paint is far less likely to reappear.
Steps
Estimated time: 2-6 hours active work; plus drying time between coats and after final coat
- 1
Prepare the area and protect surfaces
Set up tarps, remove furniture, and cover floors. Put on eye protection and a mask. Use a putty knife to gently lift loose paint without gouging the wall. This initial step prevents debris from spreading and creates a safe working zone.
Tip: Seal edges with painter’s tape to keep neighboring areas clean. - 2
Remove loose paint and feather edges
Use a scraper to gently remove all unattached paint. Lightly sand surrounding edges to feather the transition between bare substrate and intact paint. Vacuum or wipe down to remove dust for better adhesion.
Tip: Work in small sections to avoid reworking already prepared areas. - 3
Address moisture first
If moisture is present, locate and fix the source (leak, ventilation issue). Use a dehumidifier and ensure the wall is completely dry before priming. Moisture control is crucial to prevent quick recurrence of peeling.
Tip: Measure surface moisture with a meter and recheck after drying. - 4
Prime with the right product
Apply a moisture-blocking or bonding primer suited to the surface and climate. Follow the product instructions for drying times. A good primer improves adhesion and blocks stains that can bleed through.
Tip: Prime the entire repaired area for a uniform finish. - 5
Apply paint in proper conditions
Paint with the correct system (latex over latex or with the appropriate primer for oil-based coatings). Use two coats for uniform coverage, allowing adequate drying time between coats. Avoid painting in extreme humidity or temperatures.
Tip: Ventilate the space well during and after painting. - 6
Inspect and finish
After the final coat dries, inspect for missed spots and touch up as needed. Clean tools, remove covers, and monitor the area for any signs of new peeling over the next weeks. If peeling returns, reassess moisture and primer compatibility or call a pro.
Tip: Keep a photo log to track the repair progress.
Diagnosis: Visible peeling or flaking paint on interior walls
Possible Causes
- highMoisture intrusion from leaks, condensation, or high humidity
- mediumInadequate surface preparation (no primer, dirty surface, rough substrate)
- lowIncompatible paint system (latex over oil-based or mismatched primers)
- highOngoing structural issues (roof leaks, plumbing leaks, or poor ventilation)
Fixes
- easyFix moisture sources and dry the area completely before repainting
- easyThoroughly clean, sand, and remove all loose coating
- mediumUse a suitable primer (moisture-blocking or bonding) before repainting
- hardAddress structural issues; repair leaks and improve ventilation
- easyChoose a compatible paint system and follow proper drying times between coats
Your Questions Answered
What causes peeling paint on walls?
Peeling is usually caused by moisture intrusion, poor surface preparation, or a mismatched paint system. Environmental factors and structural issues can also contribute. A proper diagnosis guides effective repair.
Peeling is usually from moisture, bad prep, or wrong paint. Identify the cause to fix it properly.
Can I repaint immediately after removing loose paint?
Not until the surface is dry and properly prepared. Moisture should be resolved, and a compatible primer should be applied before the topcoat.
No. Wait for the surface to dry and prime it before repainting.
How long should the surface dry after moisture repair?
Follow the primer’s instructions. In moisture-prone spaces, give extra drying time and ensure the area is fully dry before painting.
Typically wait 24 hours or more depending on humidity until the surface is completely dry.
Is mold a concern when peeling occurs?
Yes, if mold or mildew is present, treat with an appropriate cleaner and PPE. Large infestations may require a professional assessment.
If you see mold, wear PPE and consider calling a pro for bigger problems.
When should I call a professional?
If moisture sources persist, peeling recurs after repair, or there’s extensive water damage, a licensed contractor or painter should assess the area.
If moisture keeps coming back, or damage is widespread, hire a pro.
Watch Video
Quick Summary
- Identify moisture sources before repainting
- Proper surface prep and compatible primers prevent peeling
- Address structural issues to stop recurrence
- Plan for drying time between coats to ensure durability