Why Does Paint Peel Off Walls? A Practical Troubleshooting Guide
Discover why paint peels off walls, learn how to diagnose moisture and prep failures, and fix peeling paint with a durable, properly primed finish. A practical guide from PaintQuickGuide.

Peeling paint on walls is usually caused by moisture, poor surface prep, or incompatible coatings. The quick fix is to identify and stop moisture intrusion, scrape away loose paint, sand smooth, rinse the surface, prime with a stain-blocking primer, and repaint with the right finish. If moisture persists, address leaks or humidity before re-painting.
Common Causes of Paint Peeling
Peeling paint happens for several reasons, but the two most common culprits are moisture and poor surface preparation. The question many homeowners ask is why does paint peel off walls, and the answer often points to moisture intrusion from roof leaks, plumbing, or high indoor humidity. When water stays on the wall, it weakens the substrate and pushes the coating away. In older homes, layers of paint built up over time can trap moisture or reveal lead-based paints, complicating repairs. Understanding the root cause helps you choose the right repair strategy and avoid repeating the failure. According to PaintQuickGuide, moisture problems and substrate issues top the list, making it essential to verify sources first before choosing products or methods. This section lays the groundwork for a durable fix by clarifying how moisture, prep, and coating chemistry interact.
Human error in preparation often compounds moisture problems. For example, painting over a dusty, oily, or glossy surface without proper abrasion or cleaning can create a weak bond that fails as soon as conditions change. In many homes, peeling paint is not a single-event failure but the result of a cascade: moisture continues to wick through the wall, the new coat never fully adheres, and the surface begins to peel again. A holistic approach—identifying the root cause, preparing the surface properly, and selecting compatible primers and paints—offers the best chance for a lasting finish.
Immediate Checks You Can Do Now
Before you tear into a repair, run through quick checks to narrow down the cause and plan your fix.
- Inspect for visible moisture: look for water stains, damp patches, or mould in corners and along ceilings.
- Check for leaks: look at plumbing joints, roof lines, or leaks above the wall; even a slow drip can create ongoing moisture.
- Evaluate surface prep: was this wall cleaned, deglossed, and properly sanded before painting? If not, adhesion may have failed at the first layer.
- Test the edges: gently rub painted edges to see if they crumble or flake; if so, you’ll need to remove loose material.
- Consider the environment: high humidity rooms (kitchens, bathrooms) need better ventilation and possibly humidity control before repainting.
If you identify moisture as a primary factor, the next steps focus on stopping the intrusion and ensuring the substrate is ready for new paint. If prep issues are to blame, you can often salvage the job with a thorough cleaning, sanding, and priming routine. Either way, the goal is to create a clean, dry, and well-bonding surface before applying primer and paint.
Surface Prep and Primer Playbook
If you want a durable finish, you must prep the surface correctly and choose the right primer.
- Scrape away all loose paint: use a stiff putty knife and a plastic scraper to avoid gouging the wall.
- Clean and dry the surface: wash with mild detergent, rinse, and let it dry completely. Residual soap or moisture will compromise adhesion.
- Sand glossy finishes: lightly sand with fine-grit sandpaper to create a profile for bonding.
- Prime with the right product: use a stain-blocking primer if there are water stains, or a shellac-based primer for problem areas.
- Pick a compatible topcoat: match the primer’s type (water-based vs solvent-based) to the finish you want.
Tip: Do not skip primer on patched areas; it helps seal stains and creates a uniform surface for paint. By following these steps, you lay a strong foundation that minimizes future peeling and ensures better color fidelity.
When to Call a Professional
Some problems are beyond a DIY fix and require a pro.
- Persistent leaks: if you can’t locate the source or fix the moisture, a contractor or plumber is needed.
- Structural damage: bulging or cracking plaster or drywall may indicate bigger issues.
- Lead paint concerns: homes built before 1978 may have lead-based paint—testing and abatement should be done by specialists.
- Repainting after moisture fixes: allow full drying time and ensure humidity is controlled before re-painting.
Bottom line: if you are unsure about moisture, structural integrity, or lead risk, hire a licensed pro to avoid costly rework and health hazards. A professional can also guide you on the best primer and paint system for your climate and room use.
Steps
Estimated time: 4-6 hours
- 1
Identify moisture sources
Carefully inspect the area for leaks, water intrusion, or condensation buildup. Track back to the source and plan a fix before repainting. Document spots with photos for reference.
Tip: Address the moisture problem first; otherwise the new paint will fail again. - 2
Protect the work area
Lay down drop cloths, seal adjacent rooms, and turn on exhaust fans to control humidity during the repair. This keeps dust and moisture from spreading.
Tip: Use painter’s tape to keep edges clean and reduce cleanup later. - 3
Remove loose paint
Use a putty knife or scraper to lift all peeling and blistered paint. Do not gouge the wall; you want a smooth substrate for adhesion.
Tip: Wearing a dust mask prevents inhaling paint particles. - 4
Dry and repair the surface
Let the wall dry completely. Patch cracks or holes with appropriate filler, then sand flat once cured.
Tip: Wipe away dust after sanding for a clean bonding surface. - 5
Prime with stain-blocking primer
Apply a high-quality primer suited to the wall material and skin-type of moisture. Use thin, even coats and let cure per product guidelines.
Tip: Use a shellac- or denatured-alcohol-based primer for stubborn stains. - 6
Topcoat selection and application
Choose a compatible topcoat (water-based or oil-based) according to the primer. Apply two thin coats, allowing proper dry time between coats.
Tip: Avoid rapid recoat; warmer, low-dust evenings speed up curing. - 7
Final inspection and ventilation
Inspect the finish for uniform color and adhesion. Improve ventilation to prevent future moisture buildup.
Tip: Keep indoor humidity lower than 50-60% during the first few days after painting.
Diagnosis: Visible peeling paint on interior walls after moisture events
Possible Causes
- highMoisture intrusion from leaks or high humidity
- highPoor surface preparation or incompatible primer/paint
- mediumOld lead-based paint in pre-1978 homes
Fixes
- easyIdentify and repair moisture source (leaks, condensation, ventilation)
- easyScrape away peeling sections, clean, dry, and re-prime the surface
- easyApply a compatible topcoat after proper curing
Your Questions Answered
What is the most common cause of peeling paint?
Moisture intrusion from leaks or high humidity is the most frequent cause. Poor surface prep and incompatible coatings can also contribute.
Peeling paint is usually caused by moisture or poor prep, with moisture being the most common factor.
Can peeling paint be repaired without removing all layers?
Yes, if the peeling is isolated. Remove loose paint, clean the surface, and reprime before repainting to restore adhesion.
If the peeling is limited, you can repair by removing loose paint, priming, and repainting.
Should I use oil-based or latex primer for peeling walls?
For most interior peeling walls, a water-based stain-blocking primer works well; in stubborn areas, a shellac or oil-based primer helps seal stains.
Latex primers are common, but shellac-based primers can be better for stubborn stains.
Is peeling paint dangerous? Could be lead paint?
Peeling paint can indicate moisture and sometimes older lead-based paint. If your home was built before 1978, test for lead before sanding and consider professional abatement.
Lead paint is a concern in older homes; testing is advised before any sanding.
How long does a peeling paint repair take?
Duration depends on moisture sources, drying times, and room size. Plan for several days including cure times between coats.
Repairs take time due to moisture fixes and drying between coats.
When should I hire a professional?
If moisture persists after fixes, there is structural damage, or lead risk is suspected, hire a licensed professional.
Call a professional if moisture remains, there’s structural damage, or lead risk is suspected.
Watch Video
Quick Summary
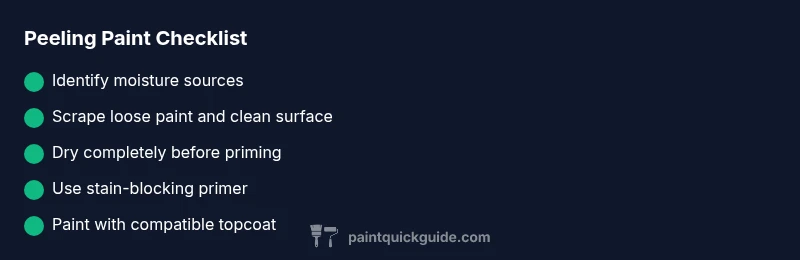
- Identify moisture sources before repainting.
- Thorough prep and priming are essential for lasting adhesion.
- Choose primer and topcoat based on substrate and moisture.
- Control humidity to prevent recurrence of peeling.