What Paint Over Epoxy Primer: A Practical Guide for DIY
Learn how to properly topcoat epoxy primer with compatible paints, including surface prep, topcoat options for metal, wood, and auto finishes, and step-by-step application tips for long-lasting results.

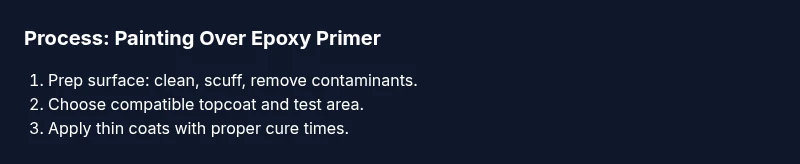
You can successfully topcoat over epoxy primer by choosing the right paint, preparing the surface, and applying thin, even coats with proper cure times. Start with a light scuff and clean the surface, then select a compatible topcoat (alkyd enamel for metal or a quality waterborne enamel for wood and automotive parts). This guide walks you through prep steps, compatible finishes, and best-practice application.
What is epoxy primer and why paint over it?
Epoxy primer is designed to provide superior adhesion, corrosion resistance, and a sealed surface. It is commonly used on metal substrates such as automotive bodies, gates, and structural components, and it creates a solid base for topcoats. The question you’ll often hear is, "what paint over epoxy primer?" The short answer is: you can topcoat successfully with a wide range of paints, but success hinges on surface preparation, substrate compatibility, and the chemistry of the topcoat. According to PaintQuickGuide, the best results come from matching topcoat chemistry to the substrate and ensuring the epoxy primer is fully cured before painting. If you skip prep or choose a topcoat that isn’t compatible, you risk peeling, hazing, or adhesion failure. In this context, the term epoxy primer is a workhorse for durability, while the topcoat determines the final look and feel of the project. Whether you’re refinishing a metal fence, a cabinet, or a hobby car, the same core principles apply: prep, compatibility, and controlled application.
The paints you choose to apply over epoxy primer fall into several families, with distinct advantages and limitations. Alkyd enamels tend to deliver strong adhesion and gloss on metal surfaces but require longer cure times and solvent control. Waterborne enamels or acrylic urethanes offer lower odor, easier cleanup, and rapid recoat windows—ideal for indoor woodwork or automotive parts in well-ventilated spaces. The PaintQuickGuide approach emphasizes testing a small area first to verify compatibility, then proceeding with a full topcoat. It’s also essential to confirm that the primer has cured fully according to the manufacturer’s guidance before applying any paint. As you plan, remember that epoxy primer’s purpose is to create a bond-friendly, sealed surface; the topcoat’s job is to deliver color, protection, and the desired sheen.
note_uri”:null},{
Tools & Materials
- 120-180 grit abrasive sandpaper(Used to scuff the epoxy primer to create a mechanical key for the topcoat.)
- Tack cloth(Removes dust after sanding to ensure a clean surface before painting.)
- Cleaning solvent or degreaser(Use isopropyl alcohol or mineral spirits to remove oils and residues.)
- Masking tape and drop cloths(Protects edges and surrounding areas while you work.)
- Clean lint-free rags(For wiping surfaces and solvent cleanup.)
- Topcoat compatible with epoxy primer(Choose a finish that matches the surface (metal, wood, automotive) and is compatible with the primer.)
- Brushes and/or rollers (5- to 9-inch rollers)(Use high-quality synthetic brushes or foam rollers for even coats.)
- Paint tray or spray equipment(Prepare a suitable application method for the chosen topcoat.)
- Respirator or protective mask(Protects from fumes and dust during sanding and painting.)
- Gloves and eye protection(Keeps skin and eyes safe from solvents.)
Steps
Estimated time: 2-6 hours
- 1
Inspect and prep the surface
Look for peeling, rust, or pitting on the epoxy primer. Clean thoroughly with a degreaser, then scuff the surface with 120-180 grit sandpaper to create a good key for the topcoat. Wipe away dust with a tack cloth.
Tip: A thorough surface inspection prevents adhesion problems later. - 2
Mask the area and protect yourself
Apply masking tape to edges and use drop cloths to protect nearby surfaces. Put on a respirator, gloves, and eye protection before you begin sanding or paint application.
Tip: Better safe than sorry—ventilate the space well. - 3
Choose the right topcoat
Confirm that your topcoat chemistry is compatible with epoxy primer and the substrate. For metal surfaces, alkyd enamels are common; for wood or auto parts, waterborne enamels or urethanes can be better choices.
Tip: Read the label for adhesion, humidity limits, and recoat times. - 4
Apply a thin first coat
Dip a quality brush or use a spray system to apply a light, even coat. Avoid heavy buildup that causes runs or orange-peel texture.
Tip: Thin coats dry faster and reduce sags. - 5
Dry and inspect first coat
Allow the coat to reach its initial tack-dry according to the product instructions. Inspect for uneven coverage or holidays (bare spots).
Tip: If necessary, gently re-sand any rough areas with low-grit paper. - 6
Apply additional coats
Apply 1-2 more thin coats, waiting the manufacturer’s recommended dry time between coats. Maintain consistent pressure and technique if using a spray gun.
Tip: Multiple thin coats yield a smoother, more durable finish. - 7
Final cure and inspection
Let the topcoat cure fully in a dust-free environment. Check for uniform color and gloss, and inspect for peel or fish-eye around edges.
Tip: Cure times vary; do not rush the final inspection. - 8
Maintenance plan
Once cured, clean with a mild cleaner and avoid abrasive scrubbing that could dull the finish. Consider a protective wax or sealant if appropriate for the surface.
Tip: Protection extends the life of the finish. - 9
Document and label
Note the products used, batch numbers, and cure times for future touch-ups. This helps ensure ongoing color matching and reliable maintenance.
Tip: Keep a simple maintenance log. - 10
Recoat if needed
If color or finish requires a touch-up later, ensure the surface is clean and scuffed before applying a fresh coat.
Tip: Always verify compatibility with the existing finish.
Your Questions Answered
Can I paint directly over epoxy primer, or do I need a sealer first?
Many epoxies accept topcoats directly after proper prep and cure. Some substrates benefit from a compatible sealer or bond improver before color coats. Always follow the primer and topcoat manufacturer’s recommendations to avoid adhesion problems.
Most epoxies can take a topcoat after proper prep and cure, but check the product guidelines.
What topcoat finishes work best over epoxy primer on metal surfaces?
For metal, alkyd enamel or urethane-based topcoats often perform well, offering durability and gloss. Ensure the product is compatible with the primer and tack-free before applying. Test on a small area first.
Alkyd enamel or urethane-based topcoats are reliable choices for metal after epoxy primer.
How long should I wait between coats when painting over epoxy primer?
Wait times depend on the topcoat and environmental conditions. Common ranges are 2-4 hours for initial dry to recoat, with full cure requiring 24-48 hours in normal conditions. Always follow the label for best results.
Let each coat dry per the product label, typically a few hours, before applying the next.
Is sanding between coats necessary when painting over epoxy primer?
Lightly scuff sand between coats to improve adhesion and create a uniform surface, especially if the first coat shows tiny imperfections. Use a fine-grit paper and wipe clean before applying the next coat.
Light sanding between coats helps adhesion and a smooth finish.
What surfaces are suitable for painting over epoxy primer?
Epoxy primer is versatile for metal, wood, and certain plastics when properly prepared. The topcoat should match the substrate and be compatible with the primer. For automotive projects, stay within compatible pairings recommended by the product lines.
Metal and wood are common, with careful prep and compatible topcoats.
Watch Video
Quick Summary
- Prep the epoxy surface thoroughly to ensure adhesion.
- Choose a topcoat compatible with epoxy primer and the substrate.
- Apply multiple thin coats for best durability and finish.
- Follow manufacturer cure times and environmental conditions.