Epoxy Paint on Concrete: A Practical How-To Guide
Learn how to apply epoxy paint on concrete floors with prep, mixing, application, and curing tips. Get a complete tool list, step-by-step instructions, troubleshooting advice, and maintenance guidance for durable garage, basement, or workshop floors.

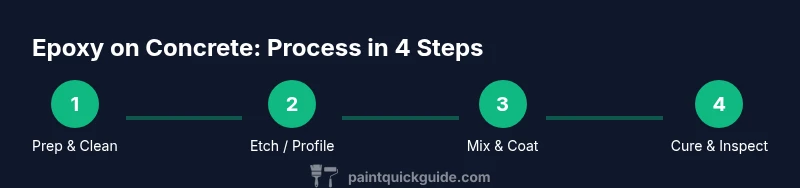
Epoxy paint on concrete is a durable, chemical-resistant coating that protects floors and enhances appearance. This guide covers prep, mixing, application, and curing to help you achieve a long-lasting finish. According to PaintQuickGuide, choosing the right epoxy system and proper surface preparation are the keys to success.
What epoxy paint on concrete is and why it matters
Epoxy paint on concrete refers to a two-part coating that chemically cures to form a robust, seamless floor surface. The cured epoxy resists oils, chemicals, abrasion, and stains, making it ideal for garages, basements, utility rooms, and even some commercial spaces. The finish can be glossy or matte depending on the formula and any added aggregates. A properly applied epoxy flooring elevates curb appeal and improves safety by reducing dust and creating better traction. For homeowners and DIYers, understanding the basics—surface prep, correct mixing, even application, and adequate curing time—is essential. Before you start, ensure adequate ventilation and stable temperatures, as curing is sensitive to environmental conditions. The PaintQuickGuide approach emphasizes planning, product selection, and precise execution to maximize durability and finish quality.
Choosing the right epoxy system for your concrete floor
Choosing the right epoxy system depends on traffic, exposure, and comfort with fumes. Two main categories dominate residential use: 1) water-based or solvent-borne systems that cure quickly with lower odor, and 2) 100% solids two-part epoxies that yield higher chemical resistance and longer wear life. PaintQuickGuide analysis shows that for home garages and workshops, a mid-range two-part epoxy offers the best balance of durability, cure time, and cost, while a water-based option is often preferred for smaller or low-traffic spaces. Consider whether you want additives for slip resistance, color options, or a clear topcoat for UV protection. Always verify surface compatibility and ventilation requirements before purchase.
Surface prep essentials: cleaning, degreasing, and profiling
Surface prep is the single most important factor in adhesion and longevity. Start by removing all debris, oils, and coatings that can impede binding. Use a degreasing cleaner for oils and a stiff brush or squeegee to lift embedded grime. For old concrete, create a proper profile by grinding, shot blasting, or etching according to the epoxy product’s instructions. This profile increases mechanical grip and prevents peeling. After prepping, rinse and allow the surface to dry completely. Any residual moisture or soap residue can interfere with curing and gloss, so use a moisture meter if moisture is a concern. A clean, properly profiled surface yields the most reliable results.
Primers, sealers, and crack repair
Not every epoxy system requires a primer, but many do, especially on porous or unfinished concrete. If the manufacturer recommends a bonding primer, apply it evenly and let it tack up before the base coat. For cracks and voids, fill with an epoxy or polyurethane-based filler and smooth flush with the surface. Large cracks may need flexible sealants to accommodate movement. If you’re working in a space with moisture, consider a moisture-locking primer to minimize blistering. Sealing the pores helps reduce first-coat hollow spots and ensures uniform color and thickness across the floor.
Mixing ratios, pot life, and working time
Accurate mixing is critical. Read the product label carefully and measure resin and hardener in clean, level containers. Mix for the recommended time to achieve a homogeneous blend, and avoid whipping air into the mix. Pot life varies with temperature and humidity, so plan your work in sections and avoid long delays at edges. Do not reuse partially mixed material, as this can compromise cure and adhesion. When in doubt, prepare a small test batch to confirm color, consistency, and flow before committing to the full coat.
Application techniques: rollers, squeegees, and technique
Apply the base coat using a long-nap roller or a notched squeegee to achieve a uniform thickness. Work in small, manageable sections to maintain a wet edge and prevent lap marks. Cut in around edges and obstacles with a brush or narrow roller, then fill in with the main application. Maintain even pressure to prevent roller marks and air bubbles, and avoid overworking the epoxy, which can thin the coat. If a second coat is needed, wait until the first coat reaches a gel-like state as specified by the manufacturer. Temperature and humidity during application affect flow and cure, so monitor conditions closely.
Curing, topcoats, and protective coatings
Curing times depend on product and environment. Keep foot traffic off the surface as directed—often after 24 hours for light use and several days for full chemical resistance. If you plan to add a topcoat or anti-slip additive, apply per the product’s guidance once the base coat has cured sufficiently. UV exposure on outdoor surfaces or in sunlit spaces can yellow some epoxies over time, so consider a UV-resistant topcoat if relevant. Store leftovers properly, as unopened, sealed containers retain potency longer. A well-cured floor should display uniform color, a smooth finish, and no scuffs or peeling.
Troubleshooting common problems
Peeling or delamination usually indicates inadequate surface prep or moisture issues. Blistering can result from trapped moisture or improper mixing. White hazing or color streaks may be caused by contaminants or improper pigment dispersion. In many cases, re-prepping the surface, applying a compatible primer, and using a fresh batch of epoxy solves these problems. Always follow manufacturer guidelines for improper adhesion, and consider performing a small test repair before tackling larger areas. If in doubt, contact the product’s technical support or consult a local pro.
Maintenance and long-term care
Protect epoxy floors by using mats in high-traffic entrances and avoiding harsh solvents that can wear the surface. Use a pH-neutral cleaner and a soft mop to maintain shine and prolong life. Address scratches or dull spots promptly with polishing compounds or mild abrasives recommended by the epoxy maker. Regularly inspect for micro-cracks and repair as needed to avoid moisture ingress and further damage. With proper care, epoxy floors maintain color, gloss, and resistance for many years, making them a smart investment for busy homes and workshops.
Cost, time planning, and tips to stay on schedule
Costs for epoxy flooring depend on the system, square footage, and any repairs needed before coating. Expect higher upfront costs for premium two-part systems and professional installation, but DIY options can lower the price dramatically if you have the skill and time. Plan for a weekend project plus curing days, and factor in surface prep, mixing, and application time. Budget for safety gear and ventilation setup, as well as potential moisture checks if your space isn’t climate-controlled. By organizing steps, allotting buffers for weather, and following the product’s instructions, you can stay on schedule and achieve a durable, attractive floor.
Tools & Materials
- Epoxy resin and hardener kit(Follow exact ratio specified by manufacturer; use a clean, level mixing container)
- Concrete etchant or cleaner(Apply as directed to open concrete pores for better adhesion)
- Concrete grinder or mechanical sander(Create an adequate profile; remove coatings and laitance)
- Degreaser and lint-free towels(Thoroughly clean and degrease to prevent oily residues)
- Mixing cups and wooden/stir sticks(Use clean cups; avoid metal contamination)
- Rollers with 1/4-inch nap and squeegee(Choose both for edges and large flat areas)
- Nitrile gloves and eye protection(PPE to protect skin and eyes from vapors and splashes)
- Respirator with organic-vapor cartridges(Ensure proper fit and replace cartridges as recommended)
- Masking tape and plastic sheeting(Protect surrounding surfaces and create clean edges)
- Moisture meter (optional but recommended)(Helps verify dryness of concrete before coating)
Steps
Estimated time: 8-12 hours active work; 24-72 hours total cure time depending on product and conditions
- 1
Gather and stage materials
Collect all required items and organize your workspace. Confirm ventilation, temperature, and lighting, then lay down plastic to protect nearby areas. This preparation reduces delays and ensures you can work in a controlled environment.
Tip: Pre-measure resin and hardener in labeled containers to speed mixing later. - 2
Clean and degrease the surface
Thoroughly remove oil, grease, and dust from the concrete. Use a degreasing cleaner and a stiff brush, then rinse and allow the floor to dry completely. Any residue can hinder adhesion and create blotches.
Tip: Use a moisture meter if you suspect residual dampness; don’t coat if moisture is high. - 3
Create a proper surface profile
Etch, grind, or blast the surface to open pores and improve mechanical bonding. Vacuum up debris and re-clean if necessary. A rougher surface generally yields better adhesion than a glossy or sealed finish.
Tip: Test a small area first to confirm adequate profile before full-scale coating. - 4
Repair cracks and pores
Fill cracks with an epoxy or polyurethane filler and smooth flush with the floor. Allow fills to cure per manufacturer instructions before proceeding. Address pores to minimize pinholes in the base coat.
Tip: Avoid overfilling; flush surfaces ensure even wear across the coating. - 5
Mix epoxy components accurately
Pour resin and hardener into a clean container and mix thoroughly for the recommended time. Scrape the sides and bottom to ensure a uniform blend. Do not split batches or delay mixing.
Tip: Discard any starter batch if inconsistent color or lumps appear. - 6
Apply base coat evenly
Pour and spread the base coat across the floor, maintaining a wet edge to avoid lap lines. Use a roller on large areas and a squeegee for controlled thickness. Cut in around edges first for clean lines.
Tip: Work in small sections to maintain even thickness and avoid air bubbles. - 7
Check for coverage and consistency
Inspect the coat for thin spots and pinholes. Lightly roll or re-squeegee where needed, without overworking the product. Maintain consistent temperature to avoid streaks.
Tip: Annotate areas that require a second coat for later reference. - 8
Apply optional second coat or topcoat
If a second base coat is required, wait until the recommended recoat window. Apply a topcoat for UV resistance or added slip resistance if specified. Follow all curing instructions between coats.
Tip: Do not rush the second coat; premature application can cause solvent entrapment and defects. - 9
Cure and inspect the finished floor
Keep the surface free from traffic until the coating fully cures. Perform a moisture-free inspection for uniform color, gloss, and adhesion. If issues are found, plan targeted repairs after the surface has cured.
Tip: Document cure times and environmental conditions to inform future projects.
Your Questions Answered
Do I need a primer for epoxy on concrete?
Not every system requires a primer, but many do, especially on porous concrete. If the manufacturer recommends a bonding primer, apply it evenly and follow the tack time. Use a primer to improve adhesion and reduce surface porosity for a uniform finish.
Primers help ensure the epoxy sticks well, especially on porous surfaces. Follow the product instructions for primer use.
Can epoxy be used outdoors or in high-moisture areas?
Some epoxy systems are formulated for outdoor or damp environments, but many are best suited for interior spaces. If outdoors, choose a UV-stable, moisture-resistant formula and plan for more frequent maintenance. Always check the product data sheet for outdoor suitability.
Outdoor epoxy coatings exist, but verify UV resistance and moisture tolerance before use.
How long does epoxy take to cure before light foot traffic?
Cure time varies by product and conditions, but most systems reach a light-use state within 24 hours and full chemical resistance within several days. Temperature and humidity can extend or shorten cure times, so follow the manufacturer’s window for recoating and traffic.
Most epoxies cure to light use in about a day, but full curing can take several days depending on conditions.
Is epoxy safe for indoor use and for families with kids or pets?
Yes, many epoxy floors are suitable for indoor use, but proper ventilation and curing conditions are essential due to solvent odors. Use low-VOC or water-based formulations if indoor air quality is a concern, and wait for complete cure before heavy foot traffic.
Indoor epoxy is generally safe after proper curing and with good ventilation.
What if my concrete is very porous or damaged?
Porous surfaces may require a bonding primer and deeper surface preparation. Repair large cracks or voids with compatible fillers and re-profile the area before coating. If damage is extensive, consult a professional to prevent future failures.
Porous or damaged concrete requires extra prep and compatible fillers before coating.
Can I tint epoxy or add anti-slip additives?
Yes, many systems offer colorants or anti-slip additives. Mix additives as directed and test a small area for texture and color uniformity. Avoid over-adding, which can affect thickness and cure.
Colorants and anti-slip options are available, but follow the product instructions for best results.
Watch Video
Quick Summary
- Prepare thoroughly to maximize adhesion and longevity
- Follow exact mixing ratios and curing guidelines
- Work in small sections to maintain a wet edge
- Protect surrounding areas and monitor environmental conditions
- Plan for cure time before exposing floor to traffic