Epoxy Floor Paint for Garage: Step-by-Step Guide
Learn how to choose, prep, apply, and maintain epoxy floor paint for garage surfaces with practical steps, safety tips, and cost guidance from PaintQuickGuide.

Epoxy floor paint for garage provides a durable, chemical-resistant coating that resists oil, water, and abrasion. This guide will show you how to choose the right kit, prep a concrete floor, and apply epoxy in a way that lasts. According to PaintQuickGuide, thorough surface prep and correct mixing are essential to maximize longevity.
Why epoxy floor paint for garage is a smart choice
Epoxy floor paint for garage offers a tough, chemical-resistant surface that resists oil, water, and abrasion. It creates a seamless, easy-to-clean floor that helps reduce stains and wear from vehicles, tools, and tracked-in dirt. For many homeowners, epoxy coatings also provide a quick visual upgrade with attractive finishes and color options. According to PaintQuickGuide, choosing a quality epoxy system and completing proper surface prep are the most important steps toward longevity, performance, and return on investment for your garage. A garage with an epoxy floor can also improve resale value by signaling a well-maintained space and making maintenance easier over time.
Key takeaways:
- Durable protection against chemicals and abrasions
- Easy cleaning and maintenance
- Wide range of colors and decorative options
Types of epoxy systems and finishes
Epoxy systems fall into a few broad categories: 1) solvent- or water-based epoxy primers and topcoats, 2) 100% solids epoxy formulations, and 3) epoxy with decorative flakes or chips. Water-based systems are easier to handle and have lower odor but may require additional coats for durability. 100% solids epoxies cure harder and faster but require precise mixing and ventilation. For garages, many DIYers choose a two-coat system (primer and topcoat) with optional broadcast chips for slip resistance and a UV-resistant finish to prevent yellowing. Understanding these options helps you balance cost, cure time, odor, and durability for your space.
Preparation: substrate, moisture, and cleaning
A successful epoxy finish starts with a clean, dry, and properly profiled concrete slab. Begin by removing all items, sweeping, and vacuuming the floor. Degrease with a concrete cleaner or degreaser, and rinse thoroughly. If the concrete has existing coatings or laitance, mechanically etch or grind to create a rough profile and ensure adhesion. Test moisture using a calcium chloride or relative humidity kit recommended by paint manufacturers. If moisture is high, postpone coating or use a moisture-mappable epoxy system. Finally, mask edges and any nearby surfaces to protect them from splatter. Good surface prep increases bonding and reduces failure risk—PaintQuickGuide emphasizes this as the most critical early step.
Surface prep: patching and leveling
Cracks and pits weaken adhesion and cause failures if left untreated. Fill cracks with a compatible cement-based patch and allow it to cure fully before applying epoxy. For uneven slabs, use leveling patches or self-leveling concrete; ensure the surface is flat within manufacturer tolerances. Cleaning between patches is essential to prevent dust from compromising adhesion. This stage may add 1-2 hours to your project time but is critical for a professional-looking result.
Color, chips, and finish options
The aesthetic part of epoxy coatings is versatile. Choose solid color epoxy for a clean, uniform look, or add decorative chips for texture and slip resistance. Clear topcoats can add gloss, while matte or satin finishes reduce glare. If you expect heavy traffic from vehicles, a non-slip additive can improve safety. Always verify color stability and UV resistance for sun-exposed garages, especially near doors or windows. Your PaintQuickGuide guide suggests testing color samples on a small concrete patch before committing to the whole floor. Decoration can boost perceived value without sacrificing durability.
Application sequence and technique overview
Most garage epoxy projects follow a pattern: prime if recommended, apply base coat or color coat, broadcast chips (optional), allow to recover, and seal with a clear topcoat. Use a long-nap roller for coverage and a fine brush for edges. Maintain a consistent, thin coat to avoid dimples or runs. Work in small sections to control the application and avoid exposing uncoated edges to air. Plan your work for a dry stretch of weather to minimize flash-off time between layers.
Curing, humidity, and temperature considerations
Epoxy cures best in a controlled environment. Most systems require a temperature range between 65–85°F (18–29°C) with low humidity for optimal cure. Avoid applying epoxy if the surface is cooler than expected or if rain is imminent within 24–48 hours. Fans and ventilation help with off-gassing, but avoid strong drafts that dry the coating too quickly and cause pinholes. Dry times vary by product; always follow the manufacturer's guidelines for recoat windows and full cure times. If you live in a climate with high humidity, you may need longer cure times or a specialized epoxy line.
Maintenance and longevity tips
A properly applied epoxy garage floor withstands oil, fuel, and water better than bare concrete, but it needs regular care. Clean with a pH-neutral cleaner and a soft broom or mop. Place mats under work areas to catch spills and avoid harsh cleaners that can dull the finish. Recoat when the floor shows abrasions or wear; some DIYers plan for a recoat every 3–5 years depending on traffic and chemicals. Avoid dragging sharp objects that can gouge the coating. Routine maintenance preserves gloss and prevents micro-scratch damage that can trap dirt.
Common mistakes and troubleshooting
Common missteps include insufficient surface prep, moisture under the slab, poor mixing ratios, and applying thick coats that trap solvents. Always follow the exact mixing instructions and wait times. If you notice yellowing, hazing, or peeling, identify the root cause—bonding failure often comes from surface profile or moisture issues. If a repair is needed, lightly sand the area and recoat with proper cleaning in between. PaintQuickGuide’s experience shows that small, targeted touch-ups after cure can save a full recoat in some cases.
Authoritative sources
For safety and best practices, consult EPA, OSHA, and professional extension resources. Useful references:
- EPA: https://www.epa.gov
- OSHA: https://www.osha.gov
- NFPA: https://www.nfpa.org
Tools & Materials
- Two-component epoxy floor coating kit(Base resin and hardener in correct 1:1 or specified ratio; mix precisely per instructions)
- Concrete cleaner/degreaser(Strong enough to remove oils; avoid leaving residues)
- Electric drill with mixing paddle(Needed for thorough resin/hardener mixing)
- Roofing/paint trays and liners(For clean, even application of coating)
- Rollers: 3/8"–1/2" nap + 4" trim roller(Nap length depends on concrete texture; use a narrow roller for edges)
- Paint brushes (for edges)(Synthetic bristles recommended to resist solvent attack)
- Masking tape and plastic sheeting(Protect adjacent walls, baseboards, and cabinetry)
- Nitrile gloves, safety glasses, and ventilation(Personal protective equipment to minimize exposure)
- Moisture meter or calcium chloride moisture test kit(Check moisture to avoid bond failures; optional but recommended)
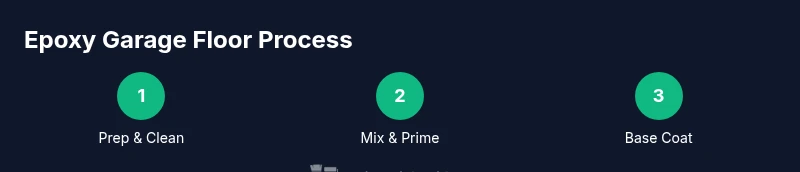
Steps
Estimated time: 1-3 days (depending on product and climate)
- 1
Prepare workspace
Move vehicles and furniture, cover surrounding surfaces, and ensure adequate ventilation. Verify the area is dry and free of loose debris. A clean, organized workspace reduces the risk of contaminants ending up in the coating.
Tip: Schedule application during a stretch of dry weather to minimize moisture exposure. - 2
Clean and degrease
Thoroughly remove oil, gasoline, and dirt using a degreaser or heavy-duty cleaner. Rinse well and allow the concrete to dry completely before proceeding. Residues can prevent proper adhesion.
Tip: Use a two-bucket method to rinse and repeat if necessary. - 3
Etch or profile the surface
Create a rough profile on the concrete to improve mechanical bonding. Use a concrete etch solution or mechanical grinding if needed. Rinse and dry thoroughly after profiling.
Tip: Follow the product’s guidance on surface profile standards for best results. - 4
Mix epoxy components
In a clean container, combine resin and hardener per the manufacturer’s ratio. Mix slowly to avoid introducing air bubbles. Scrape the sides and bottom to ensure complete blending.
Tip: Avoid over-mixing to prevent premature thickening; work within the pot life. - 5
Apply base color coat
Pour or roll a thin, even layer across the floor using a long-nap roller. Maintain a steady pace to prevent lap marks. Edges should be brushed for full coverage.
Tip: Keep an open edge where you’ll roll into fresh coating to avoid edge dryness. - 6
Broadcast decorative chips (optional)
If desired, apply decorative chips while the base coat is still tack-free for texture and slip resistance. Allow chips to settle evenly before final topcoat.
Tip: Test a small patch first to gauge chip distribution and color impact. - 7
Apply topcoat and cure
Seal with a clear topcoat if recommended by the kit. Maintain proper ventilation and avoid traffic until fully cured according to the product’s cure times.
Tip: Do not rush the cure; creeping on the surface can cause soft spots or smearing.
Your Questions Answered
Is epoxy floor paint suitable for all garage floors?
Epoxy floor paint works well on clean, dry, and properly profiled concrete. It’s durable for vehicle traffic, spills, and tools, but subfloors with excessive moisture or existing failures may require repairs first or a moisture-controlled system.
Epoxy floors suit most clean, dry garages. If moisture is present, fix that first or choose a system designed for damp concrete.
Do I need a primer before applying epoxy?
Many epoxy systems require a primer or a bond promoter for better adhesion, especially on smooth or dusty concrete. Check your product guidelines and apply primer if recommended.
Check the product directions; primers improve adhesion on challenging surfaces.
How long does curing take before I can use the garage?
Cure times vary by product and climate, but plan for at least 24–48 hours before light foot traffic and up to several days for full cure and heavy use.
Most epoxy floors cure to a walkable state within 1–2 days, full cure may take longer in humid conditions.
Can I add decorative chips after applying the base coat?
Yes. Chips are typically added while the base coat is still tacky, then sealed with a topcoat to lock them in. This can improve slip resistance and aesthetics.
Chips are broadcast while the base coat is tacky, then sealed.
Is epoxy floor paint safe for homes with children or pets?
Epoxy coatings are generally safe once cured, but vapors during application can be hazardous. Ensure proper ventilation during application and keep pets and children away until cure is complete.
Cure time is critical; avoid exposure to fumes and follow safety guidelines.
What maintenance helps extend epoxy life?
Regular cleaning with mild cleaners, quick spill cleanup, and periodic recoat when wear appears will extend the coating’s life. Avoid harsh solvents that can dull the finish.
Keep it clean, address wear, and recoat when needed.
Watch Video
Quick Summary
- Prepare the surface thoroughly before coating.
- Choose the epoxy system that matches your environment.
- Follow exact mixing and cure times for best results.
- Consider decorative chips for slip resistance and aesthetics.
- Maintain the floor to extend its life.