Can You Paint Over Paint and Primer? A Practical Guide
Discover whether you can paint over existing paint and primer, with step-by-step prep, primer choices, and pro tips for durable, smooth finishes in home and auto projects.

Yes. In many scenarios you can paint over existing paint and primer if the current layer is firmly bonded, clean, dry, and free of peeling. The right primer and topcoat dramatically improve adhesion on slick or stained surfaces. For glossy areas or stubborn stains, apply a bonding or stain-blocking primer first, then the finish coat. Always test adhesion on a small patch before full coverage.
Can you paint over paint and primer?
According to PaintQuickGuide, the short answer is yes in many cases, but success hinges on surface condition and the right prep. You can typically paint over existing paint and primer if the current layer is firmly bonded, clean, dry, and free of peeling. The choice of primer and topcoat matters: a bonding primer on slick surfaces or a stain-blocking primer on stains often yields the best results. Before you start, test a small patch to confirm adhesion and finish. In 2026, homeowners increasingly deal with mixed-material surfaces and faster turnaround times, so understanding when painting over paint and primer is appropriate helps prevent costly do-overs.
When to prime first or skip priming
Not every surface needs a new coat of primer. Flat, porous surfaces (like fresh drywall) often benefit from a primer for even color and better paint uptake. On previously painted walls with a dull or matte finish, you may skip priming if the surface is clean, dry, and lightly scuffed to promote adhesion. However, glossy finishes, high-traffic areas, or surfaces with stains, water damage, or smoke odors typically require a bonding or stain-blocking primer to prevent peeling and to seal stains. Paint over paint and primer works best when you pair a surface-appropriate primer with a compatible topcoat. In short: assess, test, then decide whether to prime or continue with just a topcoat.
Surface preparation steps: cleaning, sanding, and degreasing
Preparation is the backbone of a durable finish. Start with a thorough cleaning to remove dust, oils, and contaminants. For greasy kitchens or smoking areas, use a degreasing cleaner and rinse well. Lightly scuff-sand glossy surfaces to dull the sheen and create a rough profile for better adhesion. Fill any cracks or holes, then wipe clean again. Allow patched areas to dry completely before priming or painting. Skipping proper cleaning or sanding is the fastest route to peeling and uneven color.
Primer types: bonding, stain-blocking, and shellac
Choosing the right primer is crucial when painting over existing paint. Bonding primers are designed to stick to slick or hard surfaces where regular primers struggle. Stain-blocking primers seal odors and stains from previous finishes, preventing them from bleed-through. Shellac-based primers offer excellent adhesion and fast blocking of tannins or smoke stains, but they require proper ventilation and solvent cleanup. For most interior walls with light to moderate stains, a high-quality latex bonding primer provides a strong base for latex topcoats. For oil-based finishes or heavy stains, a shellac or shellac-bonding hybrid primer can be ideal.
Paint selection and compatibility: choosing the right topcoat
Most interior walls respond well to water-based latex paints, which dry quickly and clean up with water. If you’re painting over an oil-based finish, you’ll typically need a compatible primer and a waterborne topcoat that adheres to that primer, or you may need to stay with oil-based products for the entire job. For surfaces like cabinets or metal, consider higher-sheen finishes for washability and durability. Always check the manufacturer’s recommendations for primer-to-paint compatibility and test a small area before full coverage to confirm color and finish.
Surfaces-specific guidance: walls, trim, cabinets, and metals
Different surfaces require tailored prep. Walls and ceilings tolerate standard primers and emulsions, while trim may need a more durable enamel. Cabinets demand scuff sanding, light cleaning, and a bonding primer to prevent wear. Metal surfaces, especially in garages or outdoors, benefit from rust-inhibiting primers and corrosion-resistant topcoats. Plastic or newly primed drywall may need a specialized adhesion-promoting primer. In all cases, follow the label directions and allow sufficient dry times between coats for best results.
Common mistakes and quick fixes
Avoid skipping cleaning, using a primer not suited to the surface, or applying too-thick coats. Over-priming glossy surfaces can create texture, and under-priming can lead to visible patches. If you see peeling or bubbling after the first topcoat, reassess surface adhesion, re-sand, and re-prime as needed. When in doubt, perform a small test patch to evaluate adhesion and color uniformity before committing to the entire project.
Testing adhesion, color, and finish quality
Before committing to the full project, perform a simple adhesion test: apply a small amount of topcoat over a test patch and try to lift a corner with a putty knife after the recommended dry time. If the finish shears cleanly, the surface is ready. Check for color consistency by comparing the test patch to the surrounding area in multiple lighting conditions. For color accuracy, test at different times of day to see how the shade reads under natural and artificial light.
Drying times, curing, and maintenance
Even if the topcoat feels dry to the touch, it may still cure for days or weeks. Follow the paint manufacturer’s drying times, and avoid heavy use until full cure is achieved. Proper ventilation speeds up drying and improves indoor air quality during application. Once cured, maintain surfaces with gentle cleaning and touch up as needed to extend the life of the finish.
Tools & Materials
- All-purpose cleaner or TSP substitute(Degreases and removes grime before painting)
- Degreaser (if heavily soiled)(Optional for very dirty surfaces)
- Sanding block or 120-220 grit sandpaper(Dulls glossy surfaces to improve adhesion)
- Microfiber cloths or rags(For cleaning and wiping surfaces)
- Painter's tape(Protects edges and creates clean lines)
- Drop cloths or plastic sheeting(Keeps floors and furniture clean)
- Primer: bonding or stain-blocking(Choose based on surface condition)
- Topcoat paint (latex or oil-based as recommended)(Select a finish suitable for the room and surface)
- Paint tray and rollers (3/8 inch nap or appropriate layer)(For even coverage)
- Putty knife and wood filler or spackle(For minor repairs)
- Ventilation mask and gloves(Protects you from fumes and skin contact)
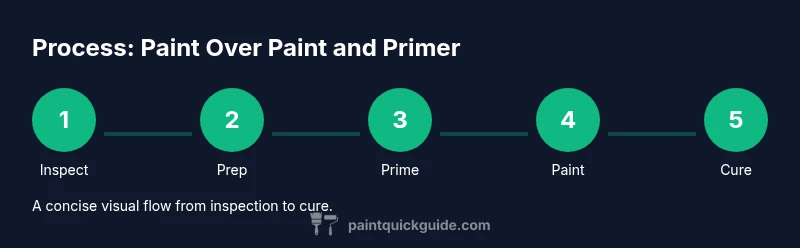
Steps
Estimated time: 60-120 minutes
- 1
Inspect the surface
Examine walls, trim, and any metal or plastic surfaces for peeling, moisture, staining, or corrosion. Decide if priming will improve coverage on slick areas or if repaired patches are needed before painting over paint and primer. This initial check helps prevent future failures and guides your primer choice.
Tip: Document problem areas with a quick list or photo so you don’t miss spots later. - 2
Clean the surface thoroughly
Wipe down surfaces with an all-purpose cleaner or TSP substitute to remove dirt, grease, and oils. Rinse with clean water and allow to dry completely before proceeding. Clean surfaces ensure the primer adheres evenly and the final color looks uniform.
Tip: For kitchens or greasy surfaces, a degreasing cleaner yields the best adhesion and longevity. - 3
Scuff and prep glossy areas
Use 120-220 grit sandpaper or a sanding block to dull glossy finishes. Wipe away dust and vacuum if needed. Scuffing creates a mechanical bond for the primer and reduces the risk of peeling.
Tip: Wear a mask to avoid inhaling dust; seal off adjacent areas with tape. - 4
Repair and fill imperfections
Fill cracks, holes, and dents with appropriate filler or spackle. Allow it to dry per product directions, then lightly sand flush with surrounding surfaces. Patchy areas can show through topcoats if not addressed.
Tip: Damp-dry filler tends to shrink; apply a second quick layer if needed. - 5
Choose and apply primer
Select a bonding primer for slick surfaces or a stain-blocking primer for stains and odors. Apply a thin, even coat and let it dry completely. If staining persists, apply a second coat and then proceed to topcoat.
Tip: Test a small patch first to confirm adhesion and appearance. - 6
Apply the finish coat
Apply the topcoat in thin, even layers to achieve uniform coverage. Maintain a wet edge to avoid lap marks. Allow sufficient drying time between coats according to the manufacturer’s instructions.
Tip: Lightly sand between coats if the finish feels rough or grainy.
Your Questions Answered
Is priming always necessary when painting over old paint?
Not always. If the surface is clean, dull, and not glossy, you may skip priming on small projects. However, for slick surfaces, stains, or repairs, priming improves adhesion and coverage and prevents future issues.
Priming isn’t always required, but for slick surfaces or stains, it’s usually a wise step.
Can you paint over oil-based paint with latex?
Directly painting latex over oil-based paint is not recommended. If you must, clean, lightly sand, and apply a bonding primer designed for oil-to-latex adhesion, then finish with a latex topcoat.
You generally should not paint latex directly over oil-based paint without a bonding primer.
How long should I wait between coats?
Wait for the recommended dry time on the can, usually several hours, and longer in high humidity. Lightly sand between coats if needed for a smooth finish.
Let each coat dry as the label says, and sand lightly between coats if you notice texture.
What should I do about peeling or bubbling paint?
If you see peeling or bubbling, remove the loose material, clean again, re-prime the area, and recoat. Address underlying moisture or adhesion problems before painting again.
Peeling means you may need to strip and re-prime in that spot.
Can I paint over wallpaper paste residue?
Any residue should be removed or neutralized; otherwise it will telegraph through the paint. Clean thoroughly and prime appropriately.
Don’t leave wallpaper paste residues; clean and prime.
Are there safety concerns when using shellac-based primers?
Shellac primers emit strong fumes and require good ventilation and PPE. Follow label instructions for ventilation, curing times, and cleanup.
Ventilate well and wear protective gear when using shellac primers.
Watch Video
Quick Summary
- Assess surface condition before painting over paint and primer.
- Choose primers suited to surface and stain conditions.
- Proper cleaning and scuffing are essential for good adhesion.
- Test adhesion on a small patch before full coverage.
- Allow adequate drying and curing between coats for durability.