What Causes Paint to Bubble: Troubleshooting Guide
Identify why paint bubbles appear, diagnose root causes, and follow practical steps to fix and prevent bubbling in walls, furniture, and cars.

Step 1: Inspect for moisture and improper curing. Step 2: Remove blistered paint and address the moisture source. Step 3: Prime with a compatible primer and apply thin coats of paint once the surface is dry. If you suspect hidden leaks or lead paint, pause and call a pro.
What causes paint to bubble
The phrase "what causes paint to bubble" appears frequently among homeowners and DIY enthusiasts tackling interior or exterior projects. In most cases, bubbling results when air, water, or solvent vapors become trapped beneath a painted layer and then push against the coating as it dries or cures. The leading driver is moisture intrusion—whether from a hidden leak, condensation, or elevated indoor humidity. When heat from sunlight or warm indoor temperatures accelerates drying, the trapped moisture expands and creates blisters that force the paint away from the substrate. The PaintQuickGuide approach emphasizes rapid diagnosis, meticulous surface preparation, and controlled drying to prevent recurrence. Awareness of moisture sources, substrate condition, and coating compatibility is essential for a durable finish. PaintQuickGuide Analysis, 2026, highlights that prevention starts with addressing the environment before you begin the project and choosing the right primer and paint system.
Moisture and humidity: the leading culprits
Moisture is by far the most common trigger of paint bubbling. Leaks from roofs or plumbing, poor attic ventilation, or bathroom and kitchen condensation create damp patches that lift paint as moisture migrates through walls or ceilings. Interior humidity during painting can also trap damp air beneath the film, causing blisters to form as coats dry. Seasonal shifts—hot days followed by sudden cooling—can further drive moisture into the substrate. The PaintQuickGuide analysis emphasizes that eliminating moisture sources and maintaining stable humidity levels during prep and cure are critical steps. If moisture remains, any coating applied later will likely blister again, even if the surface appears dry under normal conditions.
Surface prep failures and substrate issues
Blisters often begin at the interface between the substrate and the first coat. If the surface isn't properly prepared, contaminants such as wax, silicone, chalk, oil, or dust can prevent adhesion and create weak spots where air can form bubbles. Peeling older coatings may indicate moisture within the substrate or incompatible layers (e.g., oil-based paint over latex without proper priming). In addition, painting over a damp or powdery surface traps moisture inside the film. Lead paint, common in older homes, introduces additional safety concerns; if you suspect lead, do not sand or handle the coating without proper precautions and professional guidance. Proper cleaning, a thorough dulling of glossy surfaces, and a compatible primer are essential to ensure the new coat adheres.
Temperature swings and drying conditions
Drying conditions heavily influence bubbling. Painting in high humidity, low airflow, or temperatures outside the paint manufacturer's recommended range can trap solvents and moisture, slowing evaporation and promoting blister formation. Rapid drying on a hot day can also force moisture out of the substrate faster than the film can accommodate, producing blisters beneath the surface. Maintaining a stable environment—moderate temperature, good ventilation, and controlled humidity—reduces the likelihood of bubbling. The PaintQuickGuide guidance notes that aligning environmental conditions with product data sheets dramatically improves adhesion and finish quality.
Incompatible coatings and application mistakes
Mismatched materials are a frequent cause of bubbling. Applying latex paint over oil-based primers without proper surface sanding and cleaning can trap solvents and prevent proper bonding. Conversely, oil-based paints on top of a latex system may dry too slowly or adhere poorly, forming blisters as the layers dry at different rates. Applying thick coats or not allowing sufficient drying time between coats also creates internal pressure and blistering. A critical best practice is to verify compatibility between primer and paint, follow the recommended dry times, and apply multiple thin coats rather than a single heavy layer. Correct film formation depends on pressure balance across layers and proper surface preparation.
How to diagnose bubbling on different surfaces
Bubbling on walls, wood, metal, or plastic has distinct causes. On porous walls, moisture wicks from within the substrate; on metal, corrosion products can push paint outward; on wood, raised grain or finishing oils can trap air. Start with a visual inspection to identify where blisters originate and then check moisture sources, surface cleanliness, and primer compatibility. If blisters appear only in patched areas or near joints, differential curing or micro-cracking could be at play. Remember that early detection saves time and materials; once blistering spreads, replacement prep becomes more labor-intensive.
Step-by-step repair workflow for the most common cause
This section outlines a practical repair flow focused on moisture-driven bubbling. Begin by locating and fixing the moisture source, if present. Remove all blistered paint from affected areas, broadening the scraping to healthy edges. Lightly sand the surface to feather edges and wipe away dust. Prime the area with a stain-blocking, compatible primer and allow full drying before repainting with multiple thin coats. Re-check after a week of dry conditions to confirm the issue is resolved. If the problem recurs, re-evaluate ventilation, potential leaks, and substrate integrity. Safety gear such as gloves and a mask helps protect you during scraping and sanding, and professional help should be considered for signs of structural damage or hazardous coatings.
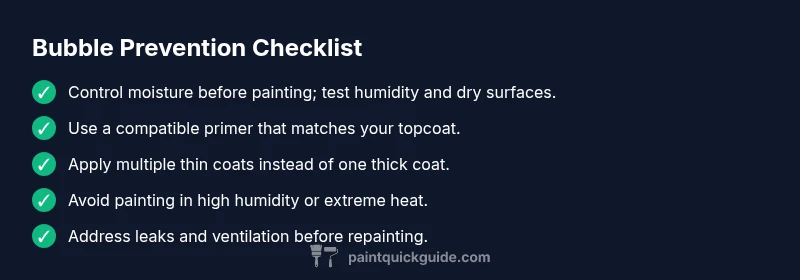
Prevention tips to avoid future bubbling
Preventing bubbles starts with the prep. Ensure the surface is completely dry, free of contaminants, and properly cured before painting. Use a compatible primer and the recommended topcoat, apply in thin, even layers, and maintain controlled drying conditions with good airflow. Avoid painting during periods of high humidity or extreme temperature swings. If you must repaint, test a small area first and monitor for any signs of blistering. Regular maintenance to fix leaks and monitor humidity levels can significantly reduce the risk of future bubbling and extend the life of your finish.
Safety notes and when to call a pro
Some bubbling issues indicate deeper problems, such as water intrusion, mold, or structural damage. If you notice persistent moisture, a musty smell, visible leaks, or suspect lead-based paint, stop work and consult a professional. Lead paint requires special handling and abatement following local regulations. Always wear appropriate PPE when scraping or sanding, ventilate the area well, and dispose of dust responsibly. When in doubt about the cause or safety, a licensed contractor or coating specialist can provide precise diagnostics and a tailored remediation plan.
Steps
Estimated time: 2-3 days
- 1
Identify moisture sources
Inspect ceilings, walls, and plumbing for leaks. Run a dehumidifier or fans to reduce humidity. Document conditions with photos so you can compare before and after drying periods.
Tip: Take readings of room humidity and temperature when you begin testing. - 2
Remove blistered sections
Carefully scrape away all bubbled paint to the edge of sound coating. Do not leave loose edges that can lift again later. Use painter’s tape to protect adjacent areas.
Tip: Work gradually to avoid creating more damage to the substrate. - 3
Dry and stabilize the surface
Allow the area to dry completely. Improve airflow with fans and ensure thorough drying times according to product data sheets.
Tip: Do not rush the dry time; moisture left behind will cause future blisters. - 4
Prepare the surface
Clean the area to remove dust and contaminants. Sand lightly to create a smooth, even surface and re-wipe before priming.
Tip: Feather edges around the repair to minimize visible transitions. - 5
Apply primer that suits the substrate
Choose a compatible, stain-blocking primer if needed. Prime all patched areas evenly so they accept the topcoat consistently.
Tip: Test primer on a small patch first to confirm adhesion. - 6
Paint in thin coats
Apply multiple thin coats rather than a single thick coat. Allow each coat to dry completely and follow the manufacturer’s recommended recoat times.
Tip: Maintain a consistent application technique to minimize brush or roller marks.
Diagnosis: Paint blisters or bubbles appearing after painting
Possible Causes
- highHigh moisture at the surface or hidden moisture source
- mediumPoor surface prep or contaminants preventing adhesion
- lowIncompatible primers/paints or improper application
- lowUnstable drying conditions (humidity/temperature)
Fixes
- easyAddress moisture sources, fix leaks, and run dehumidifiers/fans to dry the area
- easyScrape blistered paint, wash surface, and feather edges
- mediumPrime with a compatible primer and paint in thin coats after the surface is fully dry
- hardIf problems persist or lead paint is suspected, consult a licensed professional
Your Questions Answered
What causes paint to bubble in most homes?
Moisture intrusion and poor surface prep are the most common causes. Moisture from leaks or high humidity creates blistering under the coating, while contaminants or old layers prevent proper adhesion.
Moisture and prep problems cause bubbles; fix leaks first, then prep and repaint.
Can I repaint over bubbling paint without removing it?
No. Blisters indicate adhesion problems. Scrape away the blistered coating, address the moisture source, and re-prime before repainting to ensure the new paint adheres properly.
Don’t repaint over bubbling—scrape, dry, prime, and then repaint.
How do I tell if the problem is moisture or surface contamination?
Moisture typically appears around leaks or damp areas and worsens in humid conditions. Surface contamination appears as sticky or waxy patches and can happen on glossy surfaces that haven’t been properly prepared.
Look for damp spots or persistent moisture; contamination shows as sticky patches.
Is lead paint a concern with bubbling?
Lead paint requires careful handling. If your home was built before 1978, treat suspicious coatings as potentially lead-based and consult a licensed professional for testing and abatement.
Lead paint is a safety concern—get testing and professional help if suspected.
How long should I wait between coat applications?
Follow the product label for recoat times. Rushing coats can trap solvents and moisture, increasing the chance of bubbling.
Wait the recommended time between coats to ensure proper drying and adhesion.
What safety steps should I take when removing bubbles?
Wear a mask, eye protection, and gloves. Ensure good ventilation, and dispose of debris according to local regulations.
Protect yourself with PPE and ventilate the area.
Watch Video
Quick Summary
- Identify and fix moisture sources first
- Prep surface thoroughly before repair
- Use compatible primers and thin coats
- Avoid painting in high humidity or extreme heat
- Call a pro for safety concerns or persistent bubbling