How to Fix Paint Peeling Off Wall: Step-by-Step Guide
A comprehensive, step-by-step guide to stop peeling and restore walls. Learn prep, patch, prime, and paint techniques for durable, lasting results.

You can stop peeling by fixing moisture, properly preparing the surface, and applying primer before repainting. Start with thorough cleaning, remove loose paint, repair damaged spots, prime with stain-blocking primer, and finish with multiple coats of high-quality interior paint. Expect drying between coats and follow safety precautions. This routine applies to drywall, plaster, and wood surfaces alike.
What causes paint peeling off wall
When considering how to fix paint peeling off wall, the root causes usually include moisture intrusion, fluctuating humidity, and prior water damage. A glossy top layer without proper surface prep often fails to adhere to the substrate, especially on plaster or drywall. In addition, using incompatible paint layers (such as latex over oil-based enamel without proper primer) can trigger peeling over time. The underlying condition behind peeling determines the repair approach. If you focus only on the surface, you may see peeling recur once moisture or substrate issues persist. This block explains the most common causes and sets the stage for a durable fix that targets the real problem rather than just the symptom.
Diagnosing moisture and surface issues before repair
A long-lasting fix starts with a clear diagnosis. Check for signs of moisture, such as staining, musty odors, or damp patches behind the peel. Look for leaks in the roof, plumbing, or windows that could be driving humidity into the wall cavity. Use a moisture meter if available and note elevation-related problems (basement walls vs. living rooms). According to PaintQuickGuide, addressing moisture sources and ensuring the wall is dry is often the key to success when you’re figuring out how to fix paint peeling off wall. This phase also includes confirming the wall’s surface type (drywall, plaster, or masonry) to choose compatible primers and paints. A pre-repair moisture plan reduces the chance of renewed peeling.
Surface preparation and cleaning for best adhesion
Before patching or repainting, the surface must be clean and free of loose material. Scrape away all peeling flakes with a putty knife or scraper, then wipe the area with a damp cloth to remove dust and grease. Allow the wall to dry completely; this may take several hours, depending on humidity and ventilation. The prep surface should feel solid and lightly tacky-free when dry. Proper cleaning and drying are essential because contaminants and moisture are common culprits behind peeling paint, and skipping this step often leads to renewed failure. The goal is a clean, dry, and uniform base for Primer and Paint to bond reliably.
Patch, sand, and re-clean the repaired area
After removing loose material, fill any holes or gouges with a compatible patching compound or spackling paste. Smooth the patched area with a putty knife and let it dry fully according to manufacturer directions. Lightly sand the patch to blend with the surrounding surface, then wipe away dust with a damp cloth. A smooth, dust-free surface ensures an even primer coat and minimizes visible patch lines after painting. Patience here matters: rushed patches can show through the final finish. This stage is a critical bridge between prep and finish.
Primers and paints: choosing the right products
Choosing the right primer and paints is the backbone of a durable fix. For peeling walls, a bonding primer or stain-blocking primer helps seal stains, guards against moisture, and improves adhesion for the topcoat. If you’re repainting a previously glossy surface, a shellac-based primer can be particularly effective. Select a high-quality, breathable interior latex or acrylic paint with good wear resistance and washability. In this guide, we emphasize product compatibility and the reality that using the wrong primer or paint can undermine the entire repair. Based on PaintQuickGuide research, the combination of a bonding primer and a quality finish coat substantially lowers the chance of peeling returning.
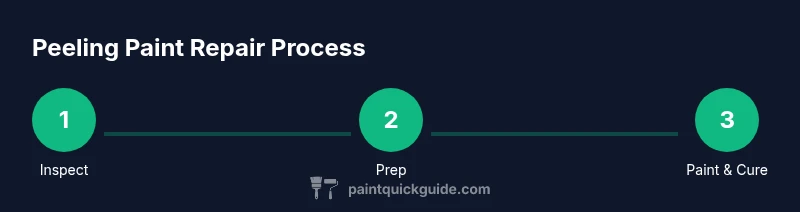
Step-by-step repair workflow (concise overview)
This overview provides a practical sequence for repairing peeling paint and ensuring durable adhesion. Start with surface prep, then patch and sand, apply a conditioning primer, and finish with one or more topcoats. Allow adequate drying time between coats. By following a disciplined workflow, you reduce the odds of moisture reoccurrence and get a smoother, longer-lasting finish. If you’re repairing a large area or dealing with persistent moisture, consider temporary containment and staged repairs.
Common mistakes to avoid during repairs
Avoid common pitfalls that lead to failures: skipping cleaning or drying steps, neglecting to remove all loose material, using incompatible primer over glossy surfaces, and rushing to paint before the wall is fully dry. Do not skip ventilation; solvent fumes can accumulate and create health risks in poorly ventilated rooms. Also, don’t ignore underlying moisture; peeling often resurfaces if you ignore a leak or high humidity. Taking time to address these factors now saves time and money later, preventing repeated peeling. This block highlights frequent missteps so you can plan a more reliable fix.
Maintenance and prevention strategies for peeling issues
Prevention starts with good ventilation, climate control, and routine wall checks. After the repair, maintain consistent indoor humidity levels and address any water intrusion promptly. Use wall cleaners appropriate for your finish and re-inspect high-moisture areas (kitchens, bathrooms, laundry rooms) regularly. Keep outlets and switch plates dry and consider moisture barriers in damp spaces. Regular maintenance paint with a breathable topcoat and a clean, dry environment will minimize future peeling and extend the life of the finish. This proactive approach aligns with long-term durability goals and reduces the need for frequent repaints.
Troubleshooting: when to call a pro and next steps
If peeling recurs after a repair or if moisture issues persist, it’s time to consult a professional. A licensed contractor can diagnose hidden leaks, assess structural moisture, and re-prepare surfaces with professional-grade materials. In stubborn cases, professional remediation might involve dehumidification or moisture barrier installation. The decision to call a pro is influenced by the wall’s location, extent of damage, and underlying moisture sources. The goal is to prevent repeated failure and ensure a safe, durable finish. Finally, a pro can help you choose the right products for your climate and wall type to maximize long-term results.
Tools & Materials
- Drop cloths(Protect floors and furniture during prep and painting.)
- Plastic sheeting or painter’s plastic(Cover large areas; prevent dust from spreading.)
- Putty knife or scraper(Remove loose paint and smooth edges.)
- Sandpaper (120–220 grit) or sanding block(Create a smooth surface for primer.)
- Cleaning supplies (mild soap or detergent)(Remove grease and dust before priming.)
- Moisture meter (optional)(Identify hidden moisture pockets.)
- Patching compound/spackle(Fill holes and gouges after scraping.)
- Painter’s tape(Mask off trim and outlets.)
- Primer (bonding or stain-blocking, oil- or water-based)(Seal stains and improve adhesion.)
- Interior latex/acrylic paint(Choose a durable, washable finish.)
- Paint tray and roller(Even application of topcoat.)
- Ventilation mask and safety goggles(Protect lungs and eyes from fumes and dust.)
Steps
Estimated time: 6-12 hours
- 1
Assess area and protect
Begin by moving furniture away from the wall and laying down drop cloths. Inspect for moisture sources like water stains or leaks. This step creates a safe workspace and prevents new damage during repairs.
Tip: Isolate the area and ensure good ventilation before starting. - 2
Remove loose paint
Use a putty knife to scrape off all peeling and blistered paint until the edge is firm and smooth. Loose paint left behind will continue to peel after the topcoat is applied. This ensures a clean substrate for bonding.
Tip: Work with a steady hand to avoid gouging the surface. - 3
Sand and smooth edges
Sand the repaired area to blend the patch with the surrounding wall. Wipe dust with a damp cloth and let dry completely before priming. Smoothing edges prevents ridges under the primer.
Tip: Lightly feather the edges to avoid obvious patch lines. - 4
Apply primer
Apply a bonding or stain-blocking primer to seal stains and improve adhesion. Allow sufficient drying time per product instructions before proceeding to patching or painting.
Tip: If the area has moisture, use a shellac-based primer for best results. - 5
Patch and re-dry
Fill small holes with patch compound, smooth, and let it dry fully. Lightly sand the patched area once dry and remove all dust. A well-prepared patch provides a uniform surface for topcoat.
Tip: Do not rush the drying phase; longer dry times yield better adhesion. - 6
Apply topcoat
Apply one or two coats of high-quality interior paint, allowing proper drying between coats. Use even strokes and maintain a wet edge for a seamless finish. This final layer seals the repair.
Tip: Finish with a satin or eggshell for durability and cleanability. - 7
Inspect and cure
Once the final coat is dry, inspect for any missed spots or imperfections and touch up as needed. Keep the area well-ventilated to speed curing and monitor for several days to confirm longevity.
Tip: Keep room temperatures stable during curing to prevent paint from pulling away.
Your Questions Answered
What causes paint to peel from walls?
Peeling is typically caused by moisture intrusion, poor surface preparation, or applying new paint over incompatible coatings. Addressing moisture and ensuring proper prep is essential for a durable repair.
Peeling usually comes from moisture, prep issues, or incompatible coatings. Fix moisture and prep first.
Do I need to remove all peeling paint before repainting?
Yes. Scrape away all loose material to ensure a solid bond for the new layer. Any remaining loose paint will continue to peel.
Yes—remove all loose paint for a strong bond.
What primer should I use for peeling walls?
Use a bonding or stain-blocking primer suitable for the surface. For glossy areas, a shellac-based primer can improve adhesion.
Use a bonding or stain-blocking primer; shellac-based primers help on glossy areas.
Can peeling be repaired on wood trim or plaster?
Yes. Patch with appropriate filler or plaster, prime, and paint with compatible coatings. Ensure all patches are dry before topcoats.
Yes, repair with suitable filler and ensure dryness before painting.
How long does this repair take?
Drying times vary by product and humidity. Plan for at least a full day from prep to final topcoat, plus additional cure time, if needed.
It typically takes a day or more, depending on products and humidity.
When should I call a professional?
If peeling recurs after repair or if moisture issues persist, a licensed contractor can diagnose and remediate underlying problems safely and effectively.
If peeling comes back or moisture is ongoing, it’s a good idea to call a pro.
Watch Video
Quick Summary
- Address underlying moisture before repainting
- Use bonding primer for better adhesion
- Prepare and dry surfaces thoroughly before painting
- Choose compatible primers and paints for durable results