Paint Bubbling Troubleshooting: Quick Fixes & Prevention
Learn why paint is bubbling, how to diagnose moisture and prep errors, and safe fixes to prevent future bubbling in walls, ceilings, or cars

Immediate guidance for a bubbling paint issue: stop painting, ventilate, and test for moisture. If moisture is present, dry the surface completely, remove loose material, and recoat with a compatible primer before repainting. If you suspect lead or a serious moisture problem, pause and contact a professional.
What paint is bubbling means and why it matters
Paint is bubbling describes raised, blister-like pockets on the coating surface. When you see paint is bubbling, moisture under the film or an incompatible primer are common culprits. According to PaintQuickGuide, this issue almost always points to moisture intrusion or poor surface prep. Understanding the root cause lets you target the repair rather than guess. In homes and cars alike, addressing bubbling quickly reduces damage and preserves the underlying substrate. In this guide, we'll walk through the most likely causes, safe fixes, and proven prevention strategies to stop the problem from returning.
Common causes of bubbling (the usual suspects)
There are several reasons the surface shows paint is bubbling: trapped moisture from leaks or high humidity; inadequate drying before painting; using incompatible primers or topcoats; applying new paint over old, glossy surfaces without proper scuffing; and environmental stresses such as temperature swings. Each scenario presents risk to both interior and exterior surfaces. In addition, water infiltration behind siding or drywall can push up the film. In some cases, poor surface prep leaves oils, waxes, or dust that prevent adhesion, causing paint is bubbling to reappear after a short cure. Paint is bubbling can also occur if a water-damaged surface is painted too soon after repair, trapping residual moisture under the new layer.
Safety and immediate steps (act fast but safely)
If you see paint is bubbling on a wall or a car panel, pause painting and ventilate the area. Wear protective gear to avoid inhaling dust when removing loose film. Do not sand or pry aggressively on lead-painted surfaces; consult a pro if you suspect lead. Quick checks include stopping moisture sources, drying the area, and removing loose material. You should also verify the area has cooled to a comfortable temperature before continuing work. As PaintQuickGuide notes, safety first means assessing structural risk and avoiding risky DIY on unknown leads or damp substrates.
Diagnosing bubbling vs blistering vs pinholes
Bubbling resembles little blisters under the paint, but blistering can also be caused by heat or chemical reactions. Pinholes are tiny, not raised, and usually stem from air drying during painting. If you can press on a bubble and it releases air with a hiss, you’re likely dealing with trapped moisture. In contrast, a dry, hard bubble may indicate solvent entrapment or coating incompatibility. Correctly distinguishing these symptoms helps you pick the right fix without wasting time and materials.
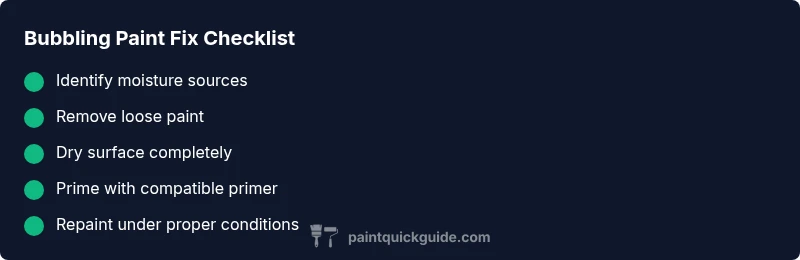
Step-by-step repair workflow (practical, action-oriented)
- Identify moisture sources and verify surface condition.
- Remove all loose/bubbled paint with a scraper, lifting only the failed layer.
- Dry the substrate completely using fans or a dehumidifier, allowing extended time for moisture to escape.
- Lightly sand the surface to create a key for the new finish, then clean thoroughly.
- Apply a compatible primer that suits the topcoat and address any stains or moisture concerns.
- Repaint using the correct topcoat in appropriate environmental conditions, avoiding extremes of temperature and humidity.
- Allow full cure before re-inspecting and touching up.
Estimated total time: 24-72 hours (drying, priming, and curing) depending on conditions. If bubbling recurs, stop and reassess moisture sources or consider professional evaluation.
Surface prep and primer selection to prevent bubbling
The most reliable way to prevent paint is bubbling is to ensure surfaces are properly prepared and primed. Clean surfaces to remove oils and dust, scuff glossy finishes to improve adhesion, and choose primers designed to bridge moisture and improve adhesion with the chosen topcoat. If you’ve had a history of bubbling, use a damp-blocking or stain-blocking primer and test a small area before broad application. Proper primer choice dramatically reduces the chance of future bubbling.
Environmental controls and timing
Bubbling is more likely when painting in high humidity, elevated temperatures, or poor ventilation. Plan painting for a dry window, and ensure surfaces have cooled after any cleaning. Use fans or dehumidifiers to control moisture levels in the work area. Keeping temperature and humidity within recommended ranges not only reduces bubbling risk but also improves overall finish quality.
Real-world scenarios and case studies
Consider a kitchen wall where paint bubbled after a plumbing leak. The first step is to stop further moisture intrusion, dry thoroughly, and remove bubbled film. Repaint with a moisture-tolerant primer and topcoat. In another scenario, a car panel bubbled after spray paint was applied over a waxed surface; the fix involves proper surface prep and compatible primers for automotive finishes. Across these cases, the principle remains: identify moisture or adhesion problems, address them, and use proper primers and environmental controls to prevent recurrence.
diagnosticFlowQuestionPlaceholderAndEtiquetteAndFlowNoteForStructureOnly?null?],
nameForSchemaWithoutErrors?null?
Steps
Estimated time: 24-72 hours
- 1
Identify moisture sources
Inspect for leaks, condensation, or dampness behind the bubbling area. Check for signs of water intrusion in adjacent walls or ceilings and address the source before proceeding.
Tip: Use a moisture meter if available to get a quick sense of dampness. - 2
Remove loose paint
Gently lift and scrape away all visibly bubbled paint without digging into the substrate. This minimizes new bubbles forming from trapped materials.
Tip: Keep the scraper at a low angle to avoid scoring the surface. - 3
Dry the surface
Run a fan or dehumidifier to thoroughly dry the substrate. Allow ample time for evaporation before re-coating.
Tip: If in doubt, err on the side of longer drying times. - 4
Prepare and prime
Lightly sand the area, clean off dust, and apply a primer suitable for the substrate and topcoat. Use a product that blocks moisture if needed.
Tip: Don’t skip the primer—adhesion starts here. - 5
Apply topcoat under proper conditions
Paint under moderate temperature and low humidity. Use even, thin coats and avoid recoat windows that trap solvents.
Tip: Follow manufacturer guidelines for recoat times. - 6
Cure and re-evaluate
Allow full cure, inspect for new bubbles, and touch up if needed. If bubbling returns, reassess moisture or substrate conditions.
Tip: If bubbling persists, consult a professional. - 7
Document and prevent
Record the moisture source and the steps taken. Implement preventive measures for future projects, such as improved ventilation and prior surface prep.
Tip: Prevention saves time and material costs.
Diagnosis: Paint bubbled or blistered after applying new coat
Possible Causes
- highMoisture trapped under coating
- highIncompatible primer/topcoat
- mediumImproper surface prep (oils/dust/wax)
- lowEnvironmental conditions (high humidity/temperature swings)
Fixes
- easyScrape away all loose/bubbled paint and let surface dry completely
- easySand the area lightly to create a key and clean thoroughly before priming
- easyApply a compatible primer after ensuring surface is dry, then repaint under suitable conditions
Your Questions Answered
What causes paint to bubble after painting a surface?
Bubbling usually signals moisture trapped under the coating or an incompatible primer/topcoat. Poor surface prep can also leave oils or dust that prevent adhesion. Watch for leaks, humidity, and improper drying.
Bubbling is typically due to trapped moisture or incompatible primers; check for leaks and prepare the surface properly.
Is bubbling always caused by moisture?
While moisture is a common cause, poor surface prep or using the wrong primer can also lead to bubbling. Always check for multiple contributing factors before deciding on a fix.
Moisture is a common cause, but confirm there isn’t another factor like bad prep or primer choice.
Should I sand bubbling areas before repainting?
Yes. Gently sand away loose material to create a smooth key for primer. Cleaning after sanding is essential to ensure good adhesion for the new coat.
Yes, lightly sand and clean before priming to help the new paint stick.
Can lead paint cause bubbling?
Lead paint can complicate bubbling repairs and poses health risks. If you suspect lead, stop work and hire a licensed professional to assess and remediate.
If lead could be present, stop and call a professional to handle the repair safely.
How long does it take to fix bubbling properly?
Time varies with moisture and drying conditions, but plan for drying and curing across a few days. Rushing the process increases the chance of reoccurrence.
It can take a few days depending on moisture and drying conditions; be patient for a lasting fix.
Watch Video
Quick Summary
- Inspect moisture sources before repainting
- Use compatible primers and topcoats
- Let surfaces dry completely
- Control humidity and temperature during painting
- Consult a pro for suspected lead or structural moisture issues