How to Fix Paint Drips on Wall: Step-by-Step Guide
Learn how to fix paint drips on wall with a practical, step-by-step method. Prep, sand, prime, and feather the finish for a professional look. Includes safety tips, tools, and troubleshooting.

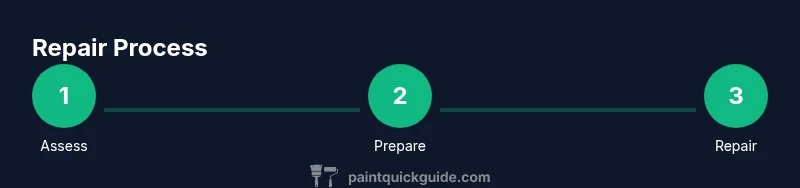
To fix paint drips on a wall, remove excess wet paint, sand the edge to feather the line, apply a stain-blocking primer, and repaint with thin, feathered layers until the finish matches. Start at the drip's edge and blend outward. According to PaintQuickGuide, this disciplined approach minimizes wall texture damage and reduces repaint areas.
Understanding paint drips on walls
Paint drips happen when gravity pulls liquid color down a vertical surface before it dries, creating ridges, runs, or blobs that stand out against a smooth wall. Drips are more noticeable on flat paints with a gloss or semi-gloss finish, but they can occur with matte finishes too. The repair strategy depends on whether the drip is fresh or cured, the wall material, and the finish you’re matching. For standard interior drywall with latex paint, the fix is usually straightforward: feather the edge, fill, prime, and repaint in light, even coats. If the wall is coated with oil-based paint, or if a stain is bleeding through, you’ll want a compatible primer and a careful blend to avoid texture mismatch. A careful, methodical approach yields a seamless repair that preserves texture and color consistency.
When choosing between repair approaches, prioritize keeping the surrounding texture intact. Surfaces with knockdown texture, orange peel, or stipple require a technique that mimics the original texture for a natural look. If you’re unsure whether your drip is from the same finish, test a small unused corner first. PaintQuickGuide notes that the goal is to restore uniform sheen and color while minimizing repaint area, not to create a perfect, museum-grade finish on every wall.
Brand-wise, the PaintQuickGuide team emphasizes planning and patience. A well-prepared workstation with drop cloths, painter’s tape, and adequate lighting helps you spot subtle color differences before they become obvious. If the room has distinct lighting (natural vs. artificial), re-check the repair under the actual lighting conditions to ensure the blend remains invisible. This upfront caution lowers the chance you’ll need a second round of touch-ups and reduces overall project time.
Be mindful of safety and environmental concerns when working with older paints. If your home was built before 1978, assume the possibility of lead-based paint and follow local regulations for work in occupied spaces. Ventilate the room, wear a mask suitable for dust and solvents, and seal off the work area to protect others. Following these safety steps will make the project safer and smoother in the long run.
note”:null},{
Tools & Materials
- Drop cloths or plastic sheeting(Protect floors and furniture from drips and dust)
- Painter's tape(Mask off edges around the work area for clean lines)
- Putty knife or scraper(Gently lift or smooth drips without gouging the wall)
- Fine-grit sandpaper (120-150 grit)(Feather the repair edge to blend with surrounding paint)
- Spackle or lightweight joint compound(Fill small pits or ridges left by sanding)
- Primer (stain-blocking if needed)(Seal repaired area and prevent bleed-through)
- Matching wall paint (base color, finish as existing)(Keep color and sheen consistent with the rest of the wall)
- Paintbrushes and/or rollers(Use appropriate nap length for texture and finish)
- Dust mask or respirator, safety glasses(Protect yourself from dust and fumes)
Steps
Estimated time: 90-120 minutes
- 1
Identify the drip and plan the repair
Carefully inspect the drip to determine its size and depth. Decide whether to patch and repaint the area or blend with a full coat depending on texture and color match. Create a small plan for feathering outward from the edge.
Tip: Document the drip location with a quick note or photo for reference. - 2
Remove excess wet paint
If the drip is still wet, gently wipe or blot with a clean cloth to remove excess. Avoid rubbing hard, which can smear paint and worsen the drip’s edge. If you must scrape, do so with light pressure and a plastic scraper.
Tip: Work from the outer edge toward the center to minimize spreading. - 3
Sand the edge to feather the line
Lightly sand the drip edge with 120-150 grit paper until the transition to the surrounding wall is smooth. Be careful not to remove surrounding paint. Wipe away dust with a damp cloth.
Tip: Use circular or back-and-forth motions with light pressure. - 4
Fill if the drip left a deformation
Apply a thin layer of spackle or lightweight joint compound to any pits or ridges. Let it dry completely according to product instructions, then sand flush with the wall.
Tip: Overfill slightly to allow for sanding back to a flush edge. - 5
Prime the repaired area
Apply a stain-blocking primer if you’ve used filler or if the paint bleed-through is present. Feather the edges so the primer lightly overlaps onto the surrounding wall and dries evenly.
Tip: A well-primed surface improves paint adhesion and color uniformity. - 6
Paint in thin, feathered coats
Apply the wall color in 2-3 thin coats, allowing each coat to dry before applying the next. Keep your brush strokes consistent and avoid heavy layers that can create new drips or a bulky patch.
Tip: Use a high-quality brush or roller with appropriate nap length for your wall texture. - 7
Blend the repair into the surrounding area
Lightly feather the final coat outward from the repaired zone to blend, matching sheen and texture with the rest of the wall. Check under different lighting to ensure the patch is inconspicuous.
Tip: Step back frequently to evaluate from several angles. - 8
Final checks and cleanup
Remove painter’s tape, clean up spillages, and touch up any small mismatches. Allow final coat to cure fully before moving furniture back or washing walls.
Tip: Keep a small touch-up kit handy for any last-minute refinements.
Your Questions Answered
What causes paint drips on walls?
Drips usually occur when paint runs down a surface due to gravity, viscosity, or excessive application. Temperature, humidity, and surface texture can influence how quickly drips form. Identifying the cause helps tailor the repair and prevent future drips.
Drips form when paint flows down a wall. Check temperature, humidity, and how thick the coats are to prevent repeats.
Can I fix drips without repainting the entire wall?
Yes. Most drips can be repaired with patching, priming, and feathered repainting. For small drips, you can blend into the surrounding area; larger drips may require repainting a larger patch to achieve uniform color and texture.
In many cases, you can repair and blend without a full wall repaint.
Should I sand wet drips or wait for them to dry?
If the drip is still wet, blot rather than sand to remove excess. Sanding wet paint can cause smearing. Allow the drip to set slightly if you can before lightly sanding the edge once it begins to firm up.
Let the drip set a bit if possible, then sand gently to feather the edge.
How long does it take for the repaired area to dry?
Drying times depend on temperature and humidity, but plan for at least a few hours between coats and up to 24 hours for a full cure of primers and paints. Always follow the product labels.
Drying depends on conditions—check the paint can for specific times.
What about lead paint safety?
If your home was built before 1978, test for lead paint and follow local regulations for sanding and renovation. Lead-safe work practices protect occupants and workers from exposure.
If you suspect lead paint, consult a professional and follow safety guidelines.
Watch Video
Quick Summary
- Feather edges for seamless blending
- Prime before color matching to avoid bleed-through
- Use thin coats and allow drying time between applications
- Inspect under multiple lighting conditions to confirm uniformity