How to Fix Paint Drips: A Complete Guide
Learn practical methods to fix paint drips on walls or cars. This educational guide covers prep, techniques for wet and dry drips, safety tips, and common mistakes to avoid.

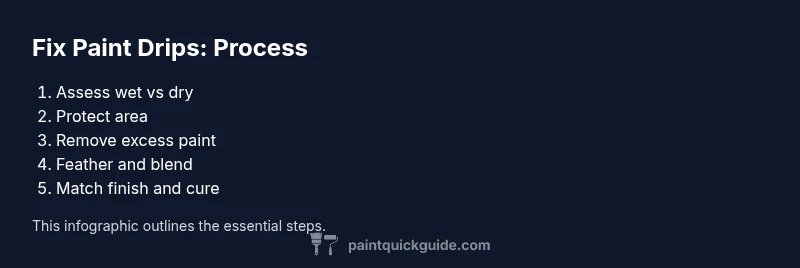
Fixing paint drips is a manageable DIY task for walls and vehicle finishes. Start by identifying whether the drip is still soft or fully cured, then select the right approach: smoothing shallow drips with a scraper, feathering edges with sandpaper, or repainting a small section. Gather masking, solvents, and matching paint before you begin.
Understanding paint drips
According to PaintQuickGuide, a paint drip is a localized raised transfer of excess paint that pooled and ran before drying. Drips can appear on walls, trim, or car panels, and they vary widely based on the surface, paint type, and application technique. Some drips are long, others are small blobs; some are still tacky, others are fully cured. The key is to identify whether the paint is water-based or oil-based, because that determines the solvent you should use and how aggressively you can work. Wet drips tend to be soft and pliable, making smoothing and light removal easier. Dry drips are rigid and may have adhered to the underlying texture, requiring more mechanical work such as sanding and feathering. In practice, most fixes involve three stages: prep, repair, and finish. PaintQuickGuide analysis shows that careful prep and accurate color matching yield durable results with minimal evidence of a repair. Prevention matters too: keep coats thin and even, mask surrounding areas, and maintain a stable work environment to reduce new drips.
Assessing the drip: wet vs dry
Assessing the drip status early saves time and effort. If the paint is still wet, you can often remove or smooth it with minimal damage to surrounding areas. Check for tackiness by pressing a clean fingertip lightly near the drip—if it leaves a mark or the surface sticks, it's still wet. If the paint looks smooth and feels dry to the touch after a gentle fingernail test, it's dry. Look at the surface texture: walls with a stippled or textured finish will hide shallow drips better than flat, slick surfaces. Also consider the paint type: water-based acrylics dry faster and are easier to fix than oil-based enamels, which cure slowly and resist reworking. If you are working on a car, the same rules apply, but the base layer may be cured differently, and you might need to warm the area slightly with a hair dryer to re-soften the drip before removal. The goal in this step is to decide whether you’ll treat the drip as a wet repair (remove or smooth) or as a dry repair (sand and repaint).
Prep and safety: setting up for success
Before touching any painted surface, prepare the work area to minimize mess and protect you. Put on safety glasses and gloves; ensure good ventilation, especially when using solvents. Cover floors and nearby furniture with drop cloths or old newspapers, and seal off the area with masking tape to protect edges. If you plan to repaint, gather a small amount of matching paint, a suitable brush or roller, and primer if the patch requires it. For cars, remove static surfaces and consider using painter's tape to protect adjacent panels. Clean the drip area with a damp cloth to remove dust, then allow it to dry completely. For high sheen finishes, test a tiny hidden spot first to confirm that the solvent won’t lift the finish. If you're repairing in hot or humid conditions, slow down the drying process by maintaining moderate temperatures to avoid new drips while you work.
Fixing techniques: wet drips vs dry drips
For wet drips that are still pliable, act quickly. Gently scrape away excess paint with a plastic putty knife or a scraper held almost flat to the surface, then wipe with a damp cloth. If the drip lies along a flat area, you can feather the edge with light sanding after removing the bulk. When using solvents to wipe away fresh drips, apply sparingly and test for color lift on a hidden area first. For dry drips, the approach is more mechanical: start with a light sanding using 220-grit sandpaper or a sanding sponge, following the texture of the surrounding surface. Once the drip is level with the neighboring area, wipe away the dust and apply a thin coat of primer if necessary, then repaint with an airbrush or fine brush to blend. For car finishes, you may need to use a dedicated scratch remover or polish after blending to restore gloss. In all cases, avoid overworking the area, which can create rings, halos, or new drips.
Finishing: blending and curing
The final step is to blend the repaired area with the surrounding paint so the repair is invisible. Choose a paint with the same base and sheen; mix a small amount of color if needed to match the shade. Feather out the edges with a clean brush, repeating light layers until the transition is seamless. After painting, allow the area to cure according to the paint manufacturer’s recommendations; curing times vary by product and environmental conditions. If the patch shows a slight glaze or differs in gloss, apply a thin coat of clear topcoat or varnish to even the finish once the color is fully dry. Inspect under different lighting to confirm there are no visible edges. For exterior walls, consider a matching sealer to protect against moisture; for cars, a buffing pass with a mild polishing compound can help restore uniform reflectivity.
Common mistakes and troubleshooting
Common mistakes include sanding too aggressively, using the wrong solvent, or painting in one thick coat that creates another drip. Always test solvents on an inconspicuous area first, and work in light, even coats. If the repaired area dries with a rough texture, lightly sand and recoat. Color matching errors are easy to spot; when in doubt, mix small test batches and apply on a scrap piece or a hidden corner before proceeding. On cars, avoid overheating finish with a heat gun; instead, use warm air to soften the drip if necessary, and never direct heat at plastic trims. If the patch fails to blend, consider repainting a slightly larger area to achieve uniform color and finish.
When to call a pro and maintenance
If the drip covers a large area, penetrates textured surfaces, or involves automotive finishes with multiple layers, a professional may achieve a more durable result in less time. For homeowners, a pro can ensure color-matching and sheen consistency across walls. For auto refinishing, a tech can calibrate color and clear coat to restore the original gloss. Ongoing maintenance to prevent future drips includes applying thinner coats, allowing proper dry times between layers, and using good lighting while painting. Regularly inspect painted surfaces and touch up minor drips promptly to minimize damage and keep finishes looking uniform.
Tools & Materials
- Masking tape (painter's tape)(2-inch width works well; protects edges while you work)
- Drop cloths or plastic sheeting(Cover floors and nearby furniture)
- Protective gloves(Nitrile gloves recommended)
- Safety glasses(Eye protection essential when sanding or using solvents)
- Plastic putty knife or scraper(Use a flexible blade to avoid gouging)
- Sandpaper or sanding sponge (220-320 grit)(For dry drips; choose grit based on finish texture)
- Fine brush or foam roller(For blending and light re-coats)
- Primer (if needed)(Use a primer compatible with existing paint)
- Matching paint(Small quantity for touch-ups; test color match first)
- Solvent or paint thinner appropriate for paint type(Test on a hidden area first to avoid color lift)
- Clean rags or microfiber cloths(For wiping and dust removal)
- Heat gun (optional for car finishes)(Use with caution; keep a safe distance)
Steps
Estimated time: 90-120 minutes
- 1
Assess the drip status
Check whether the paint is still wet or already dry, and identify the base type (water- or oil-based). This determines whether you’ll remove, smooth, or sand the area first.
Tip: Perform a light touch test on a hidden area to gauge tackiness. - 2
Protect the surrounding area
Mask edges, cover floors, and remove nearby items to prevent accidental spills or color transfer. This keeps your repair contained and cleaner in the long run.
Tip: Use multiple layers of masking tape to secure corners and avoid seepage. - 3
Remove excess wet drips
If the drip is wet, gently lift off the bulk with a plastic scraper held almost flat to the surface; wipe clean with a damp rag. Avoid gouging the base while removing the bulk.
Tip: Work from the outside of the drip toward the center to prevent spreading. - 4
Feather edges for seamless blend
For both wet and newly smoothed areas, lightly feather the edges using fine sandpaper or a sanding sponge to create a gentle transition into the surrounding color.
Tip: Keep the sanding strokes even and follow the surface texture. - 5
Prime and recoat where needed
Apply a thin coat of primer to bare spots or newly repaired surfaces, then recoat with matching paint in light, even layers. Allow appropriate drying between coats.
Tip: Test color before proceeding to ensure a precise match. - 6
Blend with matching paint
Use a fine brush or small roller to blend the repaired area with the surrounding finish. Build up in multiple very light coats until the patch disappears.
Tip: Don’t overwork; slight repetition yields the best invisibility. - 7
Check gloss and texture
Ensure the repaired spot matches the texture and sheen; adjust with light polish or additional coats if necessary. Car finishes may require polishing after curing.
Tip: Compare under multiple lighting conditions to confirm uniformity. - 8
Cure and verify
Let the repair cure fully according to product instructions before handling or washing the area. Inspect after curing and perform a minor touch-up if needed.
Tip: Avoid heavy use or cleaning for the first 24 hours in exterior conditions.
Your Questions Answered
Can I fix large drips without repainting the entire wall?
Yes, you can repair large drips by feathering the edges and blending with nearby paint, but color matching may require repainting a small patch for a seamless result.
You can repair large drips by feathering and blending, but you may need to repaint a small patch for a seamless finish.
What should I do if the drip is on wood trim?
Treat trim the same as walls: remove excess, sand lightly, prime, and repaint with careful edge work to avoid across-surface bleed.
Treat trim like walls: remove, sand, prime, and repaint with careful edges.
Is heat necessary to fix drips on automobiles?
Heat can soften enamel for older finishes, but use it cautiously and avoid direct heat on plastics or sensitive trims. If unsure, consult a pro.
Heat can help soften older finishes, but use caution and avoid plastics. When in doubt, seek a pro.
How long after painting can I touch up?
Touch-up timing depends on the product; most water-based paints can be touched up once tack-free, while oil-based may require longer cure times.
Most water-based paints are tack-free sooner; oil-based finishes need longer cure times. Check label instructions.
What solvents are safe for removing fresh drips?
Use the solvent recommended for your paint type and test on a hidden area first to prevent color lift or surface damage.
Use the right solvent for your paint and test a hidden spot first to be safe.
Watch Video
Quick Summary
- Protect the area before starting repairs
- Differentiate wet vs dry drips to choose the method
- Feather edges and blend with matching paint