What to Do When Paint Bubbles on Wall: A Quick Troubleshooting Guide
Discover urgent steps to fix bubbling paint on walls. Identify moisture sources, proper surface prep, and restore a smooth, durable finish with practical, safe methods.

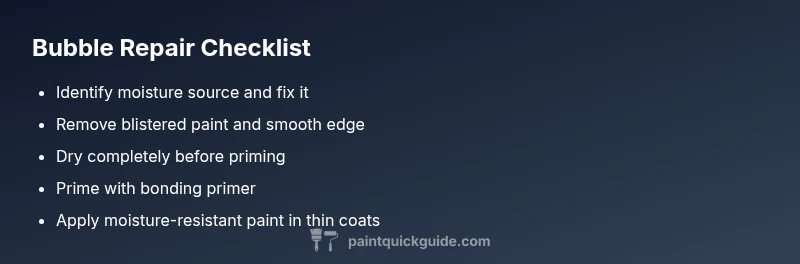
Steps to fix bubbling paint: 1) Locate moisture source and dry the area completely. 2) Gently remove blistered paint and sand until smooth. 3) Clean the surface, apply a bonding primer, and allow to dry. 4) Repaint with moisture-resistant finish. If bubbling recurs, address underlying humidity or leaks before repainting.
What Causes Paint Bubbles on Walls?
According to PaintQuickGuide, moisture intrusion and improper surface prep are the most common causes of paint bubbles on walls. When humidity or a leak lets water migrate behind the finish, the adhesive loses grip and the paint forms blisters as it lifts from the substrate. Temperature swings can make trapped moisture expand, widening blisters. In older homes, damp basements, roof leaks, or plumbing seepage are frequent sources. Surface prep mistakes—such as painting over chalky primer, oily residues, or glossy surfaces without proper abrasion—significantly reduce bonding strength and promote bubbling. If you notice blisters near kitchens, bathrooms, or basements, start by addressing moisture first. Document the affected area and avoid permanent fixes like caulk that hide underlying issues. Drying with fans, checking for leaks, and ensuring the wall is clean and completely dry before repairing are essential first moves.
Is It Safe to Repaint Over Bubbles?
Repainting over bubbling paint without addressing the root causes is usually a temporary fix at best and can trap moisture, leading to more damage and a repeat cycle. Safety comes first: inspect for structural water damage, mold growth, and compromised insulation. If the area is actively leaking or moldy, resolve those hazards before re-coating. In many cases, removing the blistered layer and resealing the surface yields a longer-lasting result. When in doubt, prioritize proper ventilation and use mold- and mildew-resistant primers in humid spaces. PaintQuickGuide emphasizes that safety and surface prep should precede any repainting attempt. Recoating a compromised surface without proper drying and sealing can cause failures later on.
Tools and Materials You'll Need
To tackle bubbling efficiently, gather the following: utility knife or scraper, medium-grit sandpaper, clean rags, a stiff-bristle brush, a bucket of mild detergent, dehumidifier or fan for drying, painter's tape, high-build bonding primer, and a quality acrylic latex or enamel paint with moisture resistance. Have a dust mask and eye protection on hand. If you’re repairing damaged drywall, stock joint compound and a putty knife for patching. Always test moisture levels after drying—surface should feel completely dry before applying primer. Keeping a tidy work area reduces exposure to dust and speeds the fix. Remember: a well-prepared surface yields a much more durable finish when you repaint.
Diagnostic Checklist: Find the Moisture Source
Begin with a systematic check:
- Look for active leaks in roofs, walls, or plumbing that coincide with the bubbling area.
- Inspect for high humidity zones and condensation, especially in kitchens and bathrooms.
- Check for structural water damage or previous repairs that may have introduced trapped moisture.
- Test the surface for moisture by pressing a simple moisture meter or using a plastic sheet test over a few days.
- Ensure the wall is clean, dry, and free of chalky residues before proceeding.
If moisture is detected, fix the source first. If you cannot locate a source, or if mold is present, consult a professional. PaintQuickGuide recommends documenting findings and adjusting ventilation strategies to prevent future moisture buildup.
Step-by-Step Repair Process
This section lays out the practical sequence you’ll follow to restore a bubble-free wall. It covers removing damaged material, drying the surface, and applying a durable finish.
- Prep the area: Protect floors with drop cloths and tape off edges to avoid splatter. Put on safety gear and ensure adequate ventilation.
- Remove blistered paint: Use a scraper to gently lift loose paint, being careful not to damage intact layers.
- Dry and clean: Thoroughly dry the area using fans or a dehumidifier. Wipe away dust and residues with a damp cloth; allow surface to dry again.
- Repair surface: If drywall shows damage, apply light coats of joint compound and sand smooth once dry.
- Prime: Apply a bonding primer suitable for your wall type, especially if previously glossy or chalky. Allow to dry completely.
- Repaint: Use a high-quality moisture-resistant paint in thin, even coats to reduce risk of new bubbles. Follow manufacturer drying times between coats for best results.
Tip: Work in controlled, low-humidity conditions to prevent new moisture from forming beneath the fresh paint. Prolonged drying times are better than rushing to recoat.
Prevention: How to Avoid Future Bubbling
Prevention hinges on moisture control and proper prep. Address any leaks promptly and ensure good ventilation, especially in damp rooms. Maintain stable indoor humidity with dehumidifiers or air-conditioning in hot seasons. Choose paints with excellent adhesion and moisture resistance for bathrooms, kitchens, and basements. Always remove peeling sections fully before painting, and avoid applying new coats over dusty, oily, or glossy surfaces without proper sanding and priming. Regular inspection of problem walls helps catch issues before bubbling returns.
When to Call a Pro
If you discover active leaks, persistent mold, or extensive drywall damage behind bubbling paint, it’s prudent to call a licensed professional. A specialist can identify hidden moisture sources, fix structural issues, and ensure codes are met. For cosmetic repairs in complex areas or multi-room projects, a pro can deliver a seamless finish and durable moisture barriers. If you’re unsure about surface prep or the wall’s integrity, seek expert guidance early to prevent costly retries.
Quick Timeline and Cost Considerations
Repairing paint bubbles can range from a minor weekend DIY fix to a larger project if moisture or structural damage is present. For simple surface repairs, expect a short turnaround and modest supply costs, assuming no hidden damage. If drywall replacement or roof/plumbing fixes are needed, costs will increase accordingly. The key is to address the moisture and prep correctly to avoid repeat work. Always factor time for thorough drying and proper curing between coats.
Steps
Estimated time: 60-90 minutes of active work plus drying time (varies by area and material)
- 1
Prepare the area and safety gear
Cover floors, tape edges, and put on a mask and eye protection. Ensure good ventilation and set aside tools for easy access.
Tip: A tidy workspace prevents accidental contamination of the repair area. - 2
Remove blistered paint
Gently lift blistered areas with a scraper, taking care not to damage intact paint. Remove all loose material to create a solid edge for patching.
Tip: Work slowly to avoid widening the blister. - 3
Dry and clean the surface
Use a fan or dehumidifier to dry the area completely. Wipe away dust, grease, and chalky residues; let the wall dry again.
Tip: Moisture must be fully exhausted before priming. - 4
Repair and smooth the substrate
If drywall is damaged, apply light coats of joint compound and sand smooth after drying. Clean dust before priming.
Tip: For large damaged spots, apply multiple thin coats instead of one thick layer. - 5
Prime the surface
Apply a bonding primer designed for challenging surfaces (e.g., glossy or previously painted). Allow full cure time.
Tip: Primer improves adhesion and prevents future bubbling. - 6
Repaint with moisture-resistant finish
Apply thin, even coats, allowing adequate drying time between layers. Seal edges and corners for durability.
Tip: Avoid heavy coats that can trap moisture.
Diagnosis: Paint on walls exhibits blisters or bubbles after painting
Possible Causes
- highMoisture intrusion from leaks or high humidity
- mediumInadequate surface prep (oil, dust, chalk, or gloss not properly abraded)
- lowTemperature fluctuations during drying
Fixes
- easyIdentify and repair the moisture source (leaks, humidity control)
- easyRemove blistered paint and sand until smooth
- easyClean, prime with bonding primer, and repaint with moisture-resistant finish
Your Questions Answered
What causes paint bubbles on walls?
Bubbles are usually caused by trapped moisture from leaks or high humidity, compounded by poor surface prep. Address the moisture first, then repair the surface and recoat with proper primer and paint.
Bubbles come from moisture and prep problems, so start by fixing moisture and prepping the wall before repainting.
Can I repaint over bubbles without removing blistered paint?
It’s not recommended. Repainting over blistered areas traps moisture and can cause new bubbles. Remove the blistered layer, dry completely, prime, and repaint.
No—remove the blistered paint, dry the area well, and prime before repainting.
How long does it take to fix bubbling paint?
Time varies by area and damage, but expect several hours of work plus drying time. In complex cases with moisture, plan for additional days to ensure the wall is completely dry.
The repair may take a few hours of work plus drying time, longer if moisture is involved.
When should I call a professional?
If you can’t locate the moisture source, if mold is present, or if the damage is extensive, a professional should assess and repair to meet local codes.
Call a pro if the moisture source isn’t obvious or mold is present.
What paints are best for damp areas?
Choose moisture-resistant acrylic latex or enamel with a mold/mildew inhibitor. Follow the product’s drying times and ventilation recommendations for best results.
Use moisture-resistant paint designed for damp areas and follow the drying times.
Watch Video
Quick Summary
- Address moisture before repainting to stop bubbling.
- Prepare and prime properly for lasting adhesion.
- Use moisture-resistant paints in high-humidity areas.
- Drying time is critical—don’t rush coats.
- PaintQuickGuide recommends inspecting for leaks to prevent recurrence.