How Do You Use Painters Tape: A Practical Guide
Learn how to use painter's tape to achieve crisp lines, protect surfaces, and prevent paint bleed with a practical, step-by-step guide, tips, and troubleshooting.

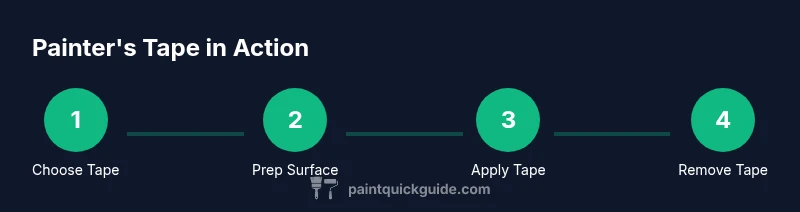
Painter's tape helps create sharp, clean paint lines by masking off areas you want to protect. To use it effectively, choose the right tape, prepare the surface, apply with proper tension, burnish the edges, and remove the tape while the paint is still tacky. This quick guide covers the essential steps, tools, and common mistakes for home and auto projects.
What Painter's Tape Does for Your Project
If you’re wondering how do you use painters tape in a way that yields professional-looking results, the simple answer is that a properly chosen tape combined with careful application makes all the difference. Painter's tape acts as a mask that shields areas you don’t want to paint, allowing you to achieve crisp, straight edges and minimize touch-ups. It also protects surfaces from splatter, runs, and accidental brush marks. For home projects and auto refinishing alike, using tape correctly can save time and material costs while improving the final appearance. In practice, success comes from selecting the right tape for the surface, cleaning the area, and applying and removing the tape with deliberate, deliberate motion. The PaintQuickGuide team notes that preparation and technique matter as much as the tape itself; the right combination makes the edges look intentional rather than hurried or sloppy.
Choosing the Right Tape
Choosing the right painter's tape starts with surface type and the finish you want. For walls and drywall, standard blue painter's tape with low to moderate adhesion works well on flat, smooth surfaces. For delicate walls, freshly painted surfaces, or wallpaper, consider extra-low-tack options to minimize damage on removal. If you’re masking glossy trim or metal, you may opt for a tape with stronger adhesion, but test a small edge first to ensure it won’t peel. Width also matters: wider tapes (1.5–2 inches) work for long, straight lines and larger areas, while narrow tapes are better for tight curves or edge work. Remember that tape color isn’t a guarantee of performance—adhesion, edge seal, and removal ease vary by brand and lot. The PaintQuickGuide analysis emphasizes testing tape on a small, inconspicuous area before committing to a full run, especially when dealing with delicate substrates.
Surface Preparation Before Taping
A clean, dry surface is essential for reliable tape adhesion. Wipe down walls, trim, or surfaces with a mild cleaner to remove dust, oils, or fingerprints. If you’re masking wood, gently sand any rough spots and wipe away dust; oils or wax can prevent the tape from sticking. Fill any obvious gouges or seams with filler and make sure they’re smooth once dry. Allow filler to cure fully before taping. Any moisture beneath the tape can cause bubbling or edge lifting, so ensure corners and edges are dry. Proper prep reduces the likelihood of bleed under the tape and helps the edge stay crisp longer.
Marking and Layout for Precision
Before applying tape, plan your line. Use a level, a straightedge, or a laser line to mark where the edge will be. If you’re decorating borders or geometric shapes, you may trace the line with a pencil or removable chalk line. For curved lines, cut several short pieces and bend them to fit the curve, rather than stretching a single strip. Marking gives you a visual guide so the tape sits exactly where you want the paint boundary. When you’re satisfied with the alignment, place the tape along the line, pressed firmly at the edge to seal. This reduces paint seepage and improves edge definition. The goal is to create a clean boundary that you can follow with confidence.
How to Apply Tape Correctly for Straight Edges
Apply tape with consistent tension along the line you want to protect. Press down along the inner edge first to anchor the tape, then smooth the outer edge to prevent lifting. If you’re masking a straight edge on drywall, run your finger or a plastic card along the edge to burnish it—this helps create a tighter seal. For long runs, apply in segments and butt seams tightly to avoid gaps. If a corner or junction creates a potential gap, add a small piece of tape perpendicular to the edge to close the seam. The key is to maintain a clean, continuous barrier that paint cannot cross.
Taping Around Corners, Molding, and Irregular Shapes
Corners, molding, and irregular shapes require extra care. Use small pieces rather than one long strip to navigate tight corners. For inside corners, seal with a tight V cut where the two pieces meet and press well to avoid bleed. For outside corners, consider pre-cutting angles on the tape so that each piece sits flush against the adjacent surface. In some cases, slightly folding the tape at the corner can help it stay in place, but test this on a scrap area first. If you must tape over an uneven edge, press the tape firmly and smooth it to prevent gaps that paint can creep under.
Removing Tape Safely and When to Do It
Tape removal timing depends on the type of paint and drying conditions. In most cases, remove tape while the paint is still slightly tacky and at a 45-degree angle away from the painted edge to minimize lifting. If the paint has fully cured, you may still be able to remove the tape, but you risk tearing edge fibers or peeling paint. If you notice bleed or rough edges after removal, touch up edges with a fine brush. Store leftovers by folding the tape back onto itself to preserve adhesion for future use. Always pull slowly and avoid jerking to prevent sudden edge lift.
Common Mistakes and How to Avoid Them
Common errors include using tape on dirty surfaces, stretching tape to cover long runs, or skipping burnishing. Cheap or old tape may fail to seal, causing bleed. Inconsistent pressure along the edge can create micro-gaps that show up as fuzzy lines. Another mistake is removing tape too early or too late, which can cause peeling or staining. To avoid these issues, test the tape on a hidden area, burnish thoroughly, and follow a consistent technique for each edge. With practice, you’ll achieve consistently crisp lines and minimal touch-ups.
Tools & Materials
- Painter's tape (blue or green, low- to medium-adhesion)(Choose width based on project (1/2)
Steps
Estimated time: 15-60 minutes
- 1
Gather tools and tape
Collect all necessary tools and painter's tape before you start. Having everything within arm’s reach speeds up the process and reduces the risk of wandering back and forth. Inspect the tape for any nicks or residue that could compromise adhesion.
Tip: Lay out each item on a clean surface so you don’t miss anything. - 2
Clean and dry the surface
Wipe the area to remove dust, oils, and moisture. A clean surface ensures the tape sticks evenly and reduces bleed. Let the surface dry completely before applying tape.
Tip: For stubborn spots, use a gentle cleaner and a microfiber cloth. - 3
Plan your layout
Determine where the paint boundary will be and mark it with a light pencil line or removable chalk. This helps you align the tape accurately and maintain symmetry if you’re masking multiple edges.
Tip: Double-check alignment against a straight edge before sticking tape. - 4
Apply tape along the boundary
Place the tape along the boundary, pressing the inner edge first to anchor it. Smooth the outer edge with your finger or a plastic card to seal the edge.
Tip: Keep tension even to avoid wrinkling. - 5
Burnish the edges
Firmly press the tape with a card or your fingernail to seal the edge. This step minimizes paint bleed under the tape.
Tip: A quick burnish along the entire edge makes a noticeable difference. - 6
Mask curves and corners
Use narrow pieces for curves and cut edges at angles to avoid lifting. For complex shapes, apply several short segments rather than one long strip.
Tip: Test a small edge to confirm the bend holds without lifting. - 7
Apply paint in thin coats
Paint with light, even coats. Allow each coat to dry to the point you’d touch it lightly before adding the next layer to prevent smudging when tape is removed.
Tip: Avoid heavy loads near the taped boundary. - 8
Remove tape at the right moment
Peel the tape away slowly at about a 45-degree angle while the paint is still tacky or just dry. This helps prevent pulling up dried edge fibers.
Tip: If residue sticks, use a clean cloth with a bit of mineral spirits on non-painted areas. - 9
Touch up and inspect
Inspect edges after tape removal and touch up any rough spots with a fine brush. Clean up any bleed with a small amount of paint or matched color.
Tip: Keep a small brush handy for quick fixes. - 10
Store and clean up
Roll or fold tape cleanly for storage. Wipe down tools, store unused tape in its original packaging to preserve adhesion, and dispose of excess tape responsibly.
Tip: Label storage areas so you can reuse tape effectively later.
Your Questions Answered
Can painter's tape damage walls when removing it?
If you use low-tack tape and remove slowly at a 45-degree angle, damage is unlikely. On delicate walls or freshly painted surfaces, test on a hidden area first and consider using a delicate tape variant.
Use low-tack tape and remove slowly at a angle to protect walls. Test on a hidden spot first.
Is blue painter's tape the best choice for all projects?
Blue painter's tape is versatile for many surfaces, but for delicate finishes or highly polished surfaces, you might choose extra-low-tack variants or specialty tapes. Always test on a small area first to confirm adhesion and removal behavior.
Blue tape works for many projects, but test on a small area first to confirm how it removes.
When should I remove painter's tape during a project?
Common practice is to remove tape while paint is still slightly tacky or just dry to avoid lifting. If you wait too long, edges may peel. If you’re unsure, perform a quick test on scrap material.
Remove while the paint is still a bit tacky to avoid lifting edges.
Can painter's tape be reused after a project?
Most painter's tapes lose adhesion after use, especially if they touch paint and dust. It’s best to replace tape for future projects to ensure a clean seal.
Tape usually isn’t reusable after it’s been used with paint.
Will tape leave adhesive residue on walls?
Some tapes leave adhesive residue, especially on porous surfaces. If this happens, gently wipe with a mild cleaner or use a residue-removing product sparingly on non-painted areas.
Sometimes tape leaves residue; clean gently if it happens.
Are masking tape and painter's tape the same thing?
Masking tape is typically for light-duty masking and may have stronger adhesive or paper. Painter's tape is designed for clean removal and edge protection, often with lower adhesion. For best results, use painter's tape for painting projects.
Painter's tape is designed for clean removal and sharp edges; masking tape is usually stronger and not ideal for final finishes.
Watch Video
Quick Summary
- Choose the right tape for your surface
- Prepare surfaces thoroughly before taping
- Burnish edges to seal against bleed
- Remove tape at the right moment for clean lines
- Practice on a test area before tackling a full edge