Can You Put Painter's Tape on Wallpaper? A Practical Guide
Learn whether painter's tape can be used on wallpaper, how to choose tape, prep surfaces, apply and remove tape safely, and practical alternatives for clean, crisp edges without damaging wallpaper.

Yes—painter's tape can be used on wallpaper for masking edges, trims, and crisp paint lines when you choose the right tape and apply carefully. This quick-answer prepares you with tape choices, prep steps, removal tips, and common mistakes to avoid so you don’t damage the wallpaper.
Why Masking Tape on Wallpaper Can Be Helpful
Masking tape used on wallpaper is not a universal solution, but when used correctly it can save you from paint bleed along delicate borders, protect decorative textures, and help you achieve crisp edges around adjacent walls or trim. According to PaintQuickGuide, using painter's tape on wallpaper can be effective if you select the right tape and apply carefully. The key is to treat wallpaper as a delicate surface: one that may lift, peel, or absorb adhesive if you press too hard or use the wrong product. This practical guide explores typical scenarios where tape helps, the risks involved, and how to avoid common mistakes so you get a clean finish without damage.
Tape Types: Low-Tack vs Standard Painter's Tape
When you’re taping on wallpaper, the adhesive strength matters more than you might think. Low-tack painter's tape (often blue or green) is designed to stick without pulling off surface fibers or inks, making it a safer choice for delicate wallpaper. In contrast, standard painter's tape can be stronger and is more likely to lift wallpaper or leave adhesive residue if the wallpaper has a vinyl finish or a heavy texture. For most residential wallpapers, a high-quality low-tack blue tape or green tape offers the best balance between edge definition and surface safety. If you’re unsure, perform a quick test on an inconspicuous area before committing to a full edge. PaintQuickGuide’s guidance in 2026 emphasizes testing and gentle pressure to minimize risk, especially with textured or vinyl finishes.
Prep and Patch: Testing and Surface Prep
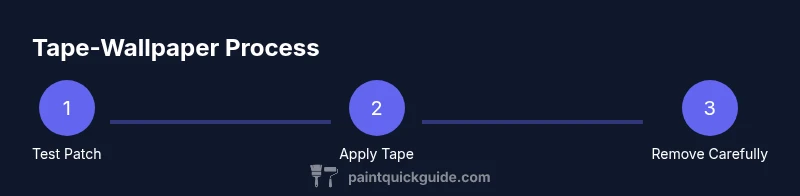
Effective masking starts with prep. Begin by inspecting the wallpaper type and finish (matte, satin, vinyl, or fabric-backed). Clean the surface with a soft cloth to remove dust, and let it dry completely. Do a small test patch with the tape on a hidden area to check for lift, curling, or adhesive residue. If the tape removes color or leaves residue, switch to a gentler option or avoid taping altogether. Keep your work area well-lit to spot edges and seams. PaintQuickGuide’s analysis highlights that surface prep and a cautious test patch significantly increase success rates when masking wallpaper in 2026.
Application Technique: How to Apply Tape on Wallpaper
Apply tape in short, straight segments rather than trying to cover long curves in a single strip. Press the tape down from the center outward to eliminate air bubbles, using a smoothing tool or a clean fingernail. Avoid stretching the tape, which can cause curling at the edges and lift the wallpaper. If you’re taping along an edge where two colors meet, place the tape just inside the lighter section to prevent overspill. For corners or intricate patterns, apply tape slightly beyond the target line and trim with a sharp blade after painting. The goal is crisp lines without pulling wallpaper fibers.
Tip: work in small sections to maintain control and prevent adhesive from setting in textured surfaces.
Removal: Remove Tape Without Damaging Wallpaper
The removal phase is where many DIY projects go wrong. Peel the tape back on itself at a shallow angle (about 45 degrees) to minimize tension on the wallpaper. If the tape resists or pulls fibers, stop and re-wet the edge with a damp cloth to loosen the adhesive slightly before continuing. Always pull parallel to the wallpaper seam when possible, not perpendicular to the surface, which can lift edges. If you notice any lifted edges, press them back down gently and re-tape only the affected area. A careful, slow removal reduces the chance of tears or tears in the wallpaper backing.
Common Mistakes and How to Avoid Them
- Using high-t tack tape on sensitive wallpaper: switch to low-tack to prevent lift.
- Skipping a test patch: test on an inconspicuous area first to gauge adhesion.
- Stretching or pulling the tape while applying: this causes curls and edge lift.
- Removing tape too quickly: pull slowly at a shallow angle to avoid tearing.
- Not cleaning the surface: dust and oils can prevent good tape adhesion and paint edges.
Alternatives to Tape When Masking Wallpaper
If tape risks damaging wallpaper, consider safer masking options. Masking film or plastic sheeting can cover larger areas without sticking to the wallpaper surface. A sharp edge and blue tape can be used for precision in tight corners, but only if the wallpaper is forgiving. For complex patterns or fragile surfaces, a paintbrush with a fine edge may be preferable to achieve clean lines without tape. Remember: always test alternatives on a hidden patch first.
Verdict: Final Thoughts on Using Painter's Tape on Wallpaper
In most cases, painter's tape can be a reliable masking tool for wallpaper when you use the right tape and apply it thoughtfully. The key is experimentation, patience, and care—start with a test patch, choose low-tack tape, apply with smooth, gentle pressure, and remove slowly. If your wallpaper is especially delicate or textured, consider safer masking methods or professional advice. The PaintQuickGuide team recommends prioritizing wallpaper safety and edge accuracy over speed, especially for high-visibility areas.
Quick Scenarios: Borders, Edges, and Clean Lines
- Borders near baseboards: tape along the baseboard edge, then paint inwards.
- Door frames and window trim: run a thin line of tape along the trim and use a small brush to avoid overspray.
- Complex patterns: use a combination of tape and masking film for large areas, then refine with a fine brush.
Tools & Materials
- low-tack painter's tape (blue or green)(Choose a tape labeled as low-tack for delicate surfaces to reduce wallpaper lift.)
- scissors or a utility knife(For trimming tape edges cleanly and safely.)
- soft microfiber cloth(For wiping away dust and any adhesive residue before/after taping.)
- painter's smoothing tool or plastic edge runner(Helps press tape smoothly and remove air bubbles.)
- plastic drop cloth or painter’s film(Covers nearby areas to protect wallpaper from splatter.)
Steps
Estimated time: 60-90 minutes
- 1
Assess wallpaper type and finish
Inspect the wallpaper finish (matte, satin, vinyl, or fabric-backed) and identify any textured areas. This informs tape selection and handling. If the wallpaper is vinyl or heavily textured, proceed with extra caution and consider alternatives. The goal is to understand how the surface will interact with adhesive.
Tip: If in doubt, perform a quick test patch first on an inconspicuous area. - 2
Test tape on a hidden patch
Choose a small, unseen area and apply a short strip of tape to evaluate adhesion and potential lift. If the tape removes color or leaves adhesive residue, you should swap to an even gentler option or avoid taping that section altogether.
Tip: Document your test results so you know which areas are safe. - 3
Clean and dry the area
Wipe the wallpaper surface with a soft microfiber cloth to remove dust, oils, and debris. Allow the surface to dry completely before applying tape to prevent trapped moisture that could loosen adhesive over time.
Tip: Dust before you tape to avoid particles causing edge fuzziness. - 4
Apply tape along the edge
Place tape along the intended edge, pressing from the center outward to eliminate air bubbles. Do not stretch the tape; keep it taut but not tight to prevent curling or lift.
Tip: Use a smoothing tool or your finger to ensure a solid seal along the edge. - 5
Paint or edge with care
Paint or apply finish inside the taped area if masking is being used. Maintain a steady pace and avoid pressing the edge into the wallpaper, which can lift fibers.
Tip: Work in small sections to minimize risks of slip or bleed. - 6
Remove tape slowly and safely
Peel back the tape at a 45-degree angle, parallel to the wallpaper seam. If resistance occurs, stop and re-wet the edge to ease the adhesive.
Tip: Take your time; rushing increases the chance of damage.
Your Questions Answered
Can painter's tape cause wallpaper damage?
Yes, if you use the wrong tape or apply it forcefully. Always perform a patch test and use low-tack tape designed for delicate surfaces.
Tape can damage wallpaper if you use the wrong tape or press too hard, so test first and choose low-tack tape.
What tape is best for wallpaper?
Low-tack painter's tape is generally best for wallpaper, especially on delicate or vinyl-backed surfaces. Test first to ensure no lift or residue.
Low-tack tape is usually best for wallpaper, but test first on a hidden area.
How do I remove tape without pulling wallpaper?
Peel at a shallow angle (about 45 degrees) toward the edge, and pause if adhesive resists. If needed, dampen the edge slightly and continue slowly.
Peel slowly at a shallow angle, and dampen if it sticks to reduce damage.
When should I avoid using tape on wallpaper?
If the wallpaper is very delicate, heavily textured, or if a test patch shows lift or residue, skip tape or use alternatives like masking film.
If test patches show lift, avoid using tape and try a safer method.
Can tape help with straight paint lines on wallpaper?
Yes, tape can help create straight paint lines along borders when taped carefully and removed correctly.
Tape can help with clean lines if applied and removed properly.
Watch Video
Quick Summary
- Test a patch before full use
- Choose low-tack tape for wallpaper surfaces
- Remove tape slowly at 45-degree angle
- Avoid using standard masking tape on delicate wallpaper