Do You Put Painter's Tape on the Ceiling? A Practical Guide
Learn whether to tape the ceiling during painting, how to apply masking tape for sharp edges, and pro tips to prevent bleed and paint-peel on walls and ceilings.

Yes—taping the ceiling edge is often worth doing to prevent bleed and achieve a clean line. Use low-tack painter’s tape and press it down firmly along the edge between ceiling and wall, then cut in with a brush if needed. Remove the tape while the paint is still slightly tacky to avoid peeling.
Do you put painters tape on the ceiling? Why masking the seam matters
The question, do you put painters tape on the ceiling, comes up frequently for DIY painters and homeowners. Masking the edge where the wall meets the ceiling helps keep ceiling paint from creeping onto the wall and creates a crisp, professional line. The decision often depends on ceiling texture, paint type, and the edge between surfaces. In practice, most painters—whether painting a single room or refreshing a whole home—include some form of edge masking. The PaintQuickGuide team notes that choosing the right tape and applying it correctly can reduce touch-ups later, saving time and frustration. If your ceiling has texture or popcorn finish, you’ll need a tape that adheres gently without lifting loose material. When used thoughtfully, ceiling masking is a quick, effective step that improves results for interior painting projects.
Types of painter's tape for ceilings and when to use them
Not all painter’s tapes are equal for ceilings, especially with delicate textures or high ceilings. Standard blue painter’s tape offers clean edges on flat surfaces but can lift on textured ceilings or fresh plaster. Green or yellow premium tapes often provide stronger adhesion and longer wear, yet may leave residue on certain paints. For ceilings with popcorn texture, look for delicate or low-adhesion tapes designed to avoid lifting loose material. A common rule is to use the lowest-tack tape that still seals the edge. If you’re masking a glossy ceiling or a surface prone to bleed, you may choose a slightly higher adhesion, but test on a small area first. The goal is a crisp line without peeling or tearing of the texture. It’s also smart to choose painter’s tape colors that you can see against your ceiling and wall colors, reducing mistakes during application.
Preparation matters: cleaning, edging plan, and protection
Before applying tape, prepare the working area. Remove ceiling fixtures or cover them, lay down drop cloths, and ensure the surface is clean and dry. A light dusting with a microfiber cloth helps paint adhere evenly and reduces the chance tape edge lifting. Mark your edge with a pencil line as a guide if you’re doing complex patterns or color-blocking. The question of do you put painters tape on the ceiling is often answered with a plan: decide whether you’ll tape first or use a brush for cutting in in tight corners. In some cases, it’s faster to cut in along the ceiling line with a high-quality angled brush, but tape is still a powerful ally for achieving consistent results across a room.
Masking technique: applying and burnishing the tape along the line
Applying tape along the ceiling edge requires a steady hand and attention to the line. Start at a corner and unfurl tape slowly, keeping it taut to prevent wrinkles. Use a straight edge or the edge of a painter’s knife to press the tape down precisely along the line. Burnish or press the tape with a clean finger or the tool handle to create a tight seal and minimize paint bleed. If you’re working on a high ceiling, consider using a pole sander with a masking tool to control the tape edge more consistently. Remember: do you put painters tape on the ceiling? Yes, when it helps you achieve a sharp, professional look and reduce post-paint touch-ups.
Texture matters: ceilings aren’t always smooth
Textured ceilings, including popcorn, knockdown, or stucco, respond differently to tape. If adhesive grabs texture, you may see lifted material or fuzzy edges. In these cases, press the tape lightly and avoid stretching it too tight, which can cause the texture to distort under the edge. You may also use a perforated tape option or painter’s paper along the edge to accommodate irregularities. For finish-quality consciousness, masking the ceiling edge remains worthwhile, but you’ll need to adjust tension and burnishing pressure to prevent damage to the texture.
Cutting in and painting: pairing tape with tools
After taping, cutting in along the taped edge with a high-quality angled brush helps you achieve a clean transition from ceiling to wall. A long-handled roller can cover large areas quickly after you’ve secured the edges. While paint bleeding can be minimized with tape, you should still cautiously overlap a tiny amount into the wall color to avoid small gaps. If you prefer to avoid tape on a very smooth ceiling, a premium edging tool or a high-precision brush may suffice, though bleed risks are higher in practice. The key is to keep a steady motion and maintain consistent pressure along the taped line.
Removing tape: timing and technique for best results
Tape removal timing matters. For most latex paints and standard finishes, remove the tape when the edge is still slightly wet or just after the paint has begun to set but isn’t fully cured. Pull away from the edge at a shallow angle to avoid lifting fresh paint. If you see any bleed, touch it up with a small brush after removing the tape. Patience here is crucial—rushing tape removal can ruin the edge you worked so hard to achieve. The end result should resemble a clean, crisp line where wall color meets ceiling color, with no stray paint on the wall.
Common mistakes to avoid and quick fixes
Common mistakes include removing tape too early, using the wrong tape on textured ceilings, and failing to press the tape firmly at the edge. A five-minute burnish before painting can save you from messy edges later. If you discover bleed after initial coats, wait until the paint dries slightly and reapply a narrow stripe of tape to re-create the edge, then touch up. For busy households, consider masking a second layer of tape to protect adjacent edges. The best practice is to test a small area first, especially on ceilings with unusual textures or colors.
Tools & Materials
- low-tack painter's tape (1 inch to 1.5 inches)(Blue or green tones; test adhesion on a small corner first)
- drop cloths or plastic sheeting(Cover floors and furniture; secure edges)
- ladder or step stool(Stable and level; use a spotter if possible)
- angled sash brush (2–2.5 inches)(For clean cut-ins along the taped edge)
- 2–4 inch painter's masking edge tool or plastic spreader(Helps press and seal tape more evenly)
- utility knife or tape cutter(Score tape at corners or when removing backing)
- microfiber cloth(Dust surface and burnish tape gently)
- painter's plastic or paper layer for fixtures(Temporary protection for ceiling fixtures)
- rubber gloves(Keeps hands clean during burnishing)
- mask or respirator (for dust or fumes)(Use as needed for ventilation)
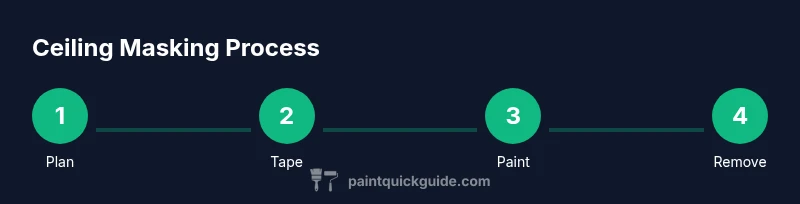
Steps
Estimated time: 60-90 minutes (depending on room size and texture)
- 1
Plan and prep
Survey the room and decide where masking is essential. Remove fixtures if possible, lay down dropcloths, and clear the area. This is where you decide whether to use ceiling masking tape or not, and how much of the ceiling edge you’ll mask.
Tip: Take a quick photo of the room to guide your masking pattern later. - 2
Clean and dry surfaces
Wipe ceilings and adjacent walls to remove dust and oils. A clean edge helps tape adhere evenly and reduces bleed risk. Allow surfaces to dry completely before taping.
Tip: If the ceiling has a sheen, lightly scuff the edge with a soft pad to improve tape adhesion. - 3
Apply tape along the edge
Gently run the tape along the ceiling-wall seam, keeping it straight. Use a taut pull so the tape hugs the edge without wrinkles. Extend the tape a few inches onto the wall to protect the surface during cutting in.
Tip: For awkward angles, use a second piece of tape as a guide and press down with a plastic edge tool. - 4
Burnish and seal
Press the tape firmly with your finger or a burnishing tool to seal it. Small air bubbles or wrinkles are your enemy—press them out toward the wall edge. The goal is a tight seal that stops paint bleed.
Tip: Run a nail or edge tool along the tape to ensure complete contact with the surface. - 5
Cut in and paint
Dip the angled brush and cut in along the taped edge. Follow with rolling the wall area, keeping a steady motion. Maintain consistent pressure to avoid pushing paint under the tape.
Tip: Use short, controlled strokes and keep the brush nearly flush to the edge for a crisp line. - 6
Remove tape at the right moment
When paint is still slightly tacky, gently peel the tape away at a shallow angle. If you see bleed, stop and touch up with a fine brush after tape removal.
Tip: Pull away from the most recently painted area to avoid lifting dry paint. - 7
Touch-ups and final checks
Inspect for any bleed or rough spots. Use a small brush to touch up the edge and ensure color consistency. A second pass with light edging can refine the line.
Tip: Keep a damp rag handy to clean any stray pencil marks or scuffs.
Your Questions Answered
Should I always tape the ceiling when painting?
Not always; tape is most valuable when achieving a crisp edge or working with delicate textures. If you’re confident in cutting in precisely and the wall-ceiling transition is simple, you may skip the tape to save time. However, for a clean, professional edge, masking is often worth the extra step.
Tape the ceiling when you want a crisp edge, especially with textured ceilings. If you’re comfortable cutting in, you can skip it, but be prepared for more touch-ups.
What type of tape is best for ceilings?
Low-tack painter’s tape is generally best for ceilings to prevent lifting delicate textures. Test a small area first, especially on glossy or freshly painted ceilings. For popcorn or knockdown textures, consider a delicate tape or masking paper to avoid damage.
Low-tack tape is typically best for ceilings; test first on textured ceilings to avoid pulling material.
Can I tape over popcorn ceilings?
Yes, but use extra care. Press the tape gently and avoid pulling too hard, which can peel the texture. Consider test-taping in an inconspicuous spot before proceeding to larger areas.
You can, but go slow and test first; avoid aggressive pressure that could lift the texture.
When should I remove the tape?</n>
Remove tape when the paint is still tacky or just starting to set. This reduces the risk of peeling the fresh edge. If you notice bleed, touch up with a small brush after removal.
Take the tape off while the paint is still a bit wet to keep edges clean.
What if paint bleeds under the tape?
Pause, wait until the edge dries slightly, then apply a narrow strip of fresh tape to re-seal the edge and touch up with a fine brush. Ensure you seal the edge well before repainting.
If you get bleed, wait a bit, reseal the edge, and touch up with a small brush.
Is masking tape safe on all ceiling types?
Most painter’s tapes are safe on common ceilings, but always test first on a small area and avoid tapes with strong adhesives on delicate textures. Use gentle pressure and remove slowly to protect the surface.
Test first and use gentle pressure; avoid strong adhesives on delicate textures.
Watch Video
Quick Summary
- Plan edge masking before painting.
- Choose low-tack tape for ceilings to avoid texture lifting.
- Seal tape edges thoroughly to prevent bleed.
- Remove tape while paint is still tacky for best edges.
- Test, then touch up as needed.