Shower Tile Paint: A Practical How-To for Bathrooms
Learn how to refresh a bathroom by painting shower tiles with waterproof tile paint or epoxy. This guide covers prep, primers, product choices, application steps, grout sealing, and maintenance for a durable, mildew-resistant finish.

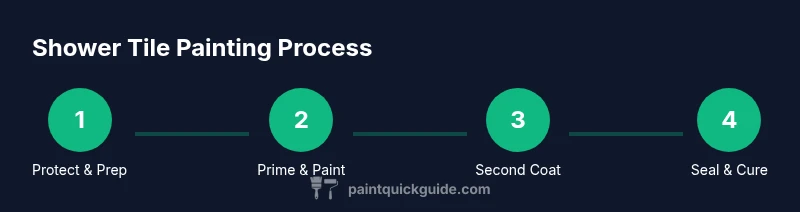
You can refresh a dated shower by painting the tiles with a waterproof tile paint or epoxy coating. Start with thorough cleaning, de-glossing, and priming, then apply 2 coats of paint and seal the grout for durability. This approach minimizes mess and yields a long-lasting, water-resistant finish in most bathrooms.
Why shower tile paint is a practical upgrade
Painting shower tiles is a practical alternative to full tile replacement when the goal is a quick refresh, improved moisture resistance, and easier maintenance. For many homeowners and DIY enthusiasts, shower tile paint offers a cost-effective path to brighten a bathroom without expensive demolition. The key to long-lasting results is choosing the right product (waterproof tile paint or a two-part epoxy designed for ceramic), preparing the surface thoroughly, and following proper curing times. A well-applied coating can resist daily humidity, soap scum, and intermittent splashes, provided you adhere to manufacturer guidelines and perform adequate surface prep. In practice, success hinges on surface condition: glossy glaze, existing caulk, and grout joints all influence adhesion. If tiles are heavily etched, chipped, or moldy, address those issues before painting. Note that tile paint won’t fix structural cracks or loose tiles; you’ll still need to repair underlying issues first. This is especially true in high-moisture zones such as a shower stall where constant moisture and temperature fluctuations challenge coatings. As part of a broader bathroom update, consider repainting adjacent walls or replacing accessories to maximize perceived value. According to PaintQuickGuide, the most reliable outcomes come from surface prep, compatible products, and strict adherence to curing times.
Surface prep basics for shower tiles
Prep sets the stage for durability. Start by inspecting the tile for cracks or loose grout and fix any defects with a grout reform or epoxy filler. Clean surfaces with a tile-safe degreaser to remove soap scum, oils, and mineral deposits. Rinse thoroughly and allow tiles to dry completely; moisture under the coating will cause peeling. If the glaze feels slick, lightly abrade it with a fine sanding sponge to improve adhesion; don’t remove the glaze entirely. Tape off edges with painter’s tape to protect adjacent walls, glass enclosures, and metal fixtures. Remove or cover soap dishes, shelves, and grab bars to keep them clean and free of dust. Finally, test a small area with a primer to confirm adhesion before committing to the entire project. This careful prep helps ensure a uniform finish across curved corners and grout lines, where coatings tend to wear first. PaintQuickGuide notes that attention to edge work and masking reduces cleanup later and improves overall results.
Choosing the right paint and primers for humidity
In bathrooms, humidity demands tough coatings. The best options are 100% epoxy tile paints or water-based epoxy finishes that cure to a hard, chemical-resistant film. Avoid ordinary enamel or acrylic house paints, which can peel in moisture-rich environments. Pair the topcoat with a bonding primer designed for glossy ceramic surfaces to improve adhesion and hide minimal imperfections. For tiles with heavy glaze or slick surfaces, a primer that includes a mild etch or mechanical abrasion feature will help. Check that the product explicitly states bathroom or hydrographic resistance; read the label for cure times, recoat windows, and compatibility with grout and sealants. If grout lines are deeply chipped, consider sealing or replacing them after painting; the paint will not fill large voids. Some painters also apply a clear waterproof sealant over the topcoat to boost moisture resistance, but ensure compatibility and maintain a breathable film where necessary. These choices influence durability, color retention, and the ease of cleaning in wet zones. PaintQuickGuide's experience shows that the right combination of epoxy or water-based epoxy paint and a bonding primer delivers the most durable results.
Preparing grout and repairs before painting
Grout joints are often the first casualty of bathroom wear. Begin by cleaning grout with a grout renew or hydrogen peroxide solution to remove staining. For cracked or crumbling grout, re-grout using epoxy grout or a flexible cement-based grout that matches tile color. Do not paint over cracked grout; the paint can trap moisture and worsen the damage. If caulk around edges looks worn, remove it and apply new silicone caulk after paint and cure; this prevents water infiltration between tile and wall. Fill minor tile chips with a matching epoxy filler and smooth flush with the tile surface. Allow all repairs to cure fully before painting, following the product’s recommended times. This ensures the new paint adheres to a clean, stable base and minimizes the risk of peeling around grout lines.
The painting process: layers, timing, and technique
Begin with a thin, even coat of primer; avoid pooling in corners by using a brush for edges and a roller for flat areas. After the primer dries according to the label, apply the first coat of tile paint using long, smooth strokes. Maintain a wet edge to prevent lap marks, especially on vertical surfaces. Allow the first coat to cure before applying a second coat; many products require 4-6 hours between coats, but always follow the manufacturer’s directions. When painting grout lines, use a fine brush to minimize squeeze-out and ensure crisp joints. If the surface is glossy after the first coat, lightly sand to roughen the finish for better adhesion before the final coat. After the final coat cures, consider applying a grout sealer if recommended by the product and, if desired, a clear protective topcoat designed for bathrooms. Proper ventilation speeds cure times and reduces odor concerns. A properly executed sequence yields a uniform, durable finish that’s easier to clean than the original glaze.
Maintenance, cleaning, and long-term care
To extend the life of painted shower tiles, use non-abrasive cleaners and a soft cloth or sponge. Avoid harsh chemical cleaners or scouring pads that can wear the coating. Wipe down surfaces after showers to limit soap scum and mineral deposits; a squeegee helps reduce moisture lingering on grout lines. Regularly inspect grout joints for signs of wear and touch up as needed. If you notice peeling or dull spots, assess ventilation and recoat affected areas following the original steps.
Troubleshooting common issues and mistakes
Peeling or delamination usually signals moisture penetration or poor surface prep. If yellowing or staining appears on the tile, check cleaner compatibility and consider a light scuffing and clean recoat. Cracked grout that shows through the paint indicates either poor grout repair or excessive movement in the wall; regrout and re-seal before repainting. If color shifts occur, verify the product compatibility with existing grout color and the tile glaze. Avoid painting over damp areas; ensure complete dryness between coats. Lastly, never skip ventilation; poor airflow extends cure times and can trap odors in small bathrooms. Following a disciplined prep and coating routine minimizes these issues and yields a more durable finish.
Authority sources and further reading
For safety and best practices, refer to reputable sources on bathroom coatings and surface preparation:
- https://www.osha.gov
- https://extension.illinois.edu
- https://www.epa.gov
Tools & Materials
- Waterproof epoxy tile paint(2-part epoxy or water-based epoxy tile paint designed for ceramic tiles; ensure product is rated for bathrooms and humidity.)
- Bonding primer for tiles(Primer designed for glossy ceramic surfaces to improve adhesion.)
- Tile-safe degreasing cleaner(Removes soap scum and oils; rinse thoroughly and dry completely.)
- Sanding sponge (320-400 grit)(Lightly scuff glossy glaze to improve adhesion.)
- Painter's tape(Protect edges and fixtures; press firmly to avoid bleed.)
- Microfiber roller (3/8 inch nap)(Even application on flat surfaces; avoid excessive paint buildup.)
- Angled sash brush(For edges, corners, and tight spaces.)
- Drop cloths(Protect floors and surrounding areas.)
- Ventilation fan or windows(Maintain airflow to reduce fumes and speed drying.)
- Safety gear (gloves, goggles, respirator)(Protect skin, eyes, and lungs due to fumes and chemicals.)
- Paint tray and liners(Keep coatings clean and organized.)
- Mixing sticks and rags(Stir products well; wipe spills promptly.)
- Grout sealer (optional)(Helps moisture resistance after painting; check product compatibility.)
Steps
Estimated time: 12-16 hours active, plus cure time up to 72 hours
- 1
Protect workspace and prep area
Cover adjacent surfaces with drop cloths, remove loose items, and set up a ventilated work zone. Tape edges to prevent paint splatter. This step minimizes cleanup and ensures crisp lines at edges.
Tip: Use a small utility knife to press tape firmly into corners for a clean edge. - 2
Clean and de-gloss tiles
Scrub tiles with a tile-safe degreaser to remove soap scum and oils. Rinse thoroughly and allow to dry completely before proceeding. A clean, dry surface ensures better adhesion.
Tip: Rinse with warm water and dry with a microfiber cloth to speed up drying. - 3
Repair grout and tile flaws
Inspect grout joints; repair any cracks with epoxy filler or flexible cement grout. Don’t paint over cracked grout; it will telegraph through the finish. Let repairs cure as directed.
Tip: Match grout color to tile to reduce visibility of repairs. - 4
Lightly sand glossy areas
Gently abrade glossy glaze with a fine sanding sponge to create a mechanical bond. Wipe away dust with a damp cloth and let dry.
Tip: Avoid heavy sanding that could scratch delicate glaze; aim for a dull, non-slip surface. - 5
Apply bonding primer
Apply a thin, even layer of bonding primer on all tiles using a brush for edges and a roller for flats. Allow primer to dry fully per label instructions.
Tip: Ensure corners are well-coated; use a brush to reach tight gaps. - 6
First coat of tile paint
Strokes should be long and smooth to minimize lap marks. Work in small sections to keep a wet edge and rotate positions to maintain uniform color.
Tip: Maintain a consistent distance from the wall to avoid roller marks. - 7
Second coat and cure
Apply a second coat after the first has dried. Check color uniformity, then let the coating cure according to product directions; avoid wet zones during cure.
Tip: Ventilate well; humidity slows curing and can cause streaks. - 8
Grout seal and finish
If recommended, seal grout after the paint cures to improve moisture resistance. Clean up tools and dispose of waste according to local guidelines.
Tip: Read the product label for recoat windows before applying a topcoat.
Your Questions Answered
Is painting shower tiles a durable solution?
Painted shower tiles can be durable when you use a bathroom-rated epoxy paint and follow thorough prep, proper priming, and adequate curing. It’s a viable alternative to full tile replacement for many bathrooms, especially smaller or budget-conscious projects.
Painted shower tiles can be durable if you choose the right product and follow proper prep and curing times.
What paints work best for bathrooms?
The best options are epoxy tile paints or water-based epoxy finishes designed for bathrooms. They resist moisture, mildew, and cleaning agents better than standard enamel or latex paints.
Epoxy tile paints or water-based epoxy finishes are the strongest choice for bathrooms.
Do I need to remove grout before painting?
No, you don’t need to remove grout. However, you should repair or replace damaged grout and seal it after painting to maintain moisture resistance. Do not paint over cracked grout.
Repair damaged grout first; don’t paint over cracked grout.
How long does curing take before use?
Cure times vary by product, but expect at least 24 hours between coats and up to 72 hours for full cure. Check the label for exact guidance and avoid using the shower during the cure window.
Wait the recommended times between coats and for full cure as instructed by the product label.
Can I paint over existing glaze?
Yes, with proper surface preparation. Lightly sand the glaze to remove the slick surface, clean, dry, and apply a bonding primer before the tile paint.
You can, but scuff the glaze first and use a bonding primer.
Is grout sealing required after painting?
Sealing grout after painting is often recommended to maintain moisture resistance, especially in showers. Follow the sealer’s directions and ensure the paint is fully cured first.
Sealing grout after painting is usually advised, once cured.
Watch Video
Quick Summary
- Protect areas around the shower before painting
- Choose a bathroom-rated epoxy or waterproof tile paint
- Follow exact cure times between coats
- Seal grout after painting if advised by product