Paint Ceramic Tile: A Practical DIY Guide for Surfaces
Learn how to safely paint ceramic tile with prep, primer, paints, sealing, and maintenance. This step-by-step guide helps homeowners refresh kitchens, bathrooms, and showers without replacing tile.

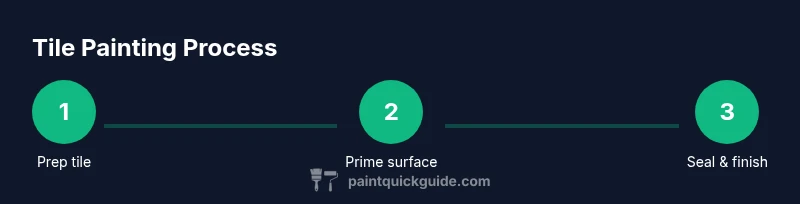
Paint ceramic tile by following a clear sequence: prep the surface, choose a bonding primer, apply thin coats of tile-safe paint, and finish with a moisture-resistant topcoat. This guide outlines essential materials, techniques, and safety steps to ensure durable, professional-looking results.
Materials and surface prep for painting ceramic tile
Paint ceramic tile is a cost-effective refresh for kitchens, bathrooms, or laundry rooms. The process starts long before any paint touches the surface. According to PaintQuickGuide, thorough prep and surface conditioning are the biggest drivers of lasting results. Begin with a clean slate: remove surface grime from the tile and grout using a degreaser or mild ammonia-based cleaner. Scrub with a stiff brush, concentrating on any built-up soap scum or soap film around corners. Rinse well and let dry completely. Moisture trapped under paint is the enemy of adhesion, so ensure there is no damp residue before proceeding. Wipe with a microfiber cloth to pick up remaining dust, then protect adjacent walls, countertops, and fixtures with painter’s tape.
If your tile is glossy or has a slick glaze, lightly abrade the surface with a fine sanding sponge (400–600 grit). This mechanical key helps primers bite into the surface. After sanding, wipe again to remove dust and inspect for any high spots. For tiles with old epoxy sealant or heavy glaze, consider a light chemical pre-treatment or heat-softening method before sanding to improve adhesion.
Next comes priming. Choose a bonding primer designed for non-porous surfaces, and apply a thin, even coat. A second coat may be needed on very smooth tile. Allow it to dry fully according to the product’s directions. Good ventilation during this stage makes a big difference, and wearing a proper respirator is advised when using solvent-based products. Once the primer is dry, you’re ready to move to paint. The goal is to create a rough, receptive surface so the finish sticks under humidity and wear.
Choosing primers, paints, and sealants for ceramic tile
Selecting the right coatings is critical when you paint ceramic tile. For non-porous, glazed tile, use a bonding primer to ensure adhesion rather than a standard wall primer. After priming, choose an enamel-based, moisture-resistant paint, such as waterborne acrylic enamel or epoxy-modified acrylic. These formulas resist humidity, cleaning agents, and temperature swings common in kitchens and bathrooms. For exceptionally damp areas, consider a two-part epoxy or a high-build acrylic enamel; these have higher durability but require careful mixing and longer cure times.
Topcoat options: a clear water-based polyurethane, polycrylic, or a hard-wearing acrylic sealant can protect the pigment layer. If the area will see heavy water exposure or frequent cleaning, use a topcoat designed for high wear and moisture resistance. The topcoat will determine how often you need to recoat and how easy it will be to clean; darker finishes can reveal brush marks less readily than lighter ones.
Finally, apply in a well-ventilated space. Let each coat dry fully before applying the next. Sand lightly between coats if needed to even out texture; wipe away abrasive dust before recoating. Avoid oil-based paints on vertical surfaces unless you’re experienced with long curing times.
Step-by-step process to paint ceramic tile
Begin with the prepared tile surface. Apply the primer, then paint in thin, even coats using a high-quality brush or foam roller. Work in small sections to maintain a wet edge and minimize lap marks. Allow the primer to dry completely before moving to color. When applying paint, use long, smooth strokes and avoid heavy coats that can pool in grout lines. After the first coat dries, inspect for thin areas or missed patches and touch up as needed.
Apply a second coat for uniform coverage and to deepen color. If you’re adding a decorative pattern or stencil, wait until the base color cures before proceeding. After painting, let the finish cure as recommended by the manufacturer—most moisture-resistant paints need at least 24–48 hours before exposure to light moisture, and longer before heavy use. Finally, seal the painted tile with a clear topcoat to improve stain resistance and cleanability. Allow the sealant to cure fully; avoid cleaning with abrasive cleaners during this period.
Finishing and maintenance after painting ceramic tile
Once the topcoat is fully cured, maintain the surface with soft cloths and mild cleaners. A durable, water-based topcoat will help resist stains and wipe-downs common in kitchens and baths. Avoid abrasive pads or acidic cleaners that could scratch or dull the finish. If you notice wear on high-traffic areas, schedule a light recoat in the maintenance window rather than waiting for significant deterioration. In damp environments, reapply a sealer periodically according to use and wear to preserve gloss and color depth. By planning routine maintenance, you can extend the life of your tile-painted surface significantly.
Common mistakes and how to avoid them
- Skipping proper cleaning: Dirt and oil sabotage adhesion. Always clean thoroughly before priming. - Not abrading glossy tile: Gloss creates a slick surface that refuses to bond. Lightly sand to give primers a grip. - Overloading coats: Thick coats dry unevenly and peel more easily. Apply thin, even layers and let each coat dry completely. - Ignoring curing times: Rushing to use the area can ruin adhesion. Follow manufacturer guidance for each product. - Choosing the wrong topcoat: Use moisture-resistant, water-based topcoats in bathrooms and kitchens to maximize durability.
Design ideas and decorative considerations
Tile painting opens up many design possibilities. Consider a glaze-like finish by using a slightly tinted topcoat or a mid-tone base with a lighter glaze over selected tiles for a subtle pattern. For bathrooms, a bright, satin finish can brighten small spaces, while deep matte tones work well in modern kitchens. Use stencils or painter’s tape to create a geometric pattern on an accent wall or splashback. If you want a classic look, pair a neutral base with a crisp white grout line. Always test color swatches in a hidden area to confirm light reflection and cleanliness under expected lighting conditions.
If you’re feeling bold, combine painted tile with one or two decorative accent tiles to create a focal point. Remember to keep contrasts in scale with the room and balance the finish across surfaces to avoid visual overload. PaintQuickGuide recommends starting with a small area to validate adhesion and color before committing to a full install.
Time management and project planning
A tile-painting project requires careful scheduling. Allow time for thorough cleaning, drying, and at least two finish coats, plus a final curing period before heavy use. The total duration will depend on room size, humidity, and the products chosen. In a typical kitchen backsplash or bathroom wall section, plan for at least a weekend window—from prep to final cure—so you’re not rushed. Include buffer days for primer and topcoat drying in humid conditions.
When budgeting, think in terms of materials, tools, and topcoat durability rather than upfront labor costs. A well-planned approach reduces wasted product and ensures consistent results across all surfaces. Break tasks into daily goals to avoid fatigue and mistakes. A clear plan makes the project feel manageable and helps keep the finish smooth and even.
Safety considerations and long-term durability
Ventilate the work area well and wear a respirator when sanding or using solvent-based products. Keep children and pets away from the work zone until the topcoat cures. Store all chemicals in their original containers and follow disposal instructions for any leftover materials. For long-term durability, choose moisture-resistant primers and topcoats designed for tile. Regular cleaning with non-abrasive cleaners will extend life, and re-sealing grout lines as needed helps prevent moisture intrusion that can threaten adhesion.
Tools & Materials
- Non-abrasive tile cleaner / degreaser(For initial cleaning; ensure no residue)
- Stiff brush or sponge(Scrub grout and tile surfaces)
- Microfiber cloths(Wipe surfaces and remove dust)
- Painter’s tape(Protect edges and fixtures)
- Drop cloths or plastic sheeting(Contain spills)
- Respirator mask or chemical-rated mask(Protection during cleaners/solvents)
- Fine-grit sanding sponge (400–600)(Lightly abrade glossy glaze)
- Bonding primer for non-porous surfaces(Promotes adhesion)
- Primer brush or mini roller(Apply even coats)
- Foam roller or high-density foam brush(Even paint loading)
- Enamel or epoxy-ready paint(Moisture-resistant finish)
- Paint tray and liners(For even paint loading)
- Fine-grit sandpaper (between coats)(Optional to smooth texture)
- Clear topcoat (water-based polyurethane or polycrylic)(Seal and protect the finish)
- Grout sealer or silicone caulk(Protect grout lines (optional))
Steps
Estimated time: 6-12 hours
- 1
Prep and clean the tile
Begin with thorough cleaning of tile and grout to remove oil, soap scum, and residue. Ensure the surface is completely dry before moving to the next step.
Tip: Use a dedicated degreaser on kitchen backsplashes for best results. - 2
Lightly abrade glossy surfaces
Gently sand the glaze with 400–600 grit to create a mechanical key for the primer. Wipe away dust before priming.
Tip: Do not over-sand; you only need enough roughness for adhesion. - 3
Apply bonding primer
Roll or brush a thin coat of bonding primer on the tile. Let it dry fully, then recoat if the surface remains slick.
Tip: Ventilate well and avoid puddling primer in grout lines. - 4
First coat of tile paint
Apply a thin, even coat of enamel or epoxy paint. Maintain a wet edge and use long, smooth strokes.
Tip: Keep coats thin to reduce visible brush marks. - 5
Second coat and color build
Allow the first coat to dry completely, then apply a second coat for full coverage and color depth.
Tip: Inspect for thin areas and touch up as needed. - 6
Seal and cure
Apply a clear topcoat suitable for moist environments. Let the finish cure fully before exposing to moisture.
Tip: Do not rush curing; timing varies by product. - 7
Cleanup and maintenance
Remove tape, clean up tools, and store leftover products properly. Wipe spills promptly after completion.
Tip: Clean with non-abrasive cleaners to maintain finish.
Your Questions Answered
Can I paint over old glazed ceramic tile?
Yes, but you must roughen the glaze and use a bonding primer to ensure adhesion. Skipping this step increases the risk of peeling.
Yes, you can, but you need to roughen the glaze and apply a bonding primer to ensure it sticks.
Is tile painting durable in bathrooms?
Durability in a bathroom is achievable with moisture-resistant paints and a proper topcoat. Avoid aggressive cleaners that can dull or scratch the finish.
Yes, with the right products and careful application, it can hold up in bathrooms.
How long does it take to cure?
Cure times vary by product; plan for at least 24–72 hours before exposure to humidity or moisture, and longer for heavy-use areas.
Dry times vary, but give it at least a day or two to cure fully.
Can I paint tile in showers?
Yes, if you use moisture-resistant topcoats and ensure proper ventilation during and after application. Epoxy-based paints offer extra durability.
Yes, with the right topcoat and good ventilation.
Do I need to re-caulk after painting?
Re-caulking may be necessary to maintain moisture barriers around edges and corners after the paint job.
Yes, you might need to re-caulk to keep moisture out.
What about grout lines?
Grout lines can be painted or re-sealed. Some homeowners prefer repainting only the tile surface and leaving grout as-is, then sealing.
You can paint grout lines or seal them for protection.
Watch Video
Quick Summary
- Prepare the tile surface thoroughly before painting.
- Use bonding primer and a compatible topcoat for durability.
- Apply thin, even coats and allow complete drying between layers.
- Seal and maintain the finish to extend tile life.