Car Paint Guide: Prep, Apply, and Finish for Cars
Learn how to choose automotive paint, properly prep surfaces, and apply basecoat and clearcoat for a durable, showroom-worthy car finish. Practical steps, tools, and safety tips for homeowners and DIY enthusiasts.

This guide walks you through selecting automotive paint, prepping the car, and applying basecoat and clearcoat for a durable finish. It's designed for homeowners and hobbyists, with practical, step-by-step instructions and safety tips. The process emphasizes surface prep, primer choice, and controlled drying, plus tips for color matching and finish consistency.
What makes car painting different
Automotive painting is a specialized discipline because the finish must endure sun, heat, moisture, chemicals, and road debris while staying visually seamless. The paints themselves are resin systems designed for flexibility and durability, with additives for UV protection and metallic or pearlescent effects. Unlike interior wall paint, car finishes must bond to curved metal and resist chips, gasoline exposure, and long-term weathering. The PaintQuickGuide Team notes that the most reliable results come from consistent spray passes and correct flash times. The best results start long before the spray gun fires: a clean surface, repaired imperfections, and a primer that matches the chosen system. According to PaintQuickGuide, surface prep quality determines the final appearance far more than hue choice or spray technique, so take your time. You’ll save time and money later by dedicating resources to proper prep, masking, and controlled drying between coats.
In this guide you’ll learn how to select automotive paints and finishes, why basecoat/clearcoat systems are common, and how to set up a safe, controlled workspace. We’ll cover solvent-based versus waterborne systems, when single-stage paints make sense, and a practical process for hobbyists and home garages. If you want a durable, showroom-worthy finish, plan for temperature, humidity, ventilation, and equipment calibration, not just color matching.
Automotive paint systems explained
Automotive finishes commonly fall into a few families: single-stage enamel, basecoat/clearcoat, and specialized effect paints (pearlescent or metallic). Basecoat/clearcoat is the workhorse of modern auto refinishing because it delivers color depth, durability, and repairability. The basecoat provides the pigment; the clearcoat adds gloss, UV protection, and resistance to abrasion. In professional shops, bases can be solvent-based or waterborne, with catalysts or reducers to control drying. Waterborne systems are increasingly common in DIY and home garages for lower odor and better environmental compliance, though they require precise temperature and humidity control.
Single-stage paints combine color and finish in one layer, which can simplify the workflow but may sacrifice some depth and durability compared to basecoat/clearcoat. When choosing, consider your climate, the level of color shift you can tolerate, and your patience for multiple thin passes. Metallics, pearls, and other specialty effects demand careful mixing and controlled application to avoid blotching. For best results, practice on test panels before working on the vehicle, and always follow the manufacturer’s data sheet for mixing ratios, flash times, and cure.
Surface prep and priming for a durable finish
Surface prep is the backbone of a great paint job. Begin with a thorough wash and degrease to remove waxes, oils, and road grime. Use a clay bar to remove embedded contaminants, then inspect for rust or dents that require filler. Sand the existing surface using progressive grits (start around 320–400, finish 600–800) to create a tooth for primer. Mask all edges, glass, and trim to protect from overspray, and lay down a clean dust sheet over the workspace. A good primer choice matters: epoxy primers provide excellent adhesion and corrosion resistance, while filler primers help smooth surface irregularities. The primer should be scuffed lightly after curing to create a stable base for the color coat. Finally, tack and clean again before applying color.
As you prepare, ensure your environment is dust-free and at a stable temperature. The right primer preps the surface and acts as a bridge between metal and color, so follow manufacturer recommendations on flash-off times and recoat windows. This prep work reduces the risk of peeling, cracking, or color mismatch after final assembly.
Color, finish, and primer strategy
Color choice matters as much as technique. Metallic and pearlescent colors require precise control of spray angle, distance, and overlap to avoid banding or mottling. You’ll typically choose a primer system (epoxy or filler) that aligns with your paint line and then select the basecoat color. If you plan to repair chips later or blend panels, a basecoat compatible with your clearcoat and a good color-matching process are essential. Clearcoat is where gloss and protection come from; thicker is not always better, so apply in thin, even passes and build up within the manufacturer’s recommended total film thickness. When improving durability, select a high-solids clear and consider a UV-resistant additive if your climate is sunny.
For DIYers, practice color matching and spray patterns on test panels; light adhesion and flash times can dramatically affect final color depth. Remember that environmental conditions — temperature, humidity, and air quality — influence both appearance and cure. PaintQuickGuide recommends planning your color palette, testing colors under lighting similar to the vehicle’s environment, and documenting mixing ratios to stay consistent across panels.
Tools, workspace, and safety practices
A successful paint job relies on proper tools and a compliant workspace. Invest in a quality HVLP spray gun with a fine finish nozzle (commonly 1.3–1.8 mm) and a clean, reliable air supply. A dedicated spray booth or a clean, dust-free garage with controlled ventilation is ideal. Use a respirator rated for organic vapors, nitrile gloves, and a coverall to protect your skin. Keep a heat source or infrared curing option ready if the product requires warm temperatures for proper curing. Lighting is crucial; place bright, diffuse lights to reveal imperfections while you spray. Maintain a clean, organized workstation with a tack cloth, clean rags, and a solvent bucket for quick cleanup. Have masking tape, paper, and edge guards handy to protect trim and glass.
In addition to the physical tools, follow the manufacturer’s data sheets for material compatibility, pot life, and mixing ratios. Always label mixed materials and discard older solutions to prevent color drift. Finally, follow local environmental and safety regulations—dispose of waste and used solvents properly.
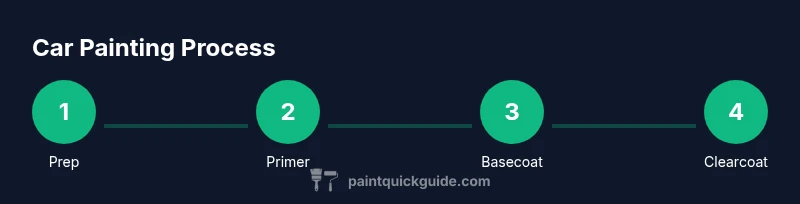
Step-by-step painting process (high-level overview)
Begin with a clean slate: ensure the body is fully decontaminated and free of oil or wax. If you’re working on a full repaint, remove trim and doors for better access and even coverage.
- Step 1: Prepare workspace and car. Set up a dust-free environment and mask areas you don’t want painted. Keep temps stable around 65–75°F (18–24°C) and ensure good ventilation. Tip: run a test spray on a metal panel first to confirm spray pattern.
- Step 2: Sand and clean. Sand original paint to create proper bite on the primer. Wipe with wax and grease remover and tack cloth to eliminate dust.
- Step 3: Apply primer. Apply epoxy primer in thin, even coats; allow flash-off between passes and sand lightly before applying color.
- Step 4: Sand and clean again. Lightly sand the primed surface (600–800 grit) and wipe clean to remove dust.
- Step 5: Apply basecoat color. Use thin, even passes with consistent overlap; avoid heavy coats that cause runs. Allow appropriate flash-off times between coats.
- Step 6: Apply clearcoat. Apply 2–3 light coats for gloss and protection, letting each layer ventilate briefly. Let the film dry per the manufacturer’s cure schedule; avoid dust during curing.
- Step 7: Final finishing. After curing, perform color-sanding and machine polishing if needed to achieve a flawless finish. Pro tip: never rush curing; heat or IR can help, but avoid overheating the paint.
Estimated total time: 8–12 hours, plus cure time per product guidelines.
Troubleshooting, finishing, and maintenance
Even experienced painters encounter issues. Common problems include orange peel (uneven surface texture), runs (heavy paint blobs), dust nibs, fisheyes (small craters from surface contamination), and color drift across panels. The fix is often to adjust spray parameters, such as air pressure, nozzle size, and fan width, and to ensure a clean, dust-free environment. If orange peel occurs, slightly thinner coats and longer flash-off times help; if runs appear, reduce the film thickness and re-sand the affected area after curing. Keep your humidity and dew point in check; high humidity can cause blushing or sags. After curing, you can perform light sanding with 1000–1500 grit and polish to restore gloss. For persistent color drift, verify mixing ratios and re-check the color code on the label. Regular maintenance includes cleaning the equipment after each session and storing materials properly to prevent skinning or skin effects.
Remember to follow safety protocols for solvents, wear your respirator, and ensure adequate ventilation throughout the process. PaintQuickGuide perspective: a cautious, methodical approach yields consistent results, especially when dealing with metallic or pearl finishes that reveal flaws more readily.
Authority sources and further reading
- Manufacturer data sheets for your specific paint line (primer, basecoat, and clearcoat) provide the most authoritative guidance on mixing ratios, flash times, and cure schedules.
- For safety and compliance, reference government sources on ventilation, solvent handling, and waste disposal.
- Practical examples and extended explanations can be found in automotive refinishing literature and reputable DIY painting references.
Tools & Materials
- HVLP spray gun (1.3–1.8 mm nozzle)(Choose a gravity or side-feed gun; ensure needle and nozzle are clean)
- Air compressor or steady air supply(Clean, dry air with adequate CFM for your gun)
- Spray booth or dust-free workspace(Ventilation with minimal particle contamination)
- Respirator with organic vapor cartridges(Fit-tested respirator; use new cartridges)
- Nitrile gloves and coveralls(Protect skin from solvents)
- Masking tape and paper(Mask edges, trim, and glass accurately)
- Wax and grease remover(Surface decontamination before priming)
- Clay bar or remover(Optional; for embedded contaminants)
- Sandpaper (grits 320–400, 600–800, 1000–1500)(Progressive sanding for adhesion and finish)
- Epoxy primer(Corrosion resistance and adhesion base)
- Filler primer(Smooths surface irregularities)
- Basecoat color cans or quota (mixed)(Color matched to finish)
- Clearcoat(Gloss and protection)
- Reducers/activators(Control viscosity and cure time)
- Tack cloths(Remove dust before painting)
- Solvent cleanup bucket and rags(Safe disposal of waste)
- IR heater or heat lamp (optional)(Aid curing in cooler environments)
Steps
Estimated time: 8-12 hours
- 1
Prepare workspace and car
Set up a dust-free area with stable temperature. Remove trim and accessories if possible to avoid overspray. Create a layout plan showing masking lines and color progression.
Tip: Test spray on a panel to verify pattern and flow before starting on the car. - 2
Mask and sand
Mask edges, glass, and trim; sand existing paint to create a mechanical key for primer (start around 320–400 grit, finish 600–800).
Tip: Keep a consistent sanding direction and avoid sanding through edges. - 3
Apply epoxy primer
Spray lightweight even coats; allow flash-off time between passes as per data sheet. Sand lightly after cure to prepare for color.
Tip: Overload the surface with primer can cause runs; aim for multiple thin coats. - 4
Seal and clean surface
Wipe with wax and grease remover, then tack clean to remove dust. Ensure no contaminants remain before color.
Tip: A clean surface prevents fisheye and defects in the finish. - 5
Apply basecoat color
Apply color in thin, even passes with proper overlap; allow flash-off between coats. Build up color gradually to avoid runs.
Tip: Practice color layering to achieve depth and even coverage. - 6
Apply clearcoat and cure
Spray multiple light coats of clear; let each coat flash off and cure per product guidelines. After cure, perform any final polishing as needed.
Tip: Do not rush curing; temperature consistency improves gloss and durability.
Your Questions Answered
What is the best automotive paint for DIY projects?
For DIYers, waterborne basecoat/clearcoat systems or single-stage enamels are common choices due to lower odors and better control. Always follow the manufacturer’s data for compatibility and curing times.
For DIYers, waterborne basecoat/clearcoat or single-stage enamels are popular due to lower odors and easier cleanup. Always follow the data sheet for cure times.
Do I need a paint booth to paint a car at home?
A dedicated, dust-free space with good ventilation is highly recommended. A true paint booth reduces dust and humidity swings, but a well-sealed garage with proper filtration can work if conditions are controlled.
A dedicated dust-free space with ventilation is recommended. A real booth reduces dust and humidity changes, but a clean, controlled garage can work too.
How long does a DIY car paint job typically take?
Most DIY projects require several sessions and can take a full day to prep, paint, and get through cure times, plus additional time for polishing. Plan for 1–2 days depending on equipment and drying conditions.
Most DIY jobs take 1–2 days, including prep, painting, and curing. More time may be needed if you’re new to the process.
Can I repair chips or scratches before painting?
Yes. Use appropriate filler or putty, sand smooth, and feather edges to blend with surrounding paint. Proper prep helps prevent visible patches after coloring.
Yes, repair chips with filler and feather edges before painting to blend repairs with the surrounding surface.
Is waterborne paint safer for DIY auto refinishing?
Waterborne paints reduce solvent exposure and odors, making them more friendly for home projects, but they require stricter humidity and temperature control for best results.
Waterborne paints reduce odor and exposure, but need careful control of humidity and temperature.
Watch Video
Quick Summary
- Prepare a clean, dust-free workspace and substrate.
- Choose primer and basecoat compatible with your clearcoat.
- Apply thin, even coats with proper flash-off times.
- Cure fully before polishing or handling the finished surface.