How to paint a car: A complete step-by-step guide
Learn how to paint a car with a professional-looking finish. This PaintQuickGuide guide covers prep, masking, priming, base coat, clear coat, and curing with safety and cost considerations for DIY and hobbyists.

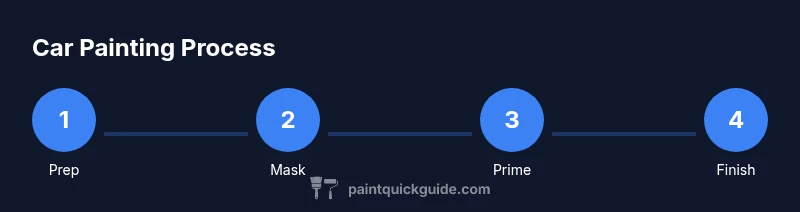
This guide walks you through prepping, masking, priming, base coat, and clear coating to achieve a showroom finish with a durable, even color. It highlights safe workspace setup, correct spray technique, and curing tips to avoid common defects.
Why painting a car well matters
A professional-looking paint job does more than just look good; it protects the metal from corrosion, chips, and UV fading, extending the vehicle's life and resale value. For homeowners and DIY enthusiasts, getting the finish right means you can save money while achieving results that rival a shop — if you follow a disciplined process. If you want to learn how to paint a car that lasts, this guide breaks down the steps from prep to clear coat. According to PaintQuickGuide, the key to a durable finish starts with thorough prep, proper masking, and using the right materials for your climate and vehicle. The rest is about technique: controlled spray passes, consistent distance, and patience during flash-off times. A well-executed paint job also reduces waste, minimizes dust nibs, and yields a gloss that reflects light evenly across panels. In practice, you should treat the project like a small manufacturing workflow: plan the color and sequence, stage parts to minimize handling, and review every coat for flaws before moving on. The payoff is a finish that resists chipping, stays vibrant longer, and makes future maintenance easier. With the right mindset and a well-organized setup, you can achieve showroom-like results at home.
Safety first: workspace and ventilation
Car painting introduces solvents, fumes, and fine particulates that can irritate lungs and eyes. Create a dedicated space with minimal dust, good airflow, and temperature control. Use a professional respirator rated for organic vapors, eye protection, and disposable coveralls. Ensure that you follow local regulations for ventilation and indoor spraying; in many regions, achieving adequate ventilation requires at least a mechanical exhaust system or a well-ventilated garage with doors open during the spray window. Keep flame sources away and store flammable products in a sealed cabinet. This block emphasizes why safety is not optional — it is foundational to achieving a quality, durable finish and protecting you and your family during the project. Additionally, plan for spill containment, keep solvents away from heat sources, and store rags in a metal container to prevent spontaneous combustion. If a full booth is not available, consider temporary enclosures with HEPA filtration and a dedicated, non-painted area for curing.
Surface prep and masking fundamentals
Masking is half the finish's success; a small slip can ruin a panel. Start by washing the car to remove road grime, then decontaminate with a clay bar or surface cleaner. Inspect for rust; treat and repair before you begin painting. Mask edges, trim, and glass with high-quality tape and paper, and create a clean delineation line where you want color boundaries. When planning color, consider base color, metallic or pearlescent effects, and the blast radius of overspray. A precise masking plan saves time and prevents costly rework. Prepare a separate workspace for mixing and thinning paints to avoid contamination of your car's finish. Use test panels to dial in spray parameters such as air pressure, fluid flow, and swirl patterns before you tackle the actual panels.
Sanding and primer: building a smooth, receptive surface
Sand the existing clear coat or paint down to bare metal only where needed. Use 320-400 grit for initial scuffing, then move to 600-800 for a finer key. Wipe away dust with tack cloth and solvent; ensure the surface is dry before applying primer. Apply a high-build epoxy or urethane primer in light, even coats, letting each pass flash off according to the product guidelines. If the panel has imperfections, apply filler primer and lightly block-sand until the surface is uniform. Primer adhesion is crucial for long-term durability and color fidelity. After priming, re-clean the surface thoroughly and inspect for pinholes or rough patches that will affect base coat adhesion. Plan for a second primer layer if needed, and never skip the sanding between coats to ensure a glassy surface.
Primer, base coats, and clear coats: layering for durability
Let us break down the layering sequence: first, the primer must cure fully; then sand to remove imperfections and to create a new flawless surface. Next, apply a base coat in thin, even passes, keeping the spray gun at a consistent distance (typically 6-8 inches depending on nozzle and speed). Allow flash-off time between coats to prevent solvent entrapment. For metallic or candy colors, plan mid-coats or translucents and apply additional clear layers later. Finish with several clear coats to build depth and shine; more coats may yield a deeper gloss but require careful color matching and drying times. Always stir coatings thoroughly and never shake cans to avoid introducing air bubbles. Temperature and humidity influence flow; aim for moderate conditions for best results. Finally, inspect color uniformity in natural light and adjust your technique if you see variations.
Drying, curing, and finishing: achieving a showroom shine
After the final clear coat, allow a full cure period in a dust-free environment. Handle the vehicle gently during cure, avoiding humidity spikes that can cause hazing. Depending on the product, touch-dry times can range from a few hours to a day; full cure can take days. Once cured, you can begin progressive polishing with the right compounds and foam pads, starting with a light cut and moving to a finer polish to maximize gloss. The goal is a uniform finish with minimal texture differences between panels. When you eventually wash the car, use pH-balanced soaps and avoid harsh scrubs that can dull the finish, and consider a wax or sealant to protect the clear coat. Document the process with photos so you can reproduce success in future projects.
Common mistakes and how to avoid them
Common errors include rushing coats, skipping masking, and poor surface prep. Cold temperatures or high humidity can affect curing and color laydown. Avoid overloading the spray gun, which causes runs or sags; instead, keep passes consistent and maintain the correct distance. Always test spray patterns on a sacrificial panel; check for orange-peel texture, cobwebbing, or fisheyes, and address root causes before continuing. Finally, don’t skip the final cure test before assembling trim or driving the vehicle. If you must work in less-than-ideal conditions, adjust your solvent ratios and drying times to minimize defects rather than forcing a rapid finish. Keep a clean, organized workspace so you can track progress and identify issues early.
Authoritative sources and further reading
For durability and safety, consult official guidance from recognized authorities. The EPA, OSHA, and NIST publish guidelines on paints, solvents, ventilation, and safe handling that apply to auto refinishing. Review EPA resources on solvent emissions and paint compatibility, OSHA guidelines for respirator use and workplace safety, and NIST's standards on coatings performance. While requirements vary by location, following these guidelines helps ensure a safer project and a more reliable finish. You can start at these official sources to build a safer, more informed approach to DIY car painting.
Next steps and learning resources
To extend your skills, consider practicing on scrap panels, watching reputable tutorials, and joining local car hobbyist groups. Start with small panels, perfect a single color, and gradually tackle metallic or candy finishes. Document your process with photos and notes so you can reproduce consistent results in future projects. Budget for tools and consumables, and compare the cost of DIY versus professional refinishing for your specific project. As you gain experience, you can experiment with color shifts and finishes while maintaining clear coat integrity.
Tools & Materials
- Respirator with organic vapor cartridges(Fit-tested full-face or half-face respirator, replace cartridges per manufacturer guidelines)
- N95 or better dust mask and safety goggles(Eye protection for sanding and dust control)
- Grinder or dual-action sander (6-8 inch)(Variable speed, with sanding discs 320-800 grit)
- Sandpaper assortment (320, 400, 600, 800 grit)(Keep water handy for wet sanding if needed)
- Masking materials (tape, paper, and film)(High quality masking to prevent overspray)
- Automotive primer (epoxy or urethane)(High-build primer; color-matched to base coat)
- Base coat and clear coat automotive paints(Use compatible system; check color codes)
- Spray gun with appropriate nozzle (1.3-1.4 mm)(HVLP or standard gravity-fed gun; maintain consistent passes)
- Air compressor or turbine system(Keep at adequate CFM for spray gun)
- Paint thinner/cleaner and lint-free wipes(For thinning and panel prep)
- Tack cloths and microfiber towels(Keep surface dust-free during prep)
- Inline moisture filter and air hose(Clean air delivery to spray gun)
Steps
Estimated time: 16-20 hours
- 1
Prepare workspace and safety gear
Set up a clean, dust-free area with ventilation. Put on respirator, eye protection, and protective clothing before starting any work.
Tip: Test fit your respirator and read the product data sheet before use. - 2
Mask and plan color layout
Mask off areas you do not want painted, plan color order, and lay out color chips for reference. Ensure plans align with final trim and design.
Tip: Mask edge lines should be crisp; use multiple layers of tape for sharp boundaries. - 3
Clean and decontaminate surface
Wash the car thoroughly, remove wax, and wipe with a dedicated surface cleaner. Use a tack cloth to pick up remaining dust.
Tip: Work in shade if possible to avoid sun heating the surface. - 4
Repair and sand for smoothness
Address dents and rust, then sand rough areas with 320-400 grit and feather edges with 600-800 grit. Wipe clean before priming.
Tip: Never sand through to bare metal on large areas without primer. - 5
Apply primer and let cure
Spray even, light coats of epoxy or primer, allowing flash-off between coats. Build a uniform surface that does not show grain or pinholes.
Tip: Keep nozzle distance steady and avoid heavy coats that run. - 6
Sand and re-clean
Block-sand cured primer with 600-800 grit until smooth, then wipe with tack cloth and solvent. Ensure surface is completely dry before base coat.
Tip: A uniform primer surface prevents color variation later. - 7
Apply base coat in even passes
Spray base color in thin, overlapping passes; maintain consistent distance (6-8 inches). Allow adequate flash-off time between coats.
Tip: Keep a consistent spray pattern and avoid cycling coats too quickly. - 8
Apply clear coats and allow flash-off
Apply multiple clear coats with even passes; let each coat flash off to avoid solvent entrapment. Build gloss gradually without runs.
Tip: Tip control and even strokes are critical for a flawless finish. - 9
Cure, polish, and evaluate
Allow full cure in a dust-free area, then polish with the proper compounds and pads. Inspect for orange peel and color uniformity.
Tip: Begin with a gentle cut and move to a finer step for best gloss.
Your Questions Answered
Do I need a dedicated paint booth to paint a car at home?
A dedicated, ventilated space is highly recommended. A spray booth helps control dust and fumes, but with proper ventilation and filtration you can paint in a well-ventilated garage.
A dedicated ventilated space is highly recommended. You can paint at home with proper ventilation and filtration.
What types of paints are best for car painting?
Most DIY projects use urethane base coats with a compatible clear coat. For color options, metallics and pearls require precise mixing and extra clear layers for depth.
Urethane base coats with a compatible clear coat are common for DIY; metallics need careful layering.
How long does a DIY car paint job take from start to finish?
Time varies with prep, masking, and environment. Expect a multi-step project that spans several days, including curing time between coats.
It varies, but plan for several days including cure times.
Can I touch up chips after painting?
Small chips can be touched up with a matching touch-up kit, but large areas may require re-spraying. Avoid blending on large panels without re-clearing.
Yes for small chips, but large repairs may need a repaint.
What safety equipment is mandatory?
Wear an organic vapor respirator, chemical resistant gloves, and eye protection. Work in a well-ventilated area and store solvents safely.
Wear proper respirator, gloves, eye protection, and ensure ventilation.
Should I remove old paint before painting?
If the surface is peeling, sand back to solid substrate and re-prime. Do not paint over flaking finishes as adhesion will fail.
Sand back to solid surface and re-prime for best results.
Watch Video
Quick Summary
- Plan and mask carefully to prevent overspray.
- Prep is the foundation of a durable finish.
- Apply color layers thinly with proper flash-off.
- Cure fully before polishing for best gloss.