How to Spray-Paint a Car: A Complete DIY Guide for Beginners
Learn a practical, step-by-step approach to spray-paint a car at home. Coverage includes prep, primer, color coats, clear coat, curing, and troubleshooting for a durable, showroom-worthy finish.

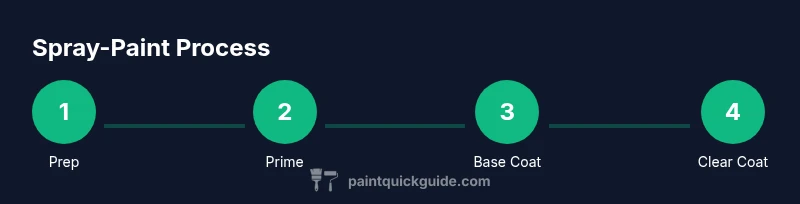
You can paint a car with spray by using an automotive HVLP sprayer, quality primers, and clear coats, in a well-ventilated, dust-free workspace. Begin with thorough masking and surface prep, then apply a base layer of primer, followed by color coats in thin, even passes. Finish with a clear coat and careful curing to achieve a smooth, durable finish.
Why spray painting a car is feasible for DIYers\n\nSpray painting a car is a feasible DIY project for homeowners who value cost savings and a custom finish, provided you have the right tools and discipline. The key is controlled technique, proper ventilation, and a clean, dust-free environment. A careful approach to masking and surface prep reduces risk of imperfections. According to PaintQuickGuide, the most reliable outcomes come from using professional-grade equipment in a dedicated workspace rather than improvised setups. With patience, you can achieve a showroom-worthy finish on panels, bumpers, and even whole vehicles. This guide will walk you through the essentials, from choosing the right spray system to final curing and maintenance.
Key concepts: HVLP, gravity feed, and check-sprays\n\nHVLP stands for high-volume, low-pressure and is the preferred method for automotive finishes because it reduces overspray and improves control. Gravity-feed spray guns typically deliver finer atomization; siphon-feed options can work but require careful handling. Check-sprays and test panels help dial in viscosity and spray pattern before you touch the car. Understanding fan size, distance, and nozzle size (commonly 1.3–1.7 mm for base coats) helps you choose the right settings. PaintQuickGuide emphasizes consistent technique: maintain even distance, keep the gun perpendicular to the surface, and apply multiple thin coats rather than a single heavy pass.
Workspace and safety setup\n\nSet up in a clean, well-ventilated area free of dust. A dedicated paint booth or a garage with exhaust fans and filtered air is ideal. Use a respirator with organic vapor cartridges, safety goggles, disposable coveralls, and nitrile gloves. Tape and masking film protect areas you don’t want coated. Keep flammable materials away and have a fire extinguisher on hand. The environment should feel calm and controlled, with temperature between 65–75°F (18–24°C) and humidity ideally below 50% to minimize defects.
Surface preparation for a flawless finish\n\nBegin with a thorough wash and degrease to remove wax and oils. Dry the surface completely, then sand with 400–600 grit to create a tooth for primer. Fill any imperfections with spot putty and re-sand. Clean panels with a tack cloth to remove dust. For panels with existing paint, scuff-sand glossy areas lightly so primer adheres well. A well-prepped surface is the foundation of a durable, even color.
Primers and base coats: choosing products and application tips\n\nChoose a compatible primer and build up to a uniform thickness. Use a seal primer on bare metal, followed by a high-build primer for smoother coverage. Allow adequate flash times between coats and avoid saw-tooth patterns by overlapping slightly. Thinning guidelines vary by product; measure and mix according to manufacturer recommendations. Always test spray on a panel to check color fill, bond, and coverage.
Applying color: technique, passes, and avoiding common issues\n\nBase coats should be applied in thin, even passes with steady motion. Maintain a consistent distance—usually 6–8 inches—from the surface and use overlapping strokes. Start with light coats to establish color, then apply additional coats to reach full coverage. Watch for dust nibs and runs; if they occur, stop, let it dry, and re-sand lightly. Temperature and air pressure can affect gloss; adjust accordingly.
Clear coat and polishing: sealing the finish\n\nClear coats protect color and add depth. Apply 2–3 light coats with sufficient flash time between passes, then let the film cure in a dust-free area. After curing, use a fine-grit compound and a polishing pad to remove tiny imperfections and bring out gloss, followed by a dedicated car wax for long-term protection. Proper drying times are essential before handling.
Troubleshooting common issues: runs, orange peel, fisheyes\n\nOrange peel results from too high viscosity, rapid flash-off, or excessive air pressure. Use a slower thinner and adjust the spray distance to minimize texture. Runs happen when the paint pools; fix by feathering edges and leveling with quick, light sweeps. Fisheyes indicate contamination on the surface; ensure degreasing steps were thorough and use clean applicators. Always test on a panel first and adjust technique before proceeding.
Maintenance, curing, and long-term care\n\nLet the finish cure fully before washing or waxing; automotive clears typically need 48–72 hours depending on conditions. Keep the car in a controlled environment away from dust and direct sunlight during curing. After curing, aftercare includes washing with pH-balanced soap, drying with microfiber, and applying maintenance wax to protect the finish. Periodic inspection helps catch micro-scratches or chips early.
Cost considerations and planning\n\nBudget for the right spray equipment, quality primers, base coats, clear coats, and safety gear. Costs can vary widely based on equipment quality and finishes; plan for a multi-coat process and a weather window for outdoor work if a booth isn’t available. PaintQuickGuide analysis shows that DIY spray projects can save money compared with professional refinishing when you factor in material costs, masking supplies, and the value of a personalized finish. Treat the project as a methodical build rather than a one-day sprint.
Tools & Materials
- HVLP spray gun (1.3–1.7 mm nozzle)(Gravity-feed preferred for consistency on panels)
- Air compressor (adequate CFM)(Oil-free compressor with steady pressure)
- Spray booth or dedicated ventilated workspace(Filtration and exhaust are critical)
- Respirator with organic vapor cartridges(P100 filters optional for extra protection)
- Safety goggles(Impact-resistant, sealed around eyes)
- Coveralls or painter’s suit(Non-silicone material preferred)
- Nitrile gloves(Chemically resistant, disposable)
- Masking tape and masking film/paper(Secure edges and create clean lines)
- Drop cloths/plastic sheeting(Protect floors and nearby surfaces)
- Sandpaper assortment (e.g., 400–600, 800–1200)(Wet sanding recommended for base/coats)
- Scuff pad and tack cloth(Dirty surface removal and dust-free finish)
- Primer (etch or high-build, compatible with topcoat)(Choose compatible with base color)
- Base coat color (urethane base)(Color matched to finish)
- Reducer/activator (as required by product)(Follow manufacturer ratios)
- Clear coat (urethane)(Finish with gloss and protection)
- Mixing cups and sticks(Accurate measurement for consistent viscosity)
- Solvent/degreaser and wax and grease remover(Prep surface thoroughly)
- Scales or a dedicated mixing line for accurate ratios(Optional but helpful for consistency)
- Fire extinguisher(Chemical foam or dry chemical type)
Steps
Estimated time: 12-16 hours
- 1
Set up the workspace and PPE
Arrange a clean, ventilated area and put on a respirator, goggles, and a protective suit. Verify ventilation and ensure no open flames nearby. Confirm all tools are ready and within reach before starting.
Tip: Test the airflow by running the exhaust and checking for stable air movement near the spray area. - 2
Mask the vehicle and prep masking materials
Mask off trim, lights, and areas you don’t want coated. Use high-quality masking tape and paper/film, pressed firmly to prevent lifting during spraying. Remove badges only if possible to improve edge precision.
Tip: Leave a small unpainted edge near panels to better blend transitions later. - 3
Wash, degrease, and dry the surface
Clean the entire surface with a degreaser to remove wax, oils, and silicone. Rinse and dry completely to avoid trapping solvents beneath coatings. A clean surface is essential for adhesion.
Tip: Use a tack cloth after drying to catch remaining dust. - 4
Scuff sand and address imperfections
Lightly scuff with 400–600 grit to create a profile for primer. Fill any dents with spot putty and re-sand until smooth. Clean again with a tack cloth.
Tip: Keep sanding uniform pressure to avoid creating low spots. - 5
Apply primer evenly
Spray a light, even primer coat across all areas. Allow proper flash time as per product instructions before applying additional coats. Build primer until the surface is uniform and free of indentations.
Tip: Aim for a glossy, uniform surface—no heavy runs in primer. - 6
Wet-sand the primer and prep for color
Wet-sand the primer with 800–1200 grit to flatten irregularities. Clean with a tack cloth and ensure the surface is completely free of dust before color.
Tip: Use continuous, smooth motions; avoid pressing too hard to prevent gouges. - 7
Mix base coat to spec and test spray
Measure base color with reducer as recommended by the product. Strain the mixture and test spray on a panel to verify color match and spray behavior before committing to the car.
Tip: Keep the test panel at room temperature and monitor spray pattern closely. - 8
Apply base coats in thin passes
Spray in steady, overlapping strokes from 6–8 inches away. Start with light coats and follow with additional passes until full coverage is achieved. Maintain consistent air pressure and avoid over-wetting.
Tip: Pause briefly between coats to prevent solvent pooling. - 9
Apply clear coat and cure
Apply 2–3 light clear coats with adequate flash time. Let the finish cure in a dust-free environment according to product guidelines before handling or polishing.
Tip: Avoid polishing until full cure to prevent dulling. - 10
Final inspection and light polishing
Check for dust, runs, or orange peel and address with careful polishing or recoat if needed after proper curing. Use a fine compound and dedicated pad to restore gloss.
Tip: Don't rush curing; curing time influences final clarity.
Your Questions Answered
Do I need a dedicated spray booth to paint a car with spray?
A dedicated spray booth is ideal for achieving the best finish, but a well-ventilated, dust-controlled garage can work with careful masking and filtration. Prioritize clean air and minimal dust intrusion.
A proper spray booth is best, but a clean, ventilated garage can work if you manage dust and ventilation carefully.
What PPE is essential for painting a car with spray?
At minimum, use a respirator rated for organic solvents, safety goggles, disposable coveralls, and nitrile gloves. Ensure cartridges are rated for the chemicals in use and replace them as recommended.
Wear a proper respirator, goggles, coveralls, and gloves. Replace filters per the manufacturer's guidelines.
Can I spray outside in good weather?
You can spray outdoors if weather is calm with no wind and low dust. Outdoor environments increase exposure to contaminants, so monitor humidity and temp closely and set up windbreaks if possible.
Outdoor spraying is possible in calm, dust-free conditions, but be mindful of wind and dust.
How long does base coat curing take between coats?
Base coats typically flash off in minutes and you can recoat after 10–20 minutes, depending on product instructions. Full curing for the finished paint can take 24–72 hours under proper conditions.
Base coats dry to handle in minutes; full cure can take a day or two depending on temperature and humidity.
What type of paint should I buy for spray finishes?
Most automotive spray projects use urethane base coats with solvent or water-based systems, followed by urethane clear coats. Make sure all products are compatible and follow the manufacturer’s mixing and reducer guidance.
Use compatible urethane base coats and clear coats, and follow the mixing instructions carefully.
How can I avoid orange peel and runs?
Achieve a smooth finish by using thin coats, controlled air pressure, and proper spray distance. Maintain steady hand motion and avoid stopping mid-stroke; practice on a panel first to dial in your technique.
Thin coats, steady distance, and practicing on a panel help prevent orange peel and runs.
Watch Video
Quick Summary
- Plan airflow, temperature, and humidity before starting.
- Mask thoroughly to protect adjacent surfaces.
- Apply multiple thin coats for even coverage and depth.
- Allow adequate curing before polishing or handling.
- Test on a panel and adjust technique as needed.