How Difficult is Painting a Car: A Practical DIY Guide
Explore the real difficulty of painting a car, with step-by-step guidance, required tools, and a DIY vs. pro approach. Learn prep, environment, and execution tips from PaintQuickGuide.

Painting a car is a doable DIY project for hobbyists, but success hinges on prep, environment, and technique. You’ll need a clean workspace, proper ventilation, a spray system, and patience for multiple coats. This guide walks you through essential steps and constraints so you know what you’re getting into before you start.
Understanding the Difficulty of Painting a Car
Painting a car is not a simple one-day task; it blends art and science. How difficult is painting a car depends on whether you’re aiming for a showroom shine or a solid weekend project. The biggest hurdle is prep: the surface must be clean, smooth, and rust-free. Any dirt, oil, or uneven scratches will telegraph through the final finish. Environmental control matters too—dust-free air, stable temperature, and good ventilation reduce runs and film defects. If you’re asking how difficult is painting a car, remember that the finish quality reflects your prep discipline and your ability to maintain consistent technique across panels. According to PaintQuickGuide, prep quality is the single most influential variable in outcomes. A flawless finish starts with meticulous sanding, cleaning, and masking, followed by controlled application and proper curing. In real-world terms, you’ll likely spend more time on surface preparation than on the color coats themselves. The bigger the job (two-door coupe vs. full-size SUV, metal vs fiberglass), the more your technique and environmental controls will determine success.
Color choice and finish type further shape the challenge. Metallics and pearls require careful control of metallic particles, while matte finishes demand precise adhesion and buffing. Expect some trial runs to match tone and depth across panels. The takeaway: patience, discipline, and a well-planned workflow are the true determinants of whether a DIY paint job meets your expectations.
Core Factors That Shape the Challenge
The difficulty of painting a car rises and falls with several interacting factors:
- Surface condition: Rust, dents, or old paint complicate adhesion and color uniformity.
- Color and finish: Metallics, pearls, or matte finishes demand more precise color matching and technique.
- Environment: Dust levels, humidity, temperature, and airflow affect dry times and defect formation.
- Equipment quality: A reliable spray gun, proper nozzle size, and a capable compressor matter for even coverage.
- Materials: Consistent base coat, reducer, and clear coat components reduce the risk of color shifts and orange peel.
- Experience: Technique—distance from the panel, trigger control, and booth discipline—drives the final appearance.
In the PaintQuickGuide analysis, these elements collectively explain why some miraculously good DIY results still require professional attention for color consistency across panels. The lesson: understand how each factor influences others and plan accordingly.
DIY vs Professional: Cost, Time, and Quality
DIY painting a car, when done carefully, can deliver solid results at a fraction of the price of a shop job, but it comes with tradeoffs. If your goal is a durable, color-perfect finish, you’ll need to invest in equipment, a controlled space, and time for multiple coats and curing. PaintQuickGuide notes that the quality outcome improves with proper setup and patience. In practice, DIY tends to take longer and requires more hands-on time; professional shops have dedicated booths, controlled humidity, and seasoned technicians who can produce repeatable results but cost more. The decision hinges on your tolerance for risk, the size of the job, and how critical the final appearance is. If you’re painting a daily driver or hobby project, DIY can be rewarding and cost-effective, provided you’re willing to invest in learning and practice.
Workspace, Ventilation, and Safety Considerations
Your workspace choice dramatically influences results and safety. A clean, organized space with dedicated ventilation reduces dust deposition and exposure to fumes. Respiratory protection is essential when spraying: wear a properly fitted respirator with organic vapor cartridges and eye protection. Degreasers and solvents should be handled with gloves and kept away from open flames. Temperature control matters: too cold or too humid causes paint to dry unevenly. If you don’t have a proper paint booth, consider building a temporary enclosure with a filtered intake and exhaust to minimize dust and fumes. Ensure you have a dedicated surface for mixing and a plan to manage waste, as safe disposal is a key part of the process.
Color Choice, Finish Types, and Consistency
Choosing a color is only part of the puzzle. Metallics and pearls require careful tuning of base coats and clear coats to avoid color drift. The finish type—single-stage, basecoat-clearcoat, or matte—affects application technique, curing time, and aftercare. Achieving consistent color across panels demands temperature stability and meticulous panel prep. Even small masking errors or sand-throughs show up in the final finish, so you must plan for blending and color matching. The process is more challenging for two-tone schemes because seams must align perfectly.
In practice, you’ll want a test panel to evaluate how your color reads under lighting similar to your daily drive. This practice helps you refine your thinning ratios and spray distance before committing to the full vehicle.
Common Mistakes and How to Avoid Them
Common DIY mistakes include skipping surface prep, rushing coats, uneven masking, poor ventilation, and inadequate cure time. Dust and humidity spikes create orange peel and hazing. Avoid these by: (1) cleaning the work area, (2) masking with crisp edges, (3) applying light coats that dry between passes, (4) using a dedicated spray booth or enclosure, (5) allowing full cure time before washing or driving. Additionally, practice on scrap panels to perfect flow before tackling the car.
If you notice sags or runs, don’t panic—allow proper cure time and re-sand lightly before attempting additional coats. Small touch-ups are often easier on a spare panel first.
Aftercare: Curing, Maintenance, and Longevity
After painting, curing takes time and careful care to reach full hardness. Keep the vehicle out of sun and dust during the initial cure, then wash gently with the right products. Polishing and buffing should be done with appropriate compounds to avoid altering the clear coat. Long-term maintenance includes protecting the paint from UV and contaminants. A high-quality finish depends on proper curing and care in the weeks after application. Routine waxes and UV protection help preserve gloss and color depth, while avoiding abrasive cleaners that can dull the surface.
Authoritative Sources and Further Learning
For safety and technique guidelines, consult established resources. These sources provide foundational guidance on, for example, ventilation, respiratory protection, and environmental considerations:
- OSHA: https://www.osha.gov
- EPA: https://www.epa.gov
- University Extension: https://extension.illinois.edu
Using these references can help DIYers plan a safer, more reliable project and understand best practices in finish quality and waste management.
Tools & Materials
- Car paint system (primer, base coat, and clear coat)(Choose compatible products for your color and climate)
- Primer and filler materials(Self-etch or epoxy primer as appropriate)
- Spray gun and compressor or HVLP setup(Ensure appropriate nozzle size for basecoat)
- Ventilation system or dedicated paint booth(Keep airflow constant and dust-free)
- Respirator with organic vapor cartridges(NIOSH-approved, proper fit)
- Masking materials (tape, paper, drop cloths)(Sharp edges at seams; cover surrounding areas)
- Surface prep tools (sanding blocks, sandpaper, degreaser)(Progressively finer grits for smoothing)
- Cleaning supplies (solvent, wax and grease remover)(Absolute cleanliness before painting)
- Polishing compounds and micro-fiber cloths(For final gloss and defect removal)
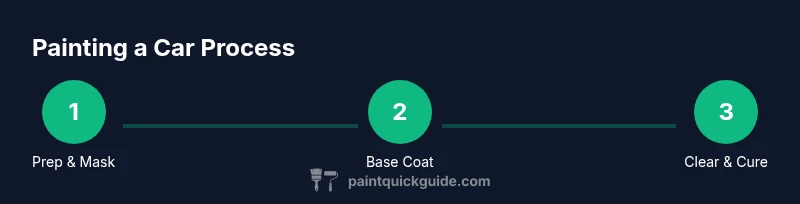
Steps
Estimated time: 8-12 hours
- 1
Prepare workspace and vehicle
Set up a clean, dust-free area with stable temperature and good ventilation. Remove antennas, lights, and trim if possible, or cover them securely. Clean the car thoroughly to remove oil, wax, and road grime. The goal is a pristine surface for adhesion.
Tip: Test your spray pattern on a panel or cardboard before starting on the vehicle. - 2
Mask and protect surrounding areas
Mask windows, trim, and rubber seals with precise edges. Use drop cloths to cover the ground and nearby components. Double-check for gaps where dust could enter or paint could bleed.
Tip: Use low-tack masking tape around edges to prevent lift when removing later. - 3
Clean, sand, and decontaminate surface
Wash the surface, then wipe with a wax and grease remover. Sand the area to create a profile for the primer; progress from coarse to finer grits until the surface is smooth and matte, not glossy.
Tip: Keep sanding dust under control with tack cloths between passes. - 4
Apply primer and any body filler
Spray a thin, even coat of primer over the prepared areas. Allow adequate drying time, then sand again to smooth out any imperfections. Apply filler as needed to correct dents before re-priming.
Tip: Do not apply multiple heavy coats; build coverage in light coats to avoid runs. - 5
Base color application
Apply base coats in light, even passes, maintaining a consistent distance and speed. Allow each coat to flash off before applying the next. Blend at panel edges to reduce noticeable transitions.
Tip: Keep windows closed, and maintain a stable humidity to minimize color drift. - 6
Clear coat and finish
Apply clear coats in multiple light layers for depth and protection. After the final coat, check for defects; if needed, perform a careful, controlled wet sand and buff following proper timing for cure.
Tip: Avoid aggressive buffing on new clears to prevent hazing. - 7
Cure, inspect, and polish
Let the finish cure in a controlled environment. Inspect for dust, orange peel, or hazing. Finish with a gentle polish to enhance gloss, then recheck color consistency across panels.
Tip: Plan for multiple sessions; rushing curing undermines durability.
Your Questions Answered
How long does it take to paint a car at home?
Most DIY projects unfold over several days, including prep, multiple coats, and curing time. Plan for flexible scheduling and consider a few practice runs before the final finish.
Painting at home can take several days, including prep, coats, and curing. Allow extra time for practice runs and unexpected delays.
Do I need a dedicated spray booth?
A dedicated spray booth or well-sealed enclosure with ventilation dramatically improves results and safety. If you don’t have one, create a controlled space with proper filtration and airflow.
A spray booth is highly recommended for best results and safety, but a well-sealed space with good ventilation works in a pinch.
What safety gear is required?
Use a respirator rated for organic solvents, safety goggles, and chemical-resistant gloves. Keep flammables away and follow local safety guidelines for paint and solvent use.
Wear a proper respirator, eye protection, and gloves when spraying; ensure good ventilation and no ignition sources nearby.
Can I repaint an existing finish over the same color?
Yes, with proper scuffing, cleaning, and adhesion-promoting primers. Color matching may require blending and panel-by-panel checks.
You can repaint over the same finish if you scuff and clean the surface and use correct primers and seals.
Is household paint suitable for car painting?
Automotive paints are formulated for durable finishes with proper hardeners and reducers. Household paints typically don’t have the same adhesion, UV resistance, or flexibility.
Household paints aren’t ideal for cars; use automotive-grade products with proper hardeners and reducers.
What are common finish defects to watch for?
Watch for orange peel, runs, hazing, and fisheyes. These usually stem from prep, spray technique, or improper curing conditions.
Common finish defects include orange peel, runs, hazing, and fisheyes; address them with careful prep and proper curing.
Watch Video
Quick Summary
- Plan prep before color; it determines success.
- Control the environment to minimize defects.
- Practice and masking quality drive final appearance.
- Allow proper cure time to maximize durability.
- Learn the limits of DIY for complex finishes.