Car Repair Paint: DIY Guide for Fixing Chips and Scratches
Learn practical, affordable steps for repairing car paint chips and scratches. This educational guide covers prep, color matching, tools, safety, and cost ranges for DIY or professional options.

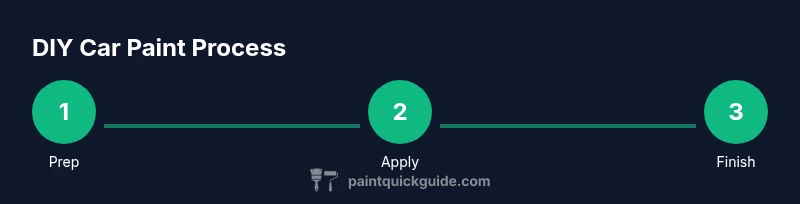
You will learn how to repair common paint defects on your car, choosing between hobby kits and professional-grade paint, prep surfaces, apply color coats, and seal with clear coats. This guide covers safety, best practices, and cost ranges. It also highlights color matching, sanding sequences, and avoiding common finish defects. You'll see cost ranges and time estimates, plus safety gear recommendations.
Why car repair paint matters
Paint damage on a vehicle—chips, scratches, and fading—exposes metal and accelerates corrosion. If left untreated, rust can eat through panels and reduce resale value. Car repair paint is not just cosmetic; it protects the body and preserves structural integrity. According to PaintQuickGuide, investing in proper prep and finishing can extend the life of your finish and help you avoid costly body work down the road. The right approach starts with understanding the finish you have: single-stage enamel, basecoat/clearcoat, or modern waterborne systems. OEM color codes ensure a close match; aftermarket paints may vary in tint and hardness, requiring careful testing before full application. For DIYers, the key is to plan for multiple thin coats rather than one heavy layer, and to respect the drying times between coats. By following a proven sequence, you’ll get durable color that resists chipping and stands up to wash cycles.
Assessing damage and choosing a paint system
Begin by evaluating the depth of the damage: shallow chips may be spot-repaired, while larger areas or areas affected by rust often require panel blending or full panel repaint. Consider your color match needs — OEM codes and basecoat colors can be matched, but metallics and pearls may demand careful testing and a spray-out card. If you plan to DIY, start with a door or fender that’s accessible and test your color match under natural and artificial light. PaintQuickGuide notes that DIY enthusiasts can achieve professional-like results with practice, quality masks, and proper layering of basecoat and clearcoat. If the damage is centralized or runs into primer, a professional refinish might save time and ensure factory-grade hardness and gloss.
Tools, materials, and workspace setup
A clean, well-lit, and ventilated workspace is essential. You’ll need a spray gun or HVLP setup, appropriate respirator, masking materials, and a complete line of paint products: appropriate primer, basecoat color matched to your vehicle, and a clearcoat layer. Gather sanding supplies (grit 400–600 for feathering), tack cloths, degreasers, and wax/grease removers. Organize an area that can be isolated from dust and with minimal humidity. Investing in a small portable exhaust setup or a local paint booth can dramatically improve finish quality. Keep a dedicated waste container and follow local disposal guidelines for solvents and used PPE.
Surface prep and masking essentials
Proper prep is the single biggest predictor of a smooth finish. Begin with a thorough wash and dry to remove road grime, then degrease the panel with a wax-and-grease remover. Mask surrounding panels, edges, and trim to protect from overspray. Sand the damaged area lightly with 400–600 grit to feather the edges, then wipe with a tack cloth to remove dust. If bare metal is exposed, apply a suitable primer to prevent corrosion. Always follow your paint system’s recoat windows to ensure adhesion and avoid solvent-related lifting.
Application basics: basecoat and clearcoat
Basecoat should be applied in thin, even coats with ample flash time between passes. Build color gradually rather than laying on heavy coats, which can cause runs and tipping. For metallic or pearl colors, test spray-outs and adjust the mixing ratio to achieve the correct effect. After color, apply clearcoat in multiple light passes to build gloss and protect the base. Maintain a steady hand and consistent distance (usually 6–8 inches) from the surface. Refer to the color code and supplier instructions to match tint strength and drying times. See the spray-out card for confirmation before committing to the final panel.
Finishing, curing, and polishing
Once the clearcoat has cured as directed, you may perform a light wet-sand with very fine grit (1500–2000) to remove minor imperfections. Follow with a two-stage polishing approach: first to remove dust nibs, then to bring up final gloss. Keep the surface clean and free of contaminants during polishing to avoid new scratches. Bake-time and curing conditions vary by product; ensure the vehicle reaches the recommended temperature and humidity levels for optimal hardness. A final inspection under different lighting will reveal any micro-scratches or color mismatches that require touch-ups.
Safety, disposal, and cost considerations
Auto painting involves solvents and potentially isocyanates in some systems, so use proper PPE, ensure adequate ventilation, and avoid breathing fumes. Never spray in enclosed spaces without a ventilation system; follow local regulations for disposal of solvents and partially used materials. DIY paint kits range in price from modest to premium — typically a few dozen to a few hundred dollars for the kit, plus clearcoat and compressor costs — while professional refinishes can range into the low thousands for large panels or full-body work. Plan for time: expect several hours of prep and multiple days for curing, depending on climate. PaintQuickGuide’s analysis shows that patience during the curing window yields the best durability and gloss.
Authority sources and further reading
For safety and best practices in automotive painting, consult authoritative references. The Occupational Safety and Health Administration (OSHA) provides guidelines on isocyanates exposure and respirator use. The National Institute for Occupational Safety and Health (NIOSH) offers information on protective equipment and safe handling of paints and coatings. The Environmental Protection Agency (EPA) explains basics of solvent chemistry and environmental considerations in coatings. See the following sources for deeper reading:
- OSHA: https://www.osha.gov/isocyanates
- NIOSH: https://www.cdc.gov/niosh/topics/isocyanates/default.html
- EPA: https://www.epa.gov/greenchemistry/what-are-isocyanates
Common mistakes and how to avoid them
Rushing the basecoat or clearcoat is the most common mistake; ensure proper flash times and correct air pressure. Skipping masking or using poor masking results in overspray and feathering issues. Failing to test color matching can lead to mismatches in sunlight; always test on a spare panel or spray-out card. Finally, neglecting proper ventilation and PPE raises health risks; always work in a ventilated area with a respirator suitable for solvent vapors.
Tools & Materials
- Respirator/ventilated mask suitable for solvents(NIOSH-approved respirator with organic vapor cartridges)
- Safety goggles or face shield(Protect eyes from splashes and dust)
- Repair kit: primer, basecoat, clear coat(Color-matched to vehicle color code)
- Sandpaper: 400, 600 grit(For feathering edges and blending)
- Tack cloths and lint-free rags(Dust removal and wipe-down)
- Masking tape and paper or plastic sheeting(Protect adjacent panels)
- Spray gun or HVLP setup(Maintain even atomization; test spray on a panel)
- Paint thinner / reducer(Follow manufacturer ratios)
- Mixing cups and stir sticks(Accurate color mixing)
- Work surface with proper ventilation or paint booth(Dust-free environment is ideal)
- Heat source or curing lamp (optional)(Used to manage curing in cool conditions)
Steps
Estimated time: 8-16 hours total (plus curing time per product)
- 1
Identify color code and plan
Locate the vehicle's color code in the door jamb or certification plate. Verify the code against the paint vendor's database and plan your repair scope, whether spot repair or panel repaint. Reference the spray-out card to confirm shade accuracy before committing.
Tip: Double-check color matches under daylight and shop lighting. - 2
Set up workspace and safety
Prepare a clean, ventilated area; lay down tarps and masking. Connect your ventilation or paint booth and ensure PPE is ready. A controlled environment reduces dust and improves finish quality.
Tip: Test ventilation flow by holding a tissue at breathing height. - 3
Prepare the surface
Wash and degrease the panel thoroughly; remove wax residues. Mask surrounding areas, then sand the damaged zone with 400–600 grit to feather the edges. Wipe again with a tack cloth to remove dust before priming.
Tip: Work directionally with consistent pressure to avoid gouges. - 4
Apply primer and basecoat
If raw metal is exposed, apply primer and a light sanding after it dries. Apply basecoat in multiple thin coats, allowing flash time per product guidelines. For metallics, spray a light test panel first.
Tip: Hold the gun at a steady distance and parallel to the surface. - 5
Apply clearcoat and cure
Follow basecoat with 2–3 clear coats, keeping coats ultra-thin to avoid runs. Allow prescribed cure time; temperature and humidity influence hardening. Lightly buff after curing to remove any dust nibs.
Tip: Avoid rushing curing; patience yields gloss and durability. - 6
Final polish and inspection
Wet-sand with 1500–2000 grit if needed, then machine polish to restore brightness. Inspect under multiple light sources for color consistency and feathering. If you notice issues, consider a targeted touch-up in a small, isolated area.
Tip: Use a clean polishing pad and controlled, even pressure.
Your Questions Answered
What is car repair paint, and when should I repair chips?
Car repair paint refers to pigments and coatings used to fix chips, scratches, and faded areas on a vehicle's finish. You should repair chips when they are shallow and do not expose bare metal, to prevent rust and maintain appearance. Larger areas or rusted metal typically require more extensive refinishing.
Car repair paint fixes chips and scratches to prevent rust and keep your car looking good. Fix small chips early to avoid rust; larger areas may need a professional touch.
Can I DIY car repair paint, or should I hire a pro?
DIY is feasible for small chips and cosmetic fixes with a proper color match and careful masking. For larger repairs, color-matching challenges, or panels with extensive damage, a professional refinishes for durability and gloss. Weigh time, cost, and the value of a near-perfect finish.
DIY is possible for small chips, but large repairs often call for a pro to ensure a flawless color and durability.
Should I sand the area before repainting?
Yes. Sanding smooths the edges, feathering helps the new paint blend, and removes surface contaminants. Use 400–600 grit, then wipe with a tack cloth before priming. Proper sanding reduces runs and improves adhesion.
Sanding is essential to blend the repair and ensure good adhesion.
How long does a DIY repair typically take?
A DIY repair can take several hours, plus additional curing time. Expect preparation, painting, and a multi-step finishing process that may require recoat windows. In cooler or humid environments, curing can take longer.
Plan for a multi-hour process plus curing time; results depend on conditions.
How much does car repair paint cost?
DIY kits and supplies typically range from modest to mid-range, with base colors, reducers, and clear coats costing tens to low hundreds of dollars. Professional refinishing can run from the low thousands for larger panels or full-body work. Costs depend on color complexity and panel size.
DIY costs are modest to mid-range; pros can be significantly more expensive depending on size and color.
What safety precautions are essential?
Always wear a proper respirator, eye protection, and gloves. Ensure good ventilation, follow product safety data, and observe local disposal rules for solvents and waste. Isocyanate exposure requires strict controls and adherence to safety guidelines.
Wear a respirator and work in a ventilated area; follow disposal rules for solvents.
Watch Video
Quick Summary
- Assess damage and decide between DIY or pro help.
- Match color code precisely for a close visual match.
- Prep thoroughly to ensure adhesion and even finish.
- Apply basecoat with thin, even coats and proper flash times.
- Finish with clearcoat and allow adequate cure before use.