Basic Car Paint Job: A Practical DIY Guide for Beginners
Step-by-step guidance for a basic car paint job at home, from prep and masking to primer, color coats, and clear finish—practical tips and budgeting.

This guide helps you complete a basic car paint job using common DIY tools. You'll learn prep, masking, priming, color application, and clear-coat finishes, plus safety considerations and budget ranges. According to PaintQuickGuide, planning your workspace and following thin, even coats yields the best results for a durable finish. This approach emphasizes safety, cost control, and achievable results for beginners.
Understanding the Basic Paint Job for a Car
A basic car paint job at home is a layered craft that focuses on prep, light coats, and careful curing. The goal is a durable, even finish that protects the metal from corrosion and restores the vehicle's appearance without the complexity of showroom-grade coatings. This approach is approachable for DIY enthusiasts who want to learn by doing, but it requires patience, the right tools, and a clean, controlled environment. This is not a one-day miracle; it’s a process that rewards consistency over perfection. According to PaintQuickGuide, a well-executed basic job emphasizes thorough preparation, thin coats, and correct curing times to prevent runs and dust inclusions. It’s about building solid adhesion with a drama-free workflow rather than chasing perfect metallic flecks on the first try. By framing the project as a sequence of small, repeatable steps, you’ll improve your odds of a professional-looking result on a budget.
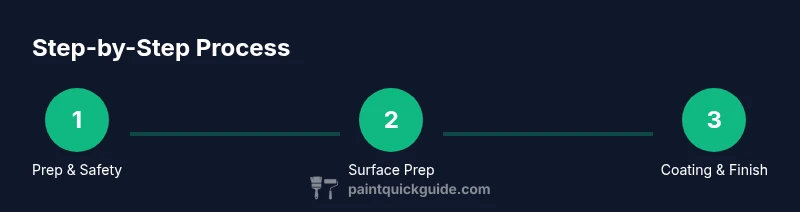
Safety, Environment, and Prep Work
Paint fumes, solvents, and lacquer thinner can be hazardous; never work in a poorly ventilated space. Set up in a well-ventilated area, preferably with a dedicated spray booth or a garage kept at stable temperature and humidity. Wear a properly fitted respirator, chemical-resistant gloves, and safety goggles. Keep flammables away and avoid open flames during any painting activity. Protect floors with drop cloths and use masking tape to shield trim, glass, and adjacent panels. A clean, dust-free environment reduces the risk of dust settling on the wet finish, which would require repaints or heavy sanding later. Plan for a realistic timeline—coats will need time to flash between applications, and curing will extend the overall project duration. This is a key area where DIY painters often save money but must respect safety rules to prevent injuries or air-quality issues.
Surface Preparation: Cleaning, Sanding, and Smoothing
A successful finish starts with the surface. Begin with a thorough wash using automotive soap to remove dirt, wax, and oils, then wipe with a tack cloth to collect remaining dust. If your paint is glossy or has micro-p imperfections, wet-sand lightly with 400-600 grit paper to create a receptive surface for primer. Feather edges around damaged areas and round any sharp chips to avoid noticeable edges after painting. After sanding, wipe again with a lint-free cloth and a suitable cleaner to eliminate fine particles. Decontaminate the surface with a clay bar or a deodorized detailing product if available; this reduces embedded contaminants that would interfere with adhesion. Finally, wipe down once more and allow the surface to dry completely before priming.
Primer, Color, and Finishes: Getting the Right Look
Primers improve adhesion and provide a uniform base color; choose a primer compatible with your car’s paint system. Apply a light, mist coat to the car body, then follow with two even coats, allowing the recommended flash time between coats. After primer cure, inspect for any pinholes, runs, or uneven areas and sand those spots lightly. For color, select a base coat that matches your desired shade and apply in thin coats—usually two to three coats, with careful spacing to avoid sags. If using metallic or pearl finishes, practice on a test panel to fine-tune the spray technique. Finally, apply a clear coat to seal the color and add gloss; this is typically completed in two even coats, with adequate cure time between layers.
Wet Sanding, Polishing, and Clear Coat: Final Finishes
Once the color has cured, perform a very light wet sanding with 1500-2000 grit to remove any minor imperfections, followed by polishing with a dedicated automotive compound. This step smooths the surface and enhances gloss, especially after a new clear coat. Rinse and dry the panel, then inspect for uniformity. Re-apply a final thin layer of clear coat if needed or if dust nibs appeared during curing. Allow the paint to cure fully in a controlled environment before washing or handling the vehicle to prevent micro-scratches. With patience, the final finish will appear smooth and even, with a durable layer of protection that resists chipping and UV damage.
DIY vs Pros: When to Hire Help and Budget Tips
A DIY basic paint job is feasible for minor panels or small repairs, but larger vehicle sections, metallics, or high-precision color matching benefit from a pro shop with a spray booth. If you’re on a tight budget, consider painting a panel or a single door as a learning exercise, then scale up. Budget broadly for supplies, including primer, base coats, clear coats, and the tools required to spray evenly. Renting a spray gun and using a rented booth can cut costs compared with buying professional equipment. Keep in mind that a truly flawless finish often relies on professional expertise and controlled environment. PaintQuickGuide notes that with careful planning, a well-executed DIY project can save money and still deliver a durable, attractive result if expectations are reasonable and the scope is limited.
Tools & Materials
- Automotive masking tape(3M or equivalent, 1-2 inch width)
- Plastic drop cloths or painter’s plastic(Cover the ground and nearby areas)
- Car wash soap and prep remover( removes wax and oils)
- Sanding blocks or blocks/pads (grit 320-400)(For body prep and feathering edges)
- Automotive primer(Compatible with base color system)
- Base coat color(Choose the shade you want)
- Clear coat(For gloss and protection)
- Spray gun with appropriate nozzle (0.8-1.3 mm)(For even coverage)
- Air compressor(Adequate CFM for spray gun)
- Respirator mask with organic vapor cartridges(For fumes and chemicals)
- Safety goggles(Protect eyes from spray and dust)
- Nitrile gloves(Chemical resistance)
- Tack cloths / lint-free rags(Remove dust between coats)
- Detailing supplies (soap, wax remover)(Prep between sessions)
Steps
Estimated time: 6-12 hours
- 1
Set up workspace and safety gear
Arrange a well-ventilated area, away from flames. Put on a respirator, goggles, and nitrile gloves. Lay out masking materials, drop cloths, and your spray equipment within easy reach.
Tip: Test your spray pattern on a panel at distance before applying to the car. - 2
Wash and decontaminate surface
Thoroughly wash the car surface to remove dirt, oils, and wax. Wipe with a tack cloth and use a clay bar on stubborn contaminants. Ensure the surface is completely dry before proceeding.
Tip: Use a dedicated decontamination product for best adhesion on older finishes. - 3
Mask off areas
Mask edges around trim, lights, windows, and adjacent panels. Use multiple layers of tape to prevent bleed-through, and cover the ground with drop cloths. Double-check for exposed seams.
Tip: Seal mask edges with light burnish for sharp paint lines. - 4
Feather and sand existing paint
Lightly sand glossy areas with 320-400 grit to create a mechanical bite. Feather surrounding edges to avoid visible transitions. Clean away sanding dust with a tack cloth.
Tip: Keep sanding strokes even and flat to prevent gouges. - 5
Apply primer
Spray a light mist coat, then two even coats, allowing flash time per manufacturer spec. Check for pinholes or thin spots and sand those areas smoothly after cure.
Tip: Primer should be uniform; avoid heavy coats that obscure panel details. - 6
Test color on a panel
Mix a small test panel to preview shade and adjust if needed. Practice spraying on the panel to ensure you’re comfortable with spray distance and speed.
Tip: Match the test panel lighting to the car’s lighting conditions. - 7
Apply base color coats
Apply 2-3 thin coats, allowing proper flash time. Keep strokes smooth and parallel, avoiding runs by maintaining consistent distance.
Tip: Aim for uniform color density; don’t rush the coats. - 8
Apply clear coat
After base has cured, apply 2 evenly spaced clear coats. Maintain a steady travel speed to reduce orange peel and ensure gloss.
Tip: Let each coat tack slightly before the next to maximize adhesion. - 9
Cure, sand lightly, and polish
Allow full cure in a controlled space. If needed, wet-sand with 1500-2000 grit and polish to restore gloss. Inspect for uniformity and perform any minor touch-ups.
Tip: Don’t handle the vehicle until the finish is fully cured to prevent scratches.
Your Questions Answered
Is a professional spray booth necessary for a basic car paint job?
Not strictly; a well-ventilated space with proper filtration can work for beginners, but a controlled environment helps with visibility and finish quality, especially for metallic or pearl colors.
A basic DIY job can be done in a well-ventilated space; a controlled environment helps when you’re aiming for a flawless metallic finish.
Do I need to remove the entire bumper to paint a car at home?
You can often paint without removing every component, but removing bumpers or large panels provides better access and a cleaner edge. Mask thoroughly and cover all joints.
You can usually work with the bumper on, but removing it makes masking easier and the edges cleaner.
What tools are essential for a DIY car paint job?
Essential tools include masking materials, a spray gun with suitable nozzle, an appropriate respirator, sanding supplies, primers, base color, clear coat, and a clean, dust-free workspace.
You’ll need masking, a spray gun, respirator, sandpaper, primers, color, and a clear coat for a DIY job.
How long does a basic paint job take from start to finish?
A typical basic DIY paint job spans several sessions and can take 6-12 hours of active work plus curing time, often spread over 2-4 days.
Plan for multiple sessions over a few days because curing times extend the overall project.
Can I paint over existing clear coat?
Painting over existing clear coat is possible with careful scuffing and proper prep, but results depend on clear coat condition. In many cases, a new base layer requires removing the old clear for best results.
You can sometimes paint over clear coat with proper prep, but removing the old clear often yields a better finish.
Watch Video
Quick Summary
- Plan step-by-step and budget for materials.
- Prep thoroughly to improve adhesion and finish.
- Apply thin coats; patience reduces runs and dust.
- Mask and protect areas meticulously to keep coatings clean.
- Allow proper cure times before washing or driving.