Will Paint Stick to Stainless Steel? A Practical DIY Guide
Learn proven steps to prep, prime, and paint stainless steel surfaces so finishes adhere and endure. This practical guide covers appliances, automotive parts, and outdoor metal.

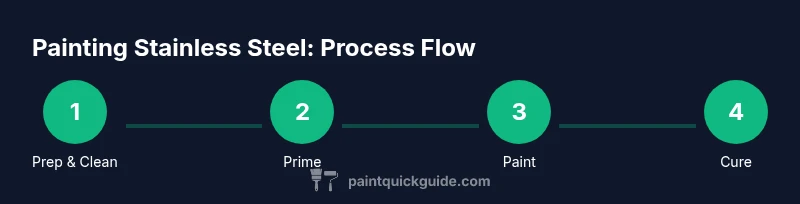
If you’re wondering will paint stick to stainless steel, the short answer is yes with proper prep. Start by cleaning and scuffing the surface, then apply a bonding primer designed for metal, and finish with a compatible topcoat. Using the right products and technique makes durable results possible. Patience during curing improves adhesion. Readiness of the finish matters for everyday use.
Why stainless steel surfaces resist paint (and how to overcome)
Stainless steel is prized for its durability and clean look, but those very properties create challenges when you want to paint. The surface is non-porous, with a passive chromium oxide film that can hinder bonding. Oils, fingerprints, and manufacturing residues further threaten adhesion. According to PaintQuickGuide, the key to turning a stainless surface into a paint-friendly base is thorough surface preparation: cleaning, degreasing, and scuffing to give the primer something to grab. When these steps are done correctly, you can achieve a durable, wipeable finish that will stand up to daily use. In this section we’ll explore why adhesion is difficult and how to overcome it with a methodical approach. We’ll also explain what kinds of finishes work best and how to choose primers that actually bond to metal. By the end of this block, you’ll understand why adhesion matters and what you can do to improve it on any stainless steel surface, from kitchen appliances to automotive trim. PaintQuickGuide’s guidance is designed for homeowners, DIY enthusiasts, and auto refinishing hobbyists seeking practical results. The information here emphasizes safe, practical methods that respect the longevity of the base metal.
What paints work on stainless steel
Choosing the right paint for stainless steel hinges on bonding ability, flexibility, and durability. The best performers are binder-rich coatings designed for metal substrates, such as epoxy or urethane enamel systems, followed by high-quality water-based acrylic enamels that include metal-friendly binders. In many cases, a dedicated bonding primer for metal is a prerequisite, enabling latex, acrylic, or enamel topcoats to grip the surface. When you search for the right combination, remember that will paint stick to stainless steel is achievable when you pair a compatible topcoat with a primer that explicitly states metal bonding properties. For indoor surfaces like kitchen panels, you might prefer low-odor water-based formulas; for outdoor or automotive components, solvent-based or two-part systems can offer superior UV resistance and durability. Paint types you’ll encounter include epoxy-based enamels, polyurethane finishes, and rust-inhibiting primers. Each option has trade-offs in ease of application, cure time, and durability in different environments. Always verify whether the product is suitable for stainless steel by checking the manufacturer’s technical data sheet and local code considerations. This section also outlines how to communicate with retailers or paint shops to confirm that your chosen system will perform as expected in your climate and use case.
Ideal surface prep steps for adhesion
A successful paint job on stainless steel begins with meticulous surface prep. Start by cleaning the surface with isopropyl alcohol or a dedicated degreasing cleaner to remove oils, fingerprints, and residues. Wipe with lint-free towels and allow to dry completely. If you find any rust spots or pitting, treat them with a rust converter or light sanding, but avoid aggressive stripping that could gouge the metal. Lightly scuff the surface with fine-grit sandpaper (about 400–600 grit) or a non-woven abrasive pad to create a micro-roughness that the primer can grab. Rinse away dust with a damp cloth and dry thoroughly. Temperature and humidity should be moderate during prep; ask yourself if the environment resembles a clean room or a garage setting. The goal is to leave a clean, slightly rough surface that accepts a bonding primer. If you skip this step, you risk adhesion failures that show up as peeling, bubbling, or chipping within weeks of application. Pro tip: wear protective gloves during prep to avoid transferring oils from your skin back onto the bare metal.
Primers and bonding agents for stainless steel
Primers are crucial to the success of any stainless steel coating system. Look for epoxy or acrylic bonding primers rated for metal and specifically engineered for stainless steel. A good primer will etch or chemically attach to the metal surface, creating a rough, compatible base for the topcoat. In many cases, an etch primer or zinc-phosphate type is recommended for longer-lasting adhesion, especially on outdoor or high-use surfaces. If you are painting appliances, choose primers that are formulated for smoother metal surfaces and can tolerate frequent cleanings. Avoid regular latex primers alone unless they explicitly state metal bonding properties. Always follow the manufacturer’s guidelines for pot life, recoat windows, and curing requirements. For best results, apply the primer in thin, even coats and allow the recommended curing time before applying the topcoat. PaintQuickGuide emphasizes that the right primer often determines the difference between a finish that lasts and one that fails prematurely. The intent is to provide a lasting, wipeable surface that resists fingerprints and oil build-up while remaining flexible enough to tolerate thermal cycling on appliances or exposed metal components.
Applying paint: topcoat options and techniques
Once the primer has cured, you’ll apply the topcoat. The choice of topcoat depends on your environment, desired aesthetic, and cleaning regimen. For indoor stainless steel, a latex or acrylic enamel with a metal-bonding additive can deliver a durable, washable surface with relatively simple cleanup. For outdoor or high-traffic areas, consider a two-component epoxy or polyurethane topcoat with UV resistance and abrasion resistance. When applying, use thin coats rather than a single thick layer to avoid drips and poor adhesion. A spray method will often give the most even finish on complex shapes, while brushes or foam rollers can work well for flat panels. If you opt for spraying, ensure proper ventilation and use a respirator. Temperature should be within the product’s specified range, typically between 60 and 85 degrees Fahrenheit, with low humidity to minimize solvent entrapment. After each coat, allow the recommended dry time and inspect for uniform color and texture before applying a second layer. A light wet-sand between coats is sometimes advised for ultra-smooth results, but only if the topcoat instructions permit this.
Finishing and curing for durability
The finishing phase defines how long the paint will last on stainless steel. After the final topcoat, allow a full cure time as specified by the product, which may span 24–72 hours indoors or longer under damp or cool conditions. Avoid heavy use during cure, and keep the area free of dust that could settle on the surface. Curing contributes to the final hardness, chemical resistance, and ease of cleaning. If you notice small imperfections after curing, a very light sanding with 600–800 grit paper followed by a retouch coat can help. Temperature and humidity also affect cure speed; a cooler environment slows cure, while excessive heat can dry too quickly, leading to micro-cracks. PaintQuickGuide recommends verifying adhesion through a simple cross-hatch test once cured: if the coating remains intact after swiping with a fingernail, you’ve achieved good adhesion. The goal is a durable finish that masks the underlying metal’s sheen while resisting fingerprints, oils, and cleaning solvents used in daily life.
Special cases: appliances, automotive, and outdoor surfaces
Painted stainless steel appears in many contexts—from kitchen appliances to automotive trim and outdoor furniture. Appliances often require lower odor, water-based systems that still provide durability and cleanability. Automotive or trim applications may demand higher UV resistance and chemical resistance, so two-part systems or solvent-based enamels may be preferred. Outdoor stainless steel requires primers and topcoats with long-term UV stability and corrosion resistance, as well as proper sealing to prevent moisture ingress. Always check compatibility with any aftermarket coatings and verify that the finish will withstand the specific environmental conditions it will face. The goal is to select products that stay flexible enough to resist cracking while remaining hard enough to resist scratches and marring. By planning for the surface context—indoor vs outdoor, appliance vs structural component—you’ll avoid common failure modes and preserve the surface’s appearance for years.
Maintenance and care after painting
A painted stainless surface should be cleaned with mild cleaners and soft cloths to avoid scratching the finish. Avoid abrasive pads or strong solvents that could wear through the coating. For daily upkeep, wipe in the direction of the grain and dry thoroughly to prevent water spots. If cleaning reveals carbon tracking or grime in hard-to-reach areas, consider a light touch-up using the same topcoat system and recoat as necessary. Inspect for chipping, peeling, or dull spots and sand lightly if needed before touching up. The finish should be re-evaluated after a couple of years, especially in kitchens or garages where grease and humidity can accelerate wear. Remember that adhesion depends on prior prep, primer choice, and the topcoat’s durability. With proper maintenance, your stainless steel surface can retain its appearance and function for a long time.
Common mistakes and how to avoid them
Most failures come from skipping essential steps or using incompatible products. Common mistakes include skipping the degrease stage, using a primer not rated for metal, applying paint in unsuitable temperatures or humidity, and applying thick coats that trap solvents and peel later. Always follow the product’s recommended temperature range and recoat windows, and verify that the primer and topcoat are compatible with stainless steel. Another frequent error is insufficient surface preparation when dealing with older, fingerprint-heavy surfaces—contamination will prevent adhesion even with good products. Finally, allow proper curing times and avoid heavy use immediately after painting. If you do make a mistake, sanding the affected area lightly and re-coating according to the current product's directions can salvage a project. The PaintQuickGuide team emphasizes patience, precise prep, and choosing products designed for metal as the core strategy for lasting results.
Tools & Materials
- Isopropyl alcohol or dedicated degreaser(Use 70%+ IPA or degreaser to remove oils)
- Lint-free cloths(For wiping surfaces and dust removal)
- Fine-grit sandpaper (400–600 grit)(Lightly scuff to create bonding surface)
- Non-woven abrasive pad (Scotch-Brite)(Alternative for scuffing in circular motions)
- Stainless steel cleaner (optional)(For a final wipe if residue remains)
- Bonding primer for metal(Epoxy or acrylic bonding primer rated for metal)
- Topcoat suitable for metal (latex or enamel)(Choose for indoor/outdoor use and cleaning needs)
- Painter’s tape(Mask edges to prevent bleed-through)
- Drop cloths or protective sheeting(Protect surrounding areas)
- Paint brushes (synthetic bristles)(Synthetic brushes for latex/enamel)
- Foam rollers or HVLP spray system(Optional for large flat areas)
- Respirator or mask and safety glasses(Protect from fumes and dust)
- Cleanup supplies (water or solvent)(Keep cleanup quick to prevent issues)
Steps
Estimated time: 6-12 hours active work + 24-48 hours curing
- 1
Prepare the workspace
Set up a clean, ventilated area with good lighting. Lay down drop cloths and ensure all surfaces you plan to paint are accessible.
Tip: Organize tools and materials beforehand to avoid delays. - 2
Degrease and clean the surface
Wipe the stainless steel with isopropyl alcohol or a degreaser until no oils remain. Dry completely before proceeding.
Tip: Use fresh cloths to avoid redistributing oils. - 3
Repair and inspect
If you detect rust or pitting, address it with a rust converter or light sanding. Do not aggressively strip beyond necessary.
Tip: Limit aggressive abrasion to prevent deep scratches. - 4
Scuff the surface
Lightly scuff the surface with 400–600 grit sandpaper or a non-woven pad to create a profile for bonding.
Tip: Wipe clean after scuffing to remove dust. - 5
Apply bonding primer
Apply a thin, even coat of bonding primer designed for metal. Allow to dry per product instructions.
Tip: Do not apply in thick coats; multiple thin coats yield better adhesion. - 6
Sand between coats (if advised)
If the primer's datasheet recommends it, lightly sand with fine paper between coats and clean again.
Tip: Avoid over-sanding primer; you want a smooth surface, not a shredded layer. - 7
Apply the topcoat (first coat)
Brush, roll, or spray a thin first coat of topcoat; maintain a light, even layer to prevent runs.
Tip: Use long, continuous strokes in the direction of any grain or contour. - 8
Apply additional coats
Apply a second coat after the first has dried to the manufacturer’s recommended recoat window; add more coats if necessary for uniform coverage.
Tip: Thin coats dry faster and reduce sagging. - 9
Final cure and inspection
Let the coating cure fully as per the product’s guidance. Inspect for adhesion and uniformity, then gently test with a fingernail.
Tip: Patience during cure yields the best durability.
Your Questions Answered
Do I need primer on stainless steel?
Yes. A bonding primer designed for metal is essential to improve adhesion on stainless steel. Skipping primer dramatically increases the risk of peeling and wear.
Yes. You should use a bonding primer made for metal to ensure the coating sticks well and lasts.
What primers work best for stainless steel?
Epoxy or acrylic bonding primers formulated for metal are typically best for stainless steel. Some surfaces also respond well to etch primers; always follow the product data sheet for compatibility.
Epoxy or acrylic metal primers are usually best for stainless steel; follow the product directions.
Can I use latex paint on stainless steel?
Yes, but only with a suitable bonding primer and, ideally, a topcoat formulated for metal. Latex alone may not adhere or resist wear in high-traffic areas.
You can, with the right primer and topcoat designed for metal.
How long does painted stainless steel last?
Durability depends on prep, primer, topcoat, and environment. With proper application and indoor use, a good system can last several years; outdoor exposure reduces lifespan without proper UV protection.
With proper prep and topcoat, it can last for years, especially indoors.
Is spray painting stainless steel safe for indoors?
Spray painting indoors is possible with proper ventilation and a low-odor system. Use a respirator, work in a well-ventilated area, and avoid applying coatings in heated spaces.
Yes, but you must ventilate and protect yourself with a respirator when spraying indoors.
Can I paint outdoors or on metal exposed to the elements?
Outdoor painting requires UV-stable topcoats and primers designed for weather exposure. Use products rated for exterior metal and follow the recoat windows closely.
Yes, with exterior-rated products and proper weather conditions.
Watch Video
Quick Summary
- Prepare meticulously for best adhesion.
- Choose a bonding primer rated for metal.
- Apply thin coats; avoid runs and sags.
- Allow full cure before use to maximize durability.
- Test a small area first to avoid big surprises.