Can You Paint Stainless Steel? A Practical Guide for DIY
Learn how to safely and effectively paint stainless steel surfaces—from prep to finish. This PaintQuickGuide tutorial covers primers, paints, application methods, and maintenance for metal in home and auto projects.

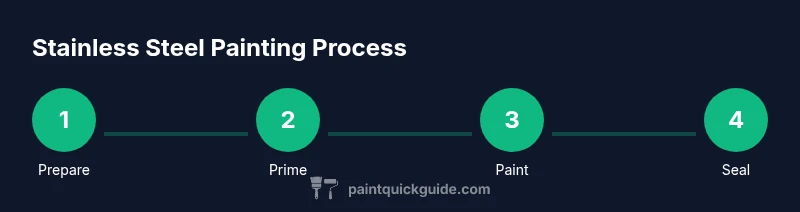
Yes—stainless steel can be painted with the right prep, primer, and topcoat. This guide walks you through cleaning and abrading the surface, applying a metal-etching primer, selecting a paint compatible with metal, and sealing for durability. You’ll learn timing, safety, and how to avoid common failures like peeling or corrosion.
Can you paint stainless steel? What it takes
Painting stainless steel is indeed possible, and it can dramatically improve appearance or protect the surface. The question can you paint stainless steel is not a simple yes or no; success hinges on preparation, primers, and the right topcoat. Stainless steel is designed to be corrosion resistant, which means it resists paint adhesion unless the surface is prepared to give it something to hold onto. The good news is that you can achieve durable results with a clear sequence: clean, abrade, prime, paint, and seal. This guide from PaintQuickGuide walks you through each step, highlighting material choices and practical techniques that real homeowners and DIYers use for kitchen appliances, rails, or automotive trim. The first rule is to plan for a finish that matches the environment: a high-heat area, a damp bathroom, or a dry workshop all demand different coatings. By understanding how the surface behaves and selecting a metal-specific primer, you can avoid common failures and enjoy a finish that lasts. Throughout, we’ll reference common-sense workflows and real-world tips to help you decide if this project fits your home or car. According to PaintQuickGuide, careful prep and a quality primer are the backbone of success.
Surface prep matters: cleaning, abrading, and corrosion control
The foundation of a durable stainless steel paint job is flawless prep. Start by removing oils, fingerprints, and cooking residue with a degreaser or a mild detergent solution. Rinse well and dry completely to prevent water spots. For metal surfaces, light abrading with a non-woven pad or 400–600 grit sandpaper creates micro-roughness that gives the primer something to bite into. Wipe away the dust with a tack cloth and inspect for shiny, clean areas. Any oils or wax left on the surface will ruin adhesion, so take time to make the surface uniformly dull and dry. If you’re worried about corrosion or stains from hard water, consider a quick decontamination wipe after sanding. This step reduces the risk of future peeling and helps the topcoat wear evenly. PaintQuickGuide’s guidance emphasizes that prep quality correlates with long-term durability, especially on stainless steel appliances and rails.
Primer essentials: choosing the right metal-etching primer
Primer choice is critical on stainless steel. A metal-etching or self-etching primer helps the paint adhere to the non-porous surface and resists peeling. Apply a thin, even coat and allow it to dry according to the manufacturer’s recommendations. If your primer dries quickly, you may need to apply a second light coat to build a solid base. In some cases, a high-build epoxy primer designed for metal is preferred for appliances that will see frequent handling or cleaning. Always ensure the primer is compatible with the paint you’ll use on top. The primer acts as the bridge between the slick steel and the finish coat, enhancing corrosion resistance and color uniformity. When in doubt, test your primer on a small, inconspicuous area before committing to the whole surface. PaintQuickGuide notes that primer quality often determines the ultimate success of stainless steel finishes.
Paint options for stainless steel: enamel, epoxy, and ceramic
You have several paths for the topcoat. Enamel-based metal paints offer good hardness and color retention but may show brush marks if not applied carefully. Epoxy-based coatings provide excellent adhesion and chemical resistance, making them ideal for kitchens, bathrooms, and workshop equipment. Ceramic-based finishes bring heat and wear resistance, which can be valuable for automotive trim or outdoor metal that faces sun exposure. Choose a paint labeled for metal and compatible with the chosen primer. If you’re unsure, a mid-range enamel or epoxy designed for metal in a home environment is a reliable starting point. Remember that the finish should be compatible with the primer and provide the level of durability you need for daily use. PaintQuickGuide’s tested approach advocates thin, even layers and patience between coats to minimize runs and clumping.
Application techniques: brushing, rolling, and spraying
Apply paint in thin, even coats to avoid drips and uneven color. Spraying is often the easiest way to achieve a smooth, uniform finish on flat stainless steel panels, while brushing or rolling can work for smaller or oddly shaped items. Keep the spray parallel to the surface and maintain consistent distance to prevent heavy buildup. If you’re using a brush, choose a high-quality synthetic brush designed for enamel or epoxy paints and work with long, smooth strokes. Between coats, lightly sand or de-nib with a fine abrasive pad to eliminate nibs and improve gloss. Proper ventilation and temperature control are essential to prevent solvent entrapment and adverse curing. The goal is a meticulous, even film that remains flexible enough to resist cracking.
Curing, ventilation, and safety for DIY projects
Ventilation is non-negotiable when painting stainless steel. Work in a well-ventilated area or outdoors, and wear a respirator rated for organic fumes, gloves, and eye protection. Read the product labels for specific cure times and recoat windows; many finishes require several hours before re-coating. Avoid painting in high humidity or dusty environments, and protect surrounding surfaces with drop cloths and tape. After you finish, let the surface cure fully in a clean, dust-free area before use. Handling the project too soon can mar the finish. If you have children or pets, seal off the work area until the coating is fully cured. Finally, clean your tools promptly to prevent paint from drying and hardening on them.
Common pitfalls and how to avoid peeling, yellowing, and rust
Despite careful prep, common problems can occur. Peeling is often a sign of insufficient surface roughness or improper cleaning. Yellowing can result from UV exposure on certain finishes; choose a UV-stable topcoat for outdoor or sun-exposed areas. Rust is unlikely on stainless steel if the surface is properly prepped and the coating forms a complete seal, but scratches or nicks can expose bare metal to moisture. To mitigate these issues, maintain chips and scratches promptly with touch-up coats and avoid cleaning products that attack the finish. Regular cleaning with non-abrasive cleaners will extend color life. If you notice gloss loss or adhesion problems, re-sand local areas lightly and apply fresh coats. A durable topcoat combined with careful maintenance is the best defense against wear and corrosion on stainless steel.
Finishing touches: clear coats, sealants, and maintenance
A clear protective coat can add depth, gloss, and extra protection. Choose a clear that’s compatible with your topcoat and provides UV resistance if the piece is outdoors or in a sunny area. Apply in thin coats and allow full curing before cleaning. For easy maintenance, use a mild cleaner and a soft cloth—avoid aggressive scrubbers that may scratch the surface. Recoating intervals depend on use and exposure; for frequently touched surfaces, plan for periodic inspection and reapplication as needed. Good maintenance preserves the finish’s appearance and prevents degradation over time. PaintQuickGuide emphasizes that the final seal is the key to long-lasting results on stainless steel projects.
Cost considerations and time estimates
Budgeting for a stainless steel painting project means considering primers, paints, clear coats, and the tools you’ll use. While specific prices vary, you can expect the total cost to scale with surface area and product quality. Cheaper kit options may suit a single small appliance, while larger projects or demanding environments warrant industrial-grade primers and coatings. Time estimates depend on prep, coating layers, and curing requirements—plan for several hours of active work plus full cure time before use. The goal is to balance cost with durability; investing in good primers and a quality topcoat yields longer-lasting results and fewer touch-ups. PaintQuickGuide recommends developing a simple schedule that aligns with your project’s scope and environmental conditions. Authority sources include safety guidelines from OSHA and extension resources to help you plan safely and effectively:
- https://www.osha.gov
- https://extension.umn.edu
- https://www.nist.gov
Quick-start checklist and first project ideas
- Gather tools and materials: degreaser, abrasive pad, primer, metal paint, clear coat, PPE, masking supplies, and drop cloths.
- Clean and de-grease the stainless surface; ensure dryness before sanding.
- Lightly abrade to create a key, then wipe away dust with a tack cloth.
- Apply primer; allow to dry fully before painting.
- Apply thin coats of paint; allow each coat to dry before applying the next.
- Finish with a clear coat that matches the environment; cure fully before use.
- Start with a small, inconspicuous area to test adhesion and appearance before committing to the whole surface.
Project ideas: repaint a refrigerator panel, refresh stainless steel cabinet handles, or revitalize metal railings with a durable, coil-friendly finish.
Tools & Materials
- Isopropyl alcohol (70-99%)(For degreasing and residue removal)
- Mild dish soap(Used with water to clean surface)
- Lint-free cloths or microfiber towels(For cleaning and drying)
- Non-woven pad or 400–600 grit sandpaper(To create micro-roughness)
- Plastic scraper or nylon brush(Remove contaminants without scratching)
- Metal-etching or self-etching primer(Promotes adhesion to stainless steel)
- Paint for metal (enamel/epoxy/ceramic)(Choose compatible topcoat)
- Clear coat or sealant for metal(Adds durability and UV protection)
- Masking tape and drop cloths(Protect surroundings and edges)
- Respirator or organic vapor mask(Protect lungs from fumes)
- Nitrile gloves(Protect skin during handling)
- Paint thinner or reducer (if needed)(For cleanup or thinning if required)
Steps
Estimated time: 4-6 hours of active work plus curing time as specified by product labels
- 1
Assess workspace
Choose a well-ventilated area, remove items nearby, and cover floors with drop cloths. Safety first: ensure no ignition sources nearby and keep pets away.
Tip: Ventilation is critical; use a fan but avoid direct drafts onto the fresh coating. - 2
Clean the surface
Wipe down with isopropyl alcohol or a degreaser to remove oils and fingerprints. Rinse if needed and dry completely before sanding.
Tip: Use fresh cloths for each pass to avoid reintroducing oils. - 3
Roughen the surface
Lightly abrade with a non-woven pad or 400–600 grit sandpaper until the surface looks slightly dull. This creates a key for the primer.
Tip: Do not gouge or overly roughen; even a gentle scuff improves adhesion. - 4
Wipe away dust
Remove all dust with a tack cloth. Ensure the surface is clean and dry before applying primer.
Tip: Dust in crevices can ruin adhesion; use a small brush to reach corners. - 5
Apply primer
Apply a thin, even coat of metal-etching primer. Let it dry fully before a light second coat if recommended by the manufacturer.
Tip: Keep coats thin to prevent runs and puddling. - 6
Prime for look and durability
Ensure the primer is uniform; any misses will show through the finish. If needed, sand lightly between coats for flatness.
Tip: Don’t rush drying times; follow the product's guidelines. - 7
First coat of paint
Apply a thin coat of metal paint in smooth, even strokes. For spray, maintain the recommended distance and overlap.
Tip: Apply multiple light coats rather than a single heavy one. - 8
Between coats
Lightly sand or wipe between coats to remove nibs. Recoat after the surface is clean and dry.
Tip: Avoid sanding through to the primer. - 9
Second coat and final layer
Apply additional thin coats until full coverage is achieved. Finish with a protective clear coat if desired.
Tip: Be mindful of edges; corners can run more easily. - 10
Cure and inspect
Allow full cure time per product instructions before use. Inspect for uniform color and adhesion; touch up if needed.
Tip: Patience during curing yields a better, longer-lasting finish.
Your Questions Answered
Can you paint stainless steel without sanding?
Sanding or roughening the surface is generally recommended to improve adhesion. In some cases, a self-etching primer can compensate for milder prep, but most applications benefit from at least light scuffing.
A light scuffing helps the finish grip the stainless steel, even if you use a self-etching primer.
What primer should I use on stainless steel?
Use a metal-etching or self-etching primer designed for stainless steel to improve adhesion and prevent peeling.
Choose a metal-etching primer for a durable base.
Will paint last long on stainless steel?
Durability depends on prep, primer, and topcoat quality. With proper steps, the finish can be quite durable for indoor use; outdoor or high-wear areas may require stronger coatings and maintenance.
Yes, with proper prep and a good topcoat, it can last, but expect maintenance for outdoor use.
Can I paint automotive stainless steel parts?
Yes, but select automotive-grade paints and primers designed for metal. Check heat resistance and exposure considerations for under-hood or exterior parts.
Yes, but use paint meant for automotive metals and consider heat exposure.
Is spray painting better than brush-on for stainless steel?
Spray painting usually yields smoother, more even coverage on flat surfaces; brushes can work for small areas but risk visible strokes.
Spray is typically easier for even coverage, but brushes can work on small parts.
What safety measures should I follow?
Work in a well-ventilated space, wear PPE, and follow product directions to avoid fumes and skin contact.
Ventilate well and wear protective gear when painting.
Watch Video
Quick Summary
- Prepare the surface carefully for reliable adhesion
- Choose metal-etching primer compatible with your paint
- Apply thin coats and allow proper curing between layers
- Seal with a clear coat for durability and UV protection
- Test on a small area before full project