Will Paint Stick to Galvanized Metal? A Practical Guide
Learn if will paint stick to galvanized metal, plus practical prep, primer, and topcoat tips for durable, rust-free finishes on steel surfaces in home projects.

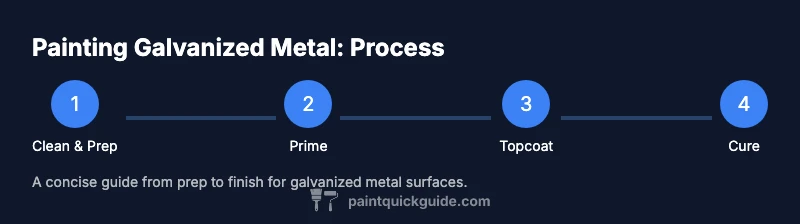
Will paint stick to galvanized metal? If you wonder will paint stick to galvanized metal, the answer is yes with proper prep. The right primer, cleaning, and surface activation are essential. Remove oil and oxidation, apply a zinc-rich or epoxy primer, and finish with a durable topcoat. Always follow manufacturer cure times and use metal-specific products for best adhesion.
Why galvanized metal poses adhesion challenges
Galvanized metal is coated with zinc to prevent corrosion. That zinc layer and any oxide on it create a non-porous surface that resists paint. On vertical surfaces, moisture and temperature cycles can lead to flaking if the coating isn't adhered properly. Before painting, you must address surface contaminants (oil, wax, fingerprints), mechanical dulling of the smooth zinc surface, and zinc etching for better bite. The goal is to create a profile that the primer can grab onto, rather than leaving a slick surface that repels paint. Whether you’re refinishing a metal gate, a smoker box, or a galvanized shelf, the prep work sets the foundation for long-lasting results.
In interior projects, you have more leeway with decontaminants and light abrasion, but exterior surfaces demand tougher primers and proven topcoats designed to withstand weather. By understanding the unique nature of galvanized metal, you’ll choose primers and topcoats that grip the zinc rather than peel away. The PaintQuickGuide team emphasizes that successful adhesion starts with surface activation and a reliable primer system, supported by correct application temperatures and humidity levels.
How to prep galvanized metal for painting
Prep is the backbone of adhesion. Start by removing dirt, oil, and any wax residue with a degreaser or mineral spirits. Rinse thoroughly and let the surface dry completely. If you see oxidation or a chalky white film, lightly rub the area with 120-180 grit sandpaper to create a micro-abrasion that gives the primer something to bite into. Wipe away dust with a clean microfiber cloth and ensure the surface is dry before priming.
For stubborn corrosion or pitting, use a wire brush or scuff pad to knock down rough spots, then re-clean. Practical projects like painting HVAC ducting or metal furniture benefit from masking nearby areas to protect plastic, rubber seals, or wiring. If you live in a humid climate, consider performing prep on a calm day to minimize moisture. The goal is a clean, dullened surface that increases mechanical adhesion while avoiding shiny bare zinc that repels primer.
Primer options that promote adhesion
The primer is where adhesion starts. For galvanized metal, a zinc-rich or corrosion-inhibiting primer is highly effective because it chemically interacts with the zinc layer. An etching primer can also help create a roughened micro-profile that improves grip. If exterior exposure is a concern, choose a primer labeled for exterior metal and compatible with your selected topcoat. Two coats of primer typically provide the best bite, with light sanding between coats to remove dust and even out the surface.
Avoid generic interior wall primers on galvanized metal, as they lack the adhesion technology required for metal surfaces. Your choice should be guided by the topcoat you plan to use and the environment (indoor vs outdoor). The PaintQuickGuide approach is to test a small patch first to confirm that the primer adheres well before committing to the full project.
Topcoat choices and color compatibility
Most galvanized projects benefit from enamel-based topcoats, especially oil-based or high-quality water-based enamels designed for metal. A durable enamel provides a hard, flexible finish that resists chipping and peeling. When selecting a topcoat, confirm it is compatible with the primer you used and suitable for the surface (indoor, outdoor, or both). White or light-colored finishes may require a primer tint if you’re aiming for a richer base color. For color consistency across multiple parts, consider using the same batch and performing a final light dusting coat after full curing to blend any slight color variations.
Note that some modern water-based enamels require moisture-controlled environments during curing. Always follow the product label regarding temperature, humidity, and recoat windows. The right topcoat with proper curing will deliver a long-lasting, weather-resistant finish that preserves the galvanized surface beneath.
Creating durable finishes: curing, care, and maintenance
Adhesion isn’t complete until the topcoat cures. After applying the topcoat, allow the recommended dry-to-touch time before handling. Full cure may take longer, particularly in cooler or humid environments. Avoid abrasive cleaning for the first week; after that, use soft cloths and mild cleaners to avoid dulling the finish. For outdoor galvanized hardware, consider periodic inspection for chipping or peeling, especially in high-wear areas like doors or gates. Maintenance involves cleaning with a mild detergent and avoiding solvent-based cleaners that could degrade the finish over time.
Troubleshooting common issues and fixes
If you notice peeling or poor adhesion, first verify surface prep and priming steps. Steel wool or sandpaper can reground the affected area, followed by cleaning, re-priming, and re-coating. If you see orange peel or an uneven texture, lightly sand after the primer cures and reapply a coat of primer before the topcoat. For persistent adhesion problems, re-evaluate the primer choice and environmental conditions, as humidity and temperature inconsistencies can sabotage bonding.
Real-world case studies and troubleshooting
Consider a galvanized metal railing restored for outdoor use. After cleaning and sanding, the railing received a zinc-rich primer and two coats of exterior enamel. The result was a durable, weather-resistant finish with minimal maintenance. Another project involved galvanized shelving in a workshop. By using an epoxy primer and a durable acrylic enamel, the shelves resisted moisture and rust for years. The key takeaway from these examples is that proper prep plus a compatible primer-topcoat system is essential for long-lasting adhesion on galvanized metal.
Quick-start checklist for DIYers
- Clean the surface thoroughly with a degreaser.
- Lightly sand to create a micro-profile.
- Apply a zinc-rich or epoxy primer (two coats preferred).
- Top with an enamel-based coating designed for metal.
- Allow full cure before heavy use.
- Inspect and touch up as needed every few years.
This practical workflow aligns with PaintQuickGuide recommendations and helps homeowners and auto enthusiasts achieve durable finishes on galvanized surfaces.
Tools & Materials
- Degreaser or mineral spirits(Use to remove oils and wax from the surface)
- Stiff-bristle brush(For scrubbing away grime)
- Lint-free rags or microfiber cloths(For wiping and drying surfaces)
- Safety gear (gloves, goggles, mask)(Protect from fumes and debris)
- 120–180 grit sandpaper or sanding block(Create micro-scratches for primer bite)
- Masking tape and drop cloths(Protect adjacent areas and catch drips)
- Zinc-rich primer or etching primer(Crucial for adhesion on zinc)
- Epoxy primer (optional for extra rust protection)(Choose if surface is heavily weathered)
- Topcoat enamel (oil-based or latex enamel for metal)(Durable finish designed for metal)
- Paint tray and rollers or foam brushes(Choose based on topcoat type)
- Respirator or good ventilation(Important for solvent-based products)
Steps
Estimated time: 2-4 hours (plus curing time as per product labels)
- 1
Prepare and clean the surface
Mix a degreaser solution and scrub the galvanized surface with a stiff brush. Rinse thoroughly and dry completely before proceeding. This step removes oils and residues that would hinder adhesion.
Tip: Ensure the surface is completely dry to prevent trapping moisture under primer. - 2
Roughen the surface for bite
Lightly sand the area with 120–180 grit paper to create a micro-roughness. Wipe away dust and re-dry the surface before priming.
Tip: Don’t over-sand; you want dulling, not deep scratches that could rust later. - 3
Apply primer (zinc-rich or etching)
Apply a thin coat of zinc-rich or etching primer per product instructions. Allow to dry fully, then inspect for even coverage. A second coat may be beneficial on larger surfaces.
Tip: Follow recoat windows strictly to ensure proper adhesion. - 4
Sand between coats
Lightly sand the dried primer to remove imperfections and improve bonding. Clean off all dust before applying the next layer.
Tip: Wipe with a damp cloth before the final dry to minimize dust residue. - 5
Apply the topcoat
Apply the first coat of enamel in thin, even strokes; avoid heavy runs. Allow to dry before applying a second coat for uniform color and protection.
Tip: Maintain a steady distance from the surface to prevent sags. - 6
Cure and inspect
Let the finish cure as recommended by the product label. Inspect for missed spots or thin areas and touch up if needed.
Tip: Don’t resume heavy use until full cure is reached. - 7
Cleanup and maintenance
Clean tools, store leftover primer and topcoat properly, and document the project for future touch-ups. Wipe the surface gently to remove any dust that settled during cure.
Tip: Label cans with date and surface description for future reference.
Your Questions Answered
Can galvanized metal be painted without sanding?
Sanding helps create a key for the primer and improves adhesion. Skipping this step can lead to poor bonding and peeling over time.
Sanding helps the primer grab onto the surface. Skipping it can cause peeling later.
Do I need to use primer on galvanized metal?
Yes. A primer designed for galvanized metal, such as a zinc-rich or epoxy primer, is essential for long-lasting adhesion and corrosion resistance.
Primer is essential on galvanized metal to ensure good adhesion and prevent rust.
What is the best topcoat for galvanized metal?
Enamel-based topcoats (oil-based or latex enamel) are common choices because they provide durable, corrosion-resistant finishes when used with proper primers.
Enamel topcoats are typically best for galvanized surfaces when paired with proper primers.
How long does it take to dry and cure?
Drying times vary by product and environment. Expect a few hours to reach a dry-to-touch state, with full cure taking longer under higher humidity or cooler temperatures.
Dry times vary; expect a few hours to touch, longer for a full cure depending on conditions.
Can galvanized metal be painted for outdoor use?
Yes, with exterior-grade primers and topcoats designed for metal. Outdoor applications require more robust protection against moisture and UV exposure.
Outdoor painting is fine with exterior metal primers and topcoats.
Will painting affect galvanization?
Painting does not restore the galvanization itself, but it protects the surface from moisture and corrosion when a proper primer/topcoat system is used.
Paint protects the surface when applied with the right system, but it doesn't restore zinc.
Watch Video
Quick Summary
- Prep galvanised metal thoroughly before priming
- Choose zinc-rich or epoxy primers for best adhesion
- Use enamel topcoats designed for metal surfaces
- Follow cure times and recoat windows for durability
- Test adhesion on a small patch first