Why Is Paint Peeling Off Drywall? Practical Fix Guide
Learn why paint peels on drywall, how to diagnose moisture and prep issues, and step-by-step fixes to restore a durable finish. Practical guidance from PaintQuickGuide for homeowners and DIYers.

Peeling drywall paint is usually moisture-related, not a failing primer. The quickest fix is to stop the moisture source, dry the wall, and re-prime with a stain-blocking primer before repainting. In many homes, moisture from leaks, high humidity, or poor surface prep leads to peeling, so tackling the root cause is essential. Addressing ventilation and sealing gaps helps prevent recurrence.
Why the paint is peeling off drywall
According to PaintQuickGuide, peeling paint on drywall is typically moisture-driven rather than a failure of primer, and the signs can be subtle at first. If you notice edge lifting, flaking patches, or glossy spots where a previous coat failed, you’re likely seeing moisture affecting adhesion. The keyword phrase why is paint peeling off drywall often signals moisture intrusion in one or more hidden cavities, such as around windows, behind sinks, or along plumbing traces. The root cause can be a slow leak, humidity buildup, or a surface that wasn't properly prepared before painting. In our experience, addressing the moisture source, ensuring thorough drying, and using a quality primer are the most reliable starting points. The PaintQuickGuide team found that prevention—via ventilation, dehumidification, and vigilant inspection—significantly reduces recurrence.
Common causes at a glance
Peeling drywall paint happens for a few main reasons. Moisture intrusion from leaks or roof gaps is the most frequent culprit, especially in bathrooms, kitchens, and basements. High indoor humidity from poor ventilation or seasonal changes can loosen adhesion even without a visible leak. Inadequate surface preparation—like painting on dust, grease, or damp plaster—undermines primer bonding. Painting over damp drywall or applying latex paint over oil-based stains without proper sealing also invites peeling. Finally, temperature fluctuations and poor ongoing maintenance, such as failing to address recurring condensation, contribute to ongoing adhesion problems. Recognize these patterns to plan a durable repair.
Moisture and humidity: the leading culprits
Moisture creates microscopic water films that reduce the bond between paint and drywall. When the wall dries unevenly after exposure, the coating can pull away in sheets. The role of humidity is especially pronounced in climates with wet seasons or in rooms with poor ventilation. Air movement matters: stagnant air traps moisture near the surface, making peeling more likely. In many projects, addressing airflow through vents or exhaust fans, repairing leaks, and using dehumidifiers during and after repairs dramatically improves long-term adhesion.
Surface prep mistakes that invite peeling
Improper surface prep is a common but fixable cause. Dusty, oily, or glossy surfaces resist primer adhesion, so paint peels in thin sheets rather than curing evenly. It’s essential to remove all loose paint, scrub away contaminants, and ensure the wall is completely dry before priming. Skipping sanding or using the wrong grit can leave micro-abrasions that trap moisture. For best results, use a primer compatible with the chosen topcoat and apply in thin, even coats. Rushing these steps increases the likelihood of recurring peeling after the next repaint.
The role of temperature and ventilation
Paint loves stable temperatures and good airflow. Sudden heat spikes or cold drafts can cause coatings to contract or expand at different rates, stressing the bond with drywall. In winter, moisture condenses on cooler walls, initiating peeling once the wall warms. In hot, humid spaces, poor ventilation compounds the problem. To minimize risk, keep the room within a comfortable temperature range during application and cure, and use exhaust fans or opening windows to move moist air away from the surface.
Assessing moisture in walls without heavy tools
Start with visual cues—staining around seams, persistent damp spots, or a musty odor can signal hidden moisture. A simple moisture check is to feel the wall; if the surface remains damp after 24–48 hours of airing out, you likely have a moisture source. Look for plumbing leaks, roof leaks, or poor flashing near windows. If you suspect hidden leaks, consider a professional moisture reading or infrared inspection. In many cases, once the moisture source is found and repaired, the wall can dry completely in a few days.</p>
Substrate and drywall specifics: plaster vs gypsum board
Drywall and plaster respond differently to moisture. Gypsum-based drywall is highly susceptible to moisture and can crumble if allowed to stay damp, while plaster tends to show cracks when bonded to a moisture-laden surface. If the substrate is damaged, simply painting over it will not fix the underlying issue. In renovations, replace damaged drywall sections or re-plaster as needed, then rebuild the wall surface with proper joint compound and tape. Always test the substrate condition before choosing primers and topcoats to ensure long-lasting adhesion.
Primer and paint selection for repairs
After preparing the surface and addressing moisture, choose a high-quality primer designed for adhesion on drywall. A stain-blocking primer (often shellac- or oil-based) helps seal water-soluble stains and prevents them from bleeding through the finish. For the topcoat, select a breathable latex or acrylic paint in a finish appropriate for the room (eg, eggshell for living spaces, satin for bathrooms). If the space has repeated moisture exposure, consider a moisture-resistant primer and paint system. Properly selecting products reduces the chance of future peeling and improves washability.
A practical repair workflow: plan, repair, repaint
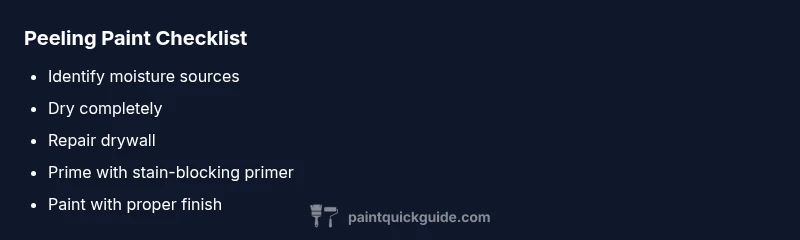
To fix peeling paint, follow a structured workflow: (1) locate and repair moisture sources (leaks, humidity, ventilation), (2) remove all loose paint and dry thoroughly, (3) repair damaged drywall with joint compound, (4) sand smooth and clean, (5) apply a stain-blocking primer, (6) apply topcoat evenly in thin layers, and (7) cure with proper ventilation. Document the root cause to prevent recurrence. This disciplined approach minimizes repeat peeling and yields a durable finish that lasts longer than a quick fix.
Safety, warnings, and when to seek professional help
Always wear protective gear when sanding or cutting paint, especially if lead-based paint may be present in older homes. Do not thin or apply primer near open flames, and ensure good ventilation to avoid inhaling fumes. If moisture problems persist after repairs, or if you notice structural issues such as cracks, mold growth, or widespread damage, call a licensed contractor or building professional. Persistent moisture is rarely solved by paint alone, and professional assessment can prevent further damage.
Prevention: long-term strategies to keep paint intact
Prevention hinges on moisture control and consistent maintenance. Improve ventilation in moisture-prone rooms, fix leaks promptly, and use a dehumidifier in damp climates. Regularly inspect walls for signs of dampness, peeling, or staining and address problems early. Repaint only after full drying, and store paints in a cool, dry place to maintain their shelf life. A proactive approach reduces repeated peeling and helps you maintain a fresh, durable finish for years.
Steps
Estimated time: 4-6 hours
- 1
Gather supplies and protect the area
Collect all tools (scraper, sanding block, shop vac, dehumidifier, primer, paint, brushes) and protect floors with a drop cloth. Turn off the power to nearby outlets for safety when working high on ladders. Ventilate the space well to keep moisture moving out.
Tip: Label sections you will repair to keep tasks organized. - 2
Inspect and locate moisture sources
Carefully inspect the area for signs of leaks or ongoing moisture. Check plumbing, roof lines, and window flashing. Document findings to prevent rework after repairs.
Tip: Use a flashlight at night to spot hidden leaks around fixtures. - 3
Remove loose paint
Using a putty knife or scraper, remove all visibly peeling and loose coating. Do not forcefully pry off stubborn sections that may damage the drywall. Only remove material that easily lifts away to avoid extra damage.
Tip: Work in small areas to avoid creating large bare patches. - 4
Dry the wall completely
Use a dehumidifier and fans to accelerate drying. If the wall remains damp, pause and continue drying for another 24–48 hours before proceeding. Moisture must be gone to prevent new peeling.
Tip: Check with a moisture meter if available. - 5
Repair damaged drywall
Patch any gouges with joint compound, embed mesh tape over seams, and feather edges smooth. Allow compound to dry completely, then sand lightly to a flush finish. Remove dust with a microfiber cloth.
Tip: Apply thin coats; multiple light coats are better than one thick one. - 6
Prime the repaired area
Apply a stain-blocking primer on the repaired area, extending slightly beyond the patch. This seals moisture and helps adhesion for the topcoat. Let the primer dry fully according to the label.
Tip: Choose a primer compatible with your topcoat and stains. - 7
Apply the paint
Use thin, even coats of latex or acrylic paint appropriate for interior surfaces. Allow adequate drying time between coats and avoid heavy applications that can trap moisture.
Tip: Back-roll to ensure uniform coverage and reduce texture differences. - 8
Check for touch-ups and curing
Inspect the finish after the final coat for any missed spots. Touch up and allow the wall to cure in a well-ventilated space for at least 24–48 hours before normal use.
Tip: Keep humidity low during the initial curing period. - 9
Prevent recurrence with maintenance
Install or improve ventilation in moisture-prone rooms, fix leaks promptly, and consider humidity control devices. Schedule seasonal checks to catch issues early before peeling starts.
Tip: Keep a simple log of repairs and moisture events for future reference.
Diagnosis: Paint starts peeling in patches after a humidity spike or water intrusion.
Possible Causes
- highHidden moisture intrusion from a leak
- mediumSurface prep issues or paint applied over damp surface
- lowChronic high humidity/condensation
Fixes
- easyIdentify and repair the moisture source (leak, plumbing, roof) and dry the area completely
- easyClean and prepare the surface: remove loose paint, clean, and dry thoroughly
- easyPrime with a stain-blocking primer and repaint using appropriate interior paint
Your Questions Answered
What is the most common cause of peeling paint on drywall?
Moisture intrusion is the leading cause. Check for leaks, hidden water damage, and humidity issues in the room. Addressing moisture is key before repainting.
Moisture is usually the culprit. Look for leaks and humidity, and fix those before you repaint.
Can I fix peeling paint myself?
Yes, many peeling paint issues can be solved with a careful moisture check, proper drying, surface prep, priming, and painting. If moisture persists or the area is large, consider professional help.
Yes, you can fix it yourself if you address moisture, prep well, and prime properly.
Should I remove all peeling paint before repainting?
Yes. Remove loose and peeling material, clean the area, and ensure the surface is dry before priming. This creates a solid base for adhesion.
Yes, remove peeling paint to expose clean, dry drywall before priming.
How long does a repair typically take?
Time varies with moisture handling and cure times. Plan for a day or two, including drying periods and multiple coats where needed.
It usually takes a day or two, plus drying time between steps.
When should I call a professional?
If you can't locate or fix the moisture source, if there's mold growth, or if the damage is extensive, consult a licensed contractor or building professional.
Call a pro if moisture persists, mold is present, or damage is widespread.
Watch Video
Quick Summary
- Identify and fix moisture sources before repainting.
- Proper surface prep is essential for lasting adhesion.
- Choose the right primer and paint for drywall repair.
- Ventilate during and after painting to prevent recurrence.
- Call a professional if moisture or structural issues persist.