Why Is Paint Not Working? A Practical Troubleshooting Guide
Urgent, practical troubleshooting for why paint isn't working—covering prep, compatibility, environment, and technique to fix failures fast.

Paint issues are usually traceable to prep, product compatibility, or environmental factors. Start with clean, dry surfaces, correct primer/coat pairing, and favorable conditions; if this doesn’t fix it, follow the full step-by-step guide below to diagnose and remedy the problem.
Why is paint not working? Signals you should not ignore
If you're wondering why is paint not working, the answer often points to three categories: surface prep, product compatibility, and environmental conditions. According to PaintQuickGuide, many failures begin before you apply color — wrong cleansing, residual oils, or a mismatched primer can sabotage adhesion and finish. In this section, we’ll map out the most frequent signals and set the stage for a reliable diagnosis. You’ll learn to verify that the substrate is clean, dry, and ready for primer, and that the coating system (primer, sealer, base coat, topcoat) is designed to work together. The aim is to move quickly from guesswork to a structured plan you can execute this weekend, with predictable results.
Surface prep and priming: the foundation of success
Paint not working often starts with the surface. If the substrate isn't properly prepared, even the best paint will fail to bond or dry evenly. Start by identifying the material (wood, metal, drywall, plastic) and check for old coatings, contamination, or moisture. Clean the surface with a proper degreaser, rinse, and let it dry completely. Light sanding then removes gloss and provides key mechanical adhesion. Prime with a compatible product for the base material and, if the previous layer is glossy or stained, use a stain-blocking primer. If you suspect moisture intrusion, resolve that issue before coating. This is the most common cause you can fix without specialized tools. According to PaintQuickGuide, thorough prep doubles your odds of a durable finish.
Paint compatibility and primers: pairing matters
Not all primers pair perfectly with every topcoat. Incompatibility shows up as peeling, wrinkling, or slow drying, especially when you mix brands or switch between acrylic and alkyd systems. Read the label for dry times, recoat windows, and surface suitability. When in doubt, perform a small test patch on a hidden area and document results. If you observe tackiness after a cure period, evaluate whether the primer or the paint contains a chemical that’s incompatible with the substrate. Paint QuickGuide recommends sticking to the same brand family for primers and topcoats or using a declared multipack system to avoid surprises. This simple check saves hours of frustration.
Environmental conditions: heat, humidity, and curing
Environment governs how paint dries and adheres. High humidity or low temperatures can slow cure and create laps or blisters. If you’re asking why is paint not working in a damp climate, the answer often lies in air flow and ambient conditions rather than the coating itself. Check the relative humidity and surface temperature with a hygrometer and thermometer. Aim for manufacturers’ recommended ranges, typically in the mid-range of 50-70% relative humidity and 60-75°F (16-24°C) for many latex paints. Ensure good air movement to avoid condensation on newly applied coats. If conditions aren’t right, delay application until conditions improve.
Application technique: coats, thinning, and tools
Another common reason paint fails is application technique. Thick coats take longer to dry and can trap solvents, causing tacky finishes. Follow the label directions for thinning and roller or brush load. Apply in thin, even coats and maintain a wet edge to avoid lap marks. For spray applications, adjust the nozzle for nozzle distance and spray pattern, and keep a steady hand to ensure uniform coverage. Use high-quality brushes or rollers suited to the texture and substrate. If you see poor leveling or brush marks, reset your approach with the right tool and stroke rhythm.
Finish type and substrate: wood, metal, or drywall
Different substrates behave differently with paint finishes. Wood can swell with humidity, causing cracking around joints; metal can rust if the coating isn’t corrosion-resistant; drywall may absorb coatings unevenly if the primer isn’t built for porosity. Consider the finish type (matte, eggshell, semi-gloss) and the substrate’s porosity as you troubleshoot. Some paints require cured sealants or binders to perform properly on particular surfaces. If your finish looks cloudy or has micro-cracking, revisit substrate compatibility and consider a dedicated primer or sealer. Accurate substrate matching saves rework and protects surface integrity.
Symptoms, tests, and quick fixes you can try now
Patchy coverage, tackiness, or color bleed are red flags. Start by cleaning and drying the surface, then recheck coats in thin layers. If adhesion remains poor, test a small area with a compatible primer and topcoat. Keep notes of each test result to guide the next step. If the symptoms persist after a controlled patch test, it’s time to revert to the last good prep and consider specialist primers or binders. This approach minimizes waste and helps you decide whether professional help is needed.
Plan of action for fix-and-verify
Create a controlled plan: document the exact product line, surface type, and current conditions. Fix prep issues first, like cleaning, sanding, and priming with a compatible system. Move to thin coats, maintain a wet edge, and observe the cure window. Do a cross-check by applying a test patch in a discreet area and evaluating adhesion, coverage, and finish. If the patch still fails, escalate to substrate-specific primers or consult the product’s technical support. This structured approach reduces guesswork and speeds results.
Prevention and maintenance for future projects
Keep a checklist for every project: match primers to topcoats, verify surface cleanliness, and maintain optimal curing conditions. Store paint properly, follow label guidance for storage and shelf life, and never mix products from incompatible families. Document environmental conditions during each coat to identify trends and improve future outcomes. Regularly test new products on small areas before committing to large projects, and keep a few spare test patches for ongoing reference.
Steps
Estimated time: 60-90 minutes
- 1
Assess symptoms and product details
Document the exact product names, batch numbers, and surface material. Note symptoms such as patchiness, tackiness, or poor leveling. This baseline helps narrow the cause and guides testing.
Tip: Take photos of issues and test patches for reference. - 2
Prep the surface properly
Remove contaminants with the recommended cleaner, rinse thoroughly, and allow full drying. Lightly sand glossy surfaces to promote adhesion. Recheck porosity and repair any damaged areas.
Tip: Always wear PPE when sanding or cleaning. - 3
Check primer and topcoat compatibility
Verify labels for surface type, dry times, and recoat windows. If in doubt, revert to a matched primer/topcoat system or perform a patch test.
Tip: Do a small patch test before committing to a full coat. - 4
Control environmental conditions
Monitor temperature and humidity; avoid applying in extremes. Use fans or a dehumidifier to reach recommended ranges before painting.
Tip: Ventilate but avoid direct air blowing on fresh coats. - 5
Apply coats correctly
Use thin, even coats with proper technique. Maintain a wet edge to prevent lap marks and ensure uniform finish. Allow adequate drying time between coats.
Tip: Keep tool use consistent to avoid texture variations. - 6
Evaluate and verify results
Inspect adhesion, coverage, and curing after the recommended period. If issues persist, consider substrate-specific primers or professional help.
Tip: Document outcomes to inform future projects.
Diagnosis: Paint won't adhere, dries unevenly, or finishes poorly after application
Possible Causes
- highPoor surface preparation or surface contamination
- highIncompatible primer and topcoat or wrong product family
- mediumUnfavorable environmental conditions during application or curing
- mediumExpired, aged, or improper paint storage affecting performance
- lowIncorrect thinning or applying coats too thick
Fixes
- easyThoroughly clean, degrease, rinse, and let surface dry; lightly sand for adhesion
- mediumSelect a compatible primer/topcoat system or perform a small test patch to confirm bonding
- easyControl environment (temperature/humidity) and ensure proper curing time before recoating
- easyInspect paint for shelf life; discard expired product and mix or stir properly before use
- easyApply thin coats with proper technique; avoid over-thinning and over-brushing
Your Questions Answered
What are the most common causes of paint failing to cure?
Most curing issues stem from poor surface prep, improper primer compatibility, and unsuitable environmental conditions. Addressing these factors in order often resolves cure problems quickly.
The most common causes are prep, primers, and environment. Fix those first to improve curing.
How can I tell if my primer is compatible with my paint?
Check the label for compatibility notes and drying windows. If in doubt, test a small patch and compare results before committing to a full coat.
Look for official compatibility notes and do a patch test to confirm.
Can environmental conditions really affect drying time?
Yes. Temperature and humidity influence drying times and film formation. Paint manufacturers specify recommended ranges; deviations can cause tackiness or poor adhesion.
Absolutely—temperature and humidity change how paints dry and cure.
Should I strip paint and start over or just recoat?
If adhesion is poor or peeling occurs, stripping and re-coating with correct prep is often best. For minor issues, spot repairs with a compatible product may work.
If it’s peeling, strip and recoat. For minor flaws, patch and recoat might be enough.
How long should I wait between coats for a reliable finish?
Follow the label’s recoat window and cure guidance. Waiting too long or too short can ruin adhesion or finish quality.
Follow the label for optimal wait times between coats.
When should I call a professional painter?
If unknown primers, persistent failures, or large areas require uniform results, consider a professional assessment. A pro can diagnose substrate issues and offer a lasting solution.
When in doubt or for large jobs, a pro can ensure even results.
Watch Video
Quick Summary
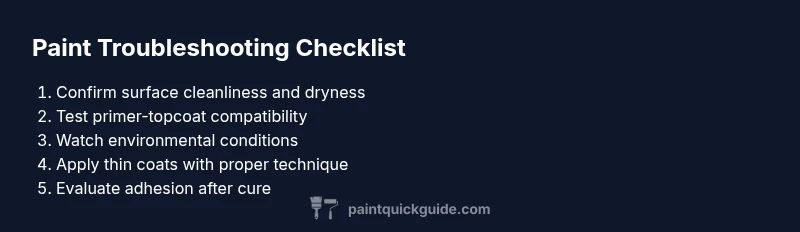
- Check prep and surface cleanliness before coatings.
- Match primers to topcoats for compatibility.
- Control temperature and humidity during application.
- Use thin coats and proper technique to avoid failures.