When to Paint Air Dry Clay: A Practical Guide
Learn when to paint air dry clay for best adhesion and finish. This guide covers drying times, testing dryness, priming, painting techniques, and finishing to help DIYers and crafters achieve professional results.

According to PaintQuickGuide, painting air-dry clay should wait until the piece is fully dry to the core, usually 24-72 hours for small pieces and longer for thicker forms. Check that surfaces are hard, no color transfer, and no flexible feel. Light sanding and a clean surface improve paint adhesion, using acrylic paints in thin layers.
Why Timing Matters for Painting Air Dry Clay
For painters, timing can make or break the final look. Air-dry clay is porous and holds moisture; painting too soon traps moisture and can cause cracking, warping, or poor adhesion. The key is to wait until the piece has dried through, which is rarely visible from the surface alone. A piece might feel dry to the touch on the outside but still contain moisture inside. The PaintQuickGuide approach emphasizes checking for a uniform dryness across the entire piece, not just the outer skin. This often means waiting an extra day or two if the sculpture is thick or has intricate interior cavities. In addition to dry time, temperature and humidity influence the evaporation rate. A warm, dry room will dry faster, while high humidity slows things down. For best results, plan painting days with an estimated window to accommodate drying, sanding, priming, and multiple paint coats. When you respect the dryness timeline, you reduce the risk of paint peeling or cracking later, and you achieve more even color saturation across textured surfaces.
Factors That Affect Dry Time
Dry time for air dry clay is influenced by several practical variables. Thickness is the most obvious, with thin surfaces drying quickly and thick bodies retaining moisture longer. Humidity and ambient temperature play large roles; high humidity slows water loss, while warm, dry air accelerates it. Air circulation also matters—good airflow helps moisture escape from porous surfaces. The type of clay matters too; some formulations include additives that alter porosity and curing behavior. Finally, surface finish and moisture trapped inside decorative cavities can extend drying time. According to PaintQuickGuide analysis, predictable dry times improve painting outcomes by reducing warping and color blotches. Plan for a drying window based on piece size, climate, and workspace conditions, and avoid rushing the process especially with complex shapes.
Preparing the Clay Before Painting
Preparation is essential to ensure paint adhesion and a smooth finish. Start by removing dust and debris from the surface with a soft brush. Lightly sand any rough areas with fine-grit sandpaper to create a uniform, slightly matte surface, which helps primer and paint grip. If the piece has fingerprints or oil residues, wipe it with a clean, slightly damp cloth and allow it to dry completely. Check for hidden pockets of moisture by gently tapping and feeling for any soft spots. Conditioning the clay by kneading and smoothing can reduce cracking later and improve uniform drying depth across the sculpture. Drying times should be recalculated if you modify the size or texture of the piece during preparation.
How to Test Dryness Without Breaking the Piece
Testing dryness safely protects your artwork. Tap a small, inconspicuous area with a fingernail and listen for a solid sound rather than a hollow one. Gently flex a subtle edge to detect any snap or springback indicating moisture. Slice a tiny, hidden section to peek at the interior; if the inner material feels cold or damp, it needs more time. Use a moisture meter designed for crafts if available, but rely primarily on tactile cues and the absence of tackiness. For larger projects, rotate sections to ensure even drying rather than concentrating moisture in one spot. When in doubt, extend the drying period by a day or two to prevent later damage.
Choosing Paints and Primers for Air Dry Clay
Acrylic paints are the standard choice for air dry clay due to their flexibility and quick dry time. Before painting, apply a primer or gesso to seal the surface and enhance color adhesion, especially on very smooth or glossy clay. Lightly sand between coats for a smoother finish and avoid thick layers that can crack as the piece flexes during drying. For the final seal, use a clear acrylic varnish or sealant compatible with acrylic paints, ensuring the piece is fully dry before application. If you work with textured or polished finishes, test the combination of primer, paint, and sealant on a small scrap piece first to confirm color fidelity and adhesion. This approach minimizes surprises on your finished sculpture and helps PaintQuickGuide readers plan accordingly.
Step-By-Step Dry-to-Paint Process
The drying to painting workflow is: (1) Confirm dryness across the entire piece, (2) Prepare a clean, dust-free workspace, (3) Apply a primer or gesso in a thin, even layer, (4) Allow primer to dry completely before painting, (5) Apply acrylic paint in thin layers, letting each coat dry before adding the next, (6) Seal with a compatible varnish after the final layer is fully dry.
Techniques for Painting Air Dry Clay
Experiment with layering techniques to create depth. Use thin washes to build color gradually, and avoid heavy single coats that can crack as the clay shrinks. Dry brushing can highlight textures, while stippling adds subtle color variation. For crisp lines, use masking tape or a fine-tipped brush; re-tape between coats to prevent bleed. Blending colors on a damp surface can create smooth gradients, but be mindful of drying times to avoid muddy transitions. A matte finish often looks natural on clay, while a satin or gloss coat can enhance durability in display pieces. Keep paint in a well-ventilated area and protect surrounding surfaces from splatters.
Common Mistakes and How to Fix Them
Common issues include painting too soon, which traps moisture; thick coats that crack; and insufficient drying leading to peeling. Remedy by letting the piece dry longer, applying thinner coats, and ensuring surfaces are dust-free before repainting. If paint bubbles, inspect for trapped moisture and sand the affected area lightly before reapplying. If colors appear uneven, lightly sand between coats and adjust your primer choice for compatibility. Handling pieces with fresh paint can leave fingerprints; wait for full cure before final handling.
Finishing and Curing After Painting
After painting, allow all layers to cure fully in a dust-free environment. Apply sealant only after the final paint layer is completely dry to prevent smudging. For enhanced durability, apply multiple thin coats of sealer, allowing adequate drying time between coats. If the project will be handled or displayed outdoors, select a weatherproof sealant and consider UV protection. Store unfinished pieces away from direct sunlight or high humidity to maintain color integrity. Regularly check painted surfaces for micro-cracks and touch up if needed to keep the finish looking fresh.
Tools & Materials
- Air-dry clay piece(Ensure the form is complete and clean before painting)
- Acrylic paints(Choose colors that suit your project; thin layers work best)
- Primer or gesso(Use a thin even coat; let dry fully before painting)
- Fine-grit sandpaper (around 400-600 grit)(Lightly smooth surfaces prior to priming)
- Soft brushes (various sizes)(For even coats and detail work)
- Water cup and cloth(Keep brushes clean between colors)
- Clear acrylic sealant(Use after final paint layer is fully dry)
- Masking tape or frisket(Helpful for clean edges or masking details)
- Moisture meter (optional)(Can help gauge interior dryness on larger pieces)
Steps
Estimated time: 2-3 hours
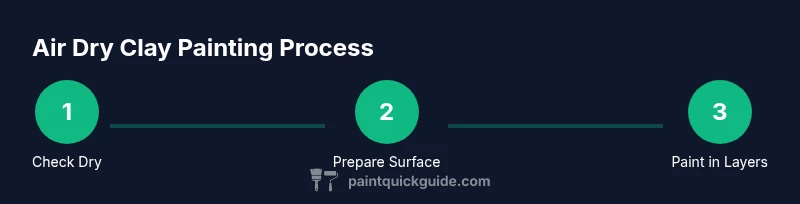
- 1
Check dryness in multiple spots
Inspect your piece for uniform dryness using tactile and visual cues. If any area still feels cool or damp, extend drying time before painting. Why: moisture pockets can cause adhesion problems and future cracking.
Tip: Test thick areas first, as they take longest to dry. - 2
Prepare the painting surface
Wipe away dust with a soft brush or cloth. If the piece is dusty, dust can cause rough paint texture or poor adhesion. Why: a clean surface helps primer bite evenly.
Tip: Avoid using water on fully dry clay; a damp cloth is sufficient. - 3
Apply a thin primer or gesso
Brush on a thin, even coat and let it dry completely. Why: primer seals the surface and improves paint adhesion, especially on shiny or smooth areas.
Tip: Use long, smooth strokes to avoid raised edges. - 4
Paint in thin layers
Apply multiple light coats rather than one heavy coat. Allow each coat to dry fully before applying the next. Why: thin layers prevent cracking and give color depth.
Tip: Wait 15-30 minutes between coats in a warm room. - 5
Add details and texture
Build color gradually and blend edges while the paint remains workable. Why: controlled layering yields a richer finish and reduces blotchiness.
Tip: Use a dry brush technique for texture without adding too much paint. - 6
Seal and cure
Apply a clear sealant after the final paint layer is fully dry. Why: sealing protects the finish and increases durability for display or handling.
Tip: Test sealant on a scrap piece first to ensure compatibility.
Your Questions Answered
How long does air dry clay need to dry before painting?
Most small air-dry clay pieces are ready to paint after 24-72 hours of drying, but larger or thicker pieces may require longer. Always check for an even, hard surface and no soft pockets before painting.
Most pieces are ready in about a day or two, but bigger projects may take longer.
Can I paint air dry clay with water-based paints?
Yes. Acrylics are commonly used because they dry quickly and flex with the clay as it cures. Avoid oil-based paints that may not adhere well without proper priming.
Acrylics are the go-to, since they dry fast and flex with the clay.
Should I seal air dry clay after painting?
Sealing is recommended for durability and protection, especially for pieces handled often or displayed outdoors. Choose a sealant compatible with acrylic paints and apply in thin coats.
Yes, seal after the paint is fully dry to protect the finish.
What happens if I paint before the clay is dry?
Painting on damp clay can trap moisture, causing blistering, cracking, or peeling later. If this happens, allow more drying time and plan a recoat after dryness.
Painting too early can ruin the finish; let it dry first.
Can I speed up drying without risking cracks?
You can improve air circulation and use a warm, dry space, but avoid direct heat like a hair dryer, which can crack the clay. Patience is often the best approach for even drying.
Avoid direct heat; air circulation helps, but don’t rush.
Is sanding necessary before painting air dry clay?
Light sanding helps create a smooth base and better primer adhesion, especially on rough textures. Do not over-sand, which could abrade details.
A light sand is usually enough to prep the surface.
Watch Video
Quick Summary
- Wait for full dryness before painting to avoid adhesion issues.
- Use thin primer and multiple light paint coats for best results.
- Seal after drying to protect the finished surface.
- Test dryness with multiple indicators (tactile, visual, and test area).
- Paint with acrylics for flexibility and easy cleanup.