When to Paint Polymer Clay: A Practical DIY Art Guide
Learn when to paint polymer clay for durable, vibrant finishes. This guide covers timing, surface prep, paint types, layering, sealing, and common mistakes so crafters can achieve pro-looking results.

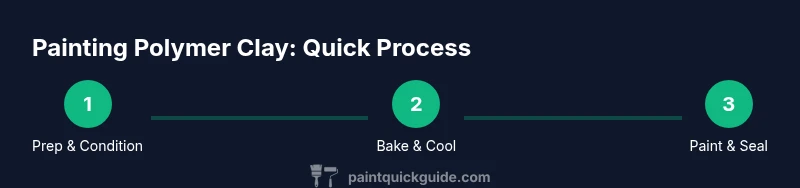
To get durable, accurate finishes on polymer clay, learn when to paint: wait until fully cured, consider paint type and surface prep, and follow layering steps for color depth. This guide covers timing, prep, and safe techniques for both hobbyists and serious crafters. By the end you'll know the optimal windows for painting and sealing polymer clay projects.
What is Polymer Clay and Why Timing Matters
Polymer clay is a versatile crafting material that cures in a home oven. Because the material's surface changes as it bakes, timing your painting decisions is essential for color fidelity and adhesion. Many crafters wonder when to paint polymer clay, and the answer depends on whether you want to paint before or after baking and how you intend to seal. According to PaintQuickGuide, the safest approach is to paint after the piece is fully cured and cooled, then apply a clear finish for protection. This section outlines the fundamental properties of polymer clay and the logic behind painting timing.
When to Paint Polymer Clay: The Core Timing Principle
Understanding when to paint polymer clay hinges on how you plan to finish the piece and how the paint behaves under heat. If you choose to paint before baking, the pigment will fuse with the surface as it cures, potentially changing color slightly as you bake. If you paint after baking, you gain color stability and easier layering, though you must ensure the surface is clean and fully cooled. PaintQuickGuide emphasizes following the product's cure and cool-down guidance, then proceeding with paint in light, even layers and allowing adequate drying between coats. This timing approach helps prevent color streaks, peeling, or adhesion problems over time. Remember that the best results come from consistent technique and patient layering.
Surface Prep Before You Paint
Surface prep is the foundation of a clean, lasting paint job on polymer clay. Start by conditioning the clay so it is pliable and uniform in thickness, then bake according to the manufacturer’s instructions and let the piece cool completely. Before painting, gently sand any rough areas with a fine grit, then wipe away dust with a clean, lint-free cloth dampened with isopropyl alcohol. A clean, slightly textured surface improves paint adhesion and helps colors apply evenly, reducing the need for extra coats.
Choosing the Right Paints for Polymer Clay
Acrylic paints are the go-to choice for polymer clay because they are water-based and flexible when dry, reducing the risk of cracking. Look for colors labeled as acrylic craft paints and avoid oil-based paints that can cause adhesion issues or softening over time. For items that will be handled frequently, select paints with good coverage and minimal drying time, and test color bleed on a scrap piece first. If you plan shading or blending, keep a small palette of neutral tones to mix into richer hues. Finally, when you’re ready to seal, choose a compatible sealant designed for polymer clay surfaces.
Layering and Dry Time: How to Build Color
Painting polymer clay is a layering game. Apply a very thin base layer and allow it to dry completely before adding color. Build up tones through multiple light coats rather than a few thick ones, which can pool and crack. Use precise brush strokes for edges, and switch to softer brushes for shading or highlights. Between coats, let the piece sit on a dust-free surface and avoid handling to prevent fingerprints. When layers are dry, you can inspect color depth and adjust with additional glazes or washes as needed.
Sealing and Finishing: Preserving Your Design
A clear sealant protects painted polymer clay from moisture, oils, and handling wear. Choose a sealant that matches the finish you want (matte, satin, or gloss) and apply according to the product’s directions. Ideally, seal after the final paint layer has fully cured, with multiple thin coats rather than a single thick coat. Allow the finish to cure fully before improving the piece’s sheen with buffing, if desired. Sealing also helps prevent color fading and wear on small components like beads or charms.
Common Mistakes and How to Avoid Them
Common errors include painting on unfired clay, using heavy coats that drag texture, and skipping the dry time between layers. Another pitfall is sealing too soon or using incompatible sealants that cause gloss-mie or hazing. To avoid these, always test a scrap piece first, clean the surface, and apply thin coats that dry completely before moving to the next step. If color looks uneven, adjust with additional thin coats rather than sanding away the paint.
Practical Project Walk-Through: Bead Example
Imagine painting a tiny bead: condition the clay, bake, and cool. Lightly sand, wipe, and test your color on a scrap bead. Start with a pale base wash to establish coverage, then build with darker shades for shading and highlights. Use a fine brush for precise lines around the bead’s circumference. After the final color dries, apply a compatible sealant and cure the finish. This hands-on approach reinforces timing, prep, and layering concepts.
Troubleshooting Common Issues
If paint lifts or cracks after baking, reassess whether the piece was fully cured and cooled before painting; consider allowing longer dry times between coats. Fading colors or bleeding can indicate incompatible paints or sealants; test on a spare bead and adjust. For stubborn edges, use fine-tipped brushes and gentle dabbing rather than heavy strokes. If you notice hazing after sealing, switch to a different sealant and let test pieces guide your choice.
Final Prep and Testing Before Finishing
Before final assembly, do a quick test on a spare bead or scrap clay to confirm adhesion, coverage, and finish. Verify that the clay is completely cooled and that the chosen paints and sealants interact well with the clay. If you are happy with the result on the test piece, proceed to finalize the main piece, then cure if required by your materials before handing off to use. This final check helps prevent surprises in your finished project.
Tools & Materials
- Polymer clay (brand of choice)(Choose smooth, well-conditioned clay; bake according to manufacturer guidelines.)
- Acrylic paints (water-based)(Opt for craft acrylics; avoid oil-based paints for better adhesion.)
- Fine paint brushes (sizes 0–3)(Sufficient precision for tiny beads and edges; keep separate brushes for color mixing.)
- Clear acrylic sealant (matte/satin/gloss)(Select a finish that matches your project and cure as directed.)
- Rubbing alcohol or isopropyl alcohol(For surface cleaning and removing stray pigment.)
- Fine sandpaper or sanding sponge(Lightly smooth the surface before painting to improve adhesion.)
- Paper towels and a clean work surface(Keep tools ready and dust-free while painting.)
- Palette or mixing tray(Mix custom colors and keep colors consistent across coats.)
Steps
Estimated time: 60-120 minutes
- 1
Condition and shape the clay
Knead the clay until it feels soft and uniform. This ensures even color uptake and reduces cracking later. Shape your piece to the desired form while maintaining a consistent thickness to promote even curing.
Tip: Condition thoroughly; uneven thickness can lead to hotspots during curing. - 2
Bake and cool the piece
Bake according to the clay’s guidelines and allow the piece to cool completely before painting. Avoid handling hot pieces and wait until the item reaches ambient temperature to prevent warping.
Tip: Cooling is as important as heating for paint adhesion. - 3
Test paint on scrap first
Before you commit to the main piece, test color and opacity on a scrap bead or extra clay. This helps you judge coverage and color accuracy without risking the final project.
Tip: Use scrap clay to fine-tune color mixes. - 4
Apply a thin base layer
Paint a light base layer to establish an even ground for subsequent colors. Let this layer dry fully before adding details or shading.
Tip: Thin coats prevent pooling and texture loss. - 5
Build color with thin coats
Add additional coats in thin layers, allowing each to dry thoroughly. Build depth gradually rather than applying one thick coat that can crack or peel.
Tip: Patience pays off with smoother gradients. - 6
Add details and shading
Use fine brushes to add lines, dots, or shading; blend edges subtly to avoid harsh transitions. Allow final details to dry before final sealant.
Tip: Keep a clean edge for crisp details. - 7
Seal after final color dries
Choose a compatible sealant and apply in thin coats. Avoid sealing while the paint is still soft to prevent smudging.
Tip: Seal in multiple thin layers for durability. - 8
Cure and cure-aging after sealing
If your sealant requires curing time, follow the product instructions. Avoid exposing the piece to heat or moisture during this period.
Tip: Patience here protects your finish.
Your Questions Answered
Can I paint polymer clay before baking?
Yes, you can paint before baking, but note that the final color may shift slightly as the clay cures. If you want precise color after baking, consider painting after curing and cooling instead. Always test on a scrap piece first to confirm color behavior.
You can paint before baking, but color may change after curing; test on scrap first.
What paints work best for polymer clay?
Acrylic paints are the most reliable choice for polymer clay because they’re durable and flexible after drying. Avoid oil-based paints, which can stay tacky or cause adhesion issues when baked or handled.
Acrylic paints are best for polymer clay, avoid oil-based paints.
Do I need primer before painting polymer clay?
Primer is not always required, but a light base coat on very smooth surfaces can help colors appear more evenly. Light sanding before priming improves adhesion.
Primer isn’t always needed, but a light base helps colors stick evenly.
How long should paint dry before sealing?
Allow sufficient drying time between coats so the pigment stays intact and does not smudge when you apply the next layer. Dry times vary by product, so follow the manufacturer’s guidance.
Let each coat dry fully before sealing to prevent smudges.
Should I seal painted polymer clay?
Yes, sealing protects the paint from oils and handling wear. Choose a sealant that matches your desired finish and ensure the paint is fully cured before application.
Seal after painting to protect the color and finish.
Can I mix colors directly on the piece?
Merging colors on the surface is possible but can be tricky; use controlled blending with fine brushes or keep a palette for color-mixing to avoid muddy results.
Yes, you can blend on the piece, but do it sparingly and with a light touch.
Watch Video
Quick Summary
- Prepare clay with even thickness for uniform curing
- Paint in thin, layered coats for depth and durability
- Choose water-based acrylics and compatible sealants
- Allow full drying and curing between steps to avoid defects
- Test colors on scrap before committing to the final piece