When Can You Paint Over Plaster? A Practical DIY Guide
Learn exactly when and how to paint over plaster, including curing, moisture checks, primer choices, and a step-by-step workflow for a durable, long-lasting finish.

You can paint plaster once the surface is fully dry, dust-free, and stable. Verify curing by confirming the plaster has dried to the point where it no longer feels cool or damp. Clean and prime with a bonding primer before painting to ensure adhesion and a durable finish. If you see any moisture or cracking, address those issues first.
Understanding the question: when can you paint over plaster
If you’re planning a fresh plaster job or renovating an older space, you’re likely wondering, when can you paint over plaster? The short answer is: after the plaster has fully dried, cured, and been properly prepared for painting. The exact timing depends on plaster type (lime, gypsum, or cement-based plasters), thickness, ventilation, and ambient humidity. In practice, homeowners and DIY enthusiasts should avoid applying paint to surfaces that still feel cool, damp, or chalky. According to PaintQuickGuide, success hinges on achieving a solid, stable base, not just a clean surface. Before you pick up a brush, ensure the wall has stopped shedding moisture and that any cracks or surface imperfections have been addressed. This patience pays off with fewer issues like blistering, peeling, or cracking down the line, and it sets the stage for a smoother, longer-lasting finish.
In many common interior applications, plaster walls are finished to a level where a standard acrylic latex or latex-based paint adheres well when the surface is properly prepared. However, you’ll get the best results by treating plaster as a porous substrate that benefits from a sealing primer designed to block dust and improve adhesion. The bottom line: timely, careful preparation is the foundation of when you can paint over plaster, and it directly influences the quality of your final result.
Moisture and plaster readiness
Moisture is the primary enemy of a successful paint job on plaster. Damp plaster can blister, flake, or develop a fuzzy, powdery surface known as efflorescence. The key is to test for moisture and ensure it has dropped to levels where the plaster can accept paint without reabsorbing moisture from the new coating. Use a moisture meter or hygrometer to get objective readings, and evaluate the surrounding environment—bathrooms, basements, kitchens, and areas with poor ventilation often require longer drying times. If you’ve recently completed plastering, allow the wall to dry in a well-ventilated space before testing for readiness. PaintQuickGuide recommends checking several spots, including near any seams or corners, to confirm uniform dryness. If the plaster is slow to dry, improve airflow with fans or dehumidifiers and wait longer before proceeding. Once readings indicate stable dryness and there are no cold spots or damp areas, you’re ready to move to the next stage.
Inspecting plaster health before painting
Even when a wall feels dry, you must inspect plaster for structural issues that could undermine the finish. Look for cracks bigger than a hairline, loose patches, bulging areas, or mildew and mold in humid spaces. Tap test: a hollow-sounding area often means subsidence or poor bonding; those areas require repair before priming. If you notice efflorescence—white powdery salt deposits—address the underlying moisture and then clean the surface with a stiff brush and clean water before testing again. Any peeling paint, powdery surfaces, or rough texture should be scarified or skim-coated to create a uniform substrate. By addressing the health of the plaster first, you reduce the likelihood of future failures once paint is applied. PaintQuickGuide emphasizes that the health of the substrate is the most important factor in determining when you can paint over plaster.
Surface prep: cleaning, patching, and smoothing
Surface prep is the most critical step toward a durable finish. Begin by cleaning the plaster to remove dust, grease, and chalky residue that can impede adhesion. A damp sponge or cloth works well for light dust; for tougher grime, use a mild detergent solution and rinse with clean water. Repair cracks and holes with a plaster-compatible patching compound or lightweight joint compound, then allow it to dry completely. Sand patched areas to create a flush, smooth surface, taking care not to gouge the plaster. After sanding, wipe the surface to remove dust. The goal is a uniform, dust-free surface ready for primer. Proper prep minimizes the risk of future flaking and ensures a more even paint application, especially on older plaster with uneven textures.
Primers and paints: choosing the right products for plaster
Plaster behaves like a porous substrate that benefits from a good bonding primer. Select an acrylic latex interior bonding primer designed for plaster and masonry; this helps block dust and promotes adhesion for the finish coat. Avoid acrylic wall primers that lack bonding properties, which can lead to peeling on plaster surfaces. For paint, choose high-quality interior latex or acrylic latex paints with adequate hide and durability. If the plaster is particularly old or previously painted, consider a breathable primer and paint system to allow moisture to escape without trapping it behind the coating. Finally, read manufacturer recommendations for topcoats and recoat windows to ensure the finish remains durable through cleaning and daily use.
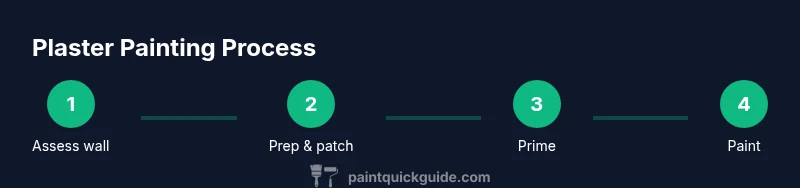
Step-by-step painting workflow (high-level overview)
- Prepare the room: remove furniture or move it to the center, cover floors, and ensure good ventilation. 2) Test patch: apply primer on a small area to check adhesion and drying. 3) Prime: apply one coat of bonding primer evenly across the surface. 4) Cut in and roll: after the primer dries, paint in sections—cut in along edges first, then roll the walls for even coverage. 5) Inspect and touch up: check for missed spots, drips, or roller texture and touch up as needed. 6) Clean up: rinse brushes and rollers promptly and remove masking tape after the final coat is dry. 7) Cure and cure time: allow adequate post-paint drying before heavy use. 8) Final inspection: confirm the surface is uniform and clean with no damp patches.
Note: For plaster, avoid applying thick coats or multiple heavy layers at once; multiple thin coats yield a smoother, more durable finish. Always follow the primer and paint manufacturer’s guidelines for drying times between coats.
Common mistakes and how to avoid them
Common mistakes include painting damp plaster, skipping primer, or using low-quality paint on a porous substrate. Skipping patching can show through the finish, and failing to sand between coats can leave a rough texture. Avoid rushing the process—especially on larger walls—so that the primer and paint dry evenly. When in doubt, perform a small test area and compare results over several days to ensure the finish remains stable.
Protecting, finishing, and long-term care
Keep the finished plaster surface protected from moisture and heavy abrasion during the first week after painting. While curing, avoid cleaning with harsh solvents or aggressive scrubbing that could compromise the finish. Use a soft cloth and mild cleaner for routine maintenance, and be mindful of humidity levels in bathrooms and kitchens. If you notice blistering, peeling, or new cracking after painting, reassess moisture sources and reseal or re-prime as needed. Regular dusting and gentle cleaning can significantly extend the life of a plaster-painted surface, especially in high-traffic areas.
Quick reference checklist (for when you can paint over plaster)
- Confirm the plaster is fully dry and free of damp spots.
- Inspect for cracks, loose patches, and efflorescence; repair before painting.
- Clean the surface thoroughly and remove all dust.
- Use a bonding primer designed for plaster to promote adhesion.
- Apply topcoats in thin, even layers; avoid heavy coats.
- Allow proper drying time between coats and inspect afterward for uniform coverage.
- Protect surrounding surfaces and ventilation during painting.
Tools & Materials
- Dust mask or respirator (NIOSH-approved)(Protect against plaster dust; use a respirator for dusty patches)
- Drop cloths and plastic sheeting(Cover floors and furniture fully)
- Bucket and sponges(For cleaning and rinsing)
- Mild detergent solution(Pre-wash greasy or dirty plaster)
- Stiff brush or scrub pad(Remove stubborn grime and efflorescence)
- Patch or joint compound(Repair cracks and holes)
- Sandpaper (120-150 grit)(Smooth patched areas and edges)
- Putty knife or scraper(Apply patching compound smoothly)
- Vacuum with brush attachment(Remove dust before priming)
- Bonding primer for plaster(Enhances adhesion on porous plaster)
- Acrylic latex interior paint(Choose high-quality for durability)
- Paint rollers (3/8-1/2 inch nap)(Even coverage on textured plaster)
- Paint tray and liners(For efficient rolling)
- Painter's tape(Protect edges and molding)
- Caulk for minor gaps(Optional for very fine gaps)
Steps
Estimated time: 3-6 hours
- 1
Assess plaster and prepare the space
Inspect for moisture, cracks, and loose areas. Move furniture away, cover floors, and ensure good ventilation before starting.
Tip: Document any issues with photos to guide repairs. - 2
Clean and dry the surface
Wipe away dust and grime with a damp sponge, then rinse and air-dry completely. A clean surface improves primer adhesion.
Tip: Avoid saturating the wall; damp is fine, wet is not. - 3
Repair cracks and holes
Apply patching compound to cracks and gouges; smooth with a putty knife and let dry thoroughly.
Tip: Sand patched areas to feather edges and remove dust. - 4
Sand and dust removal
Lightly sand repairs to create a uniform surface. Vacuum or wipe away dust before priming.
Tip: Use a microfiber cloth to capture remaining dust. - 5
Prime with bonding primer
Apply a thin, even coat of bonding primer to promote adhesion and seal the plaster surface.
Tip: Work in sections to maintain a damp edge and prevent lap marks. - 6
First topcoat application
Roll the first coat evenly over walls; avoid overloading the roller to prevent drips on textured plaster.
Tip: Maintain a consistent speed and direction for uniform texture. - 7
Second coat and final check
Apply a second coat if needed after the first dries. Check for coverage, texture, and seams.
Tip: Inspect from different angles to catch missed spots. - 8
Clean up and ventilate
Remove masking, clean tools, and allow the surface to dry with proper airflow.
Tip: Keep windows open and use fans to speed drying. - 9
Final inspection and touch-ups
Look for drips, rough patches, or color inconsistencies and touch up as needed.
Tip: Take a final walk with good lighting to reveal imperfections.
Your Questions Answered
Can you paint plaster directly over new plaster?
Yes, but only after it has fully dried and cured and you have cleaned and prepped the surface. Moisture or damp patches should be resolved first. A bonding primer helps ensure the coating sticks well to the plaster.
Yes, you can paint new plaster, but only after it’s fully dry and clean. Fix moisture and seal with a bonding primer for good adhesion.
What primer should I use on plaster?
Choose an acrylic latex bonding primer designed for plaster or masonry. It seals dust and provides a stable surface for the topcoat. Avoid primers that aren’t intended for porous substrates.
Use a bonding primer made for plaster to seal dust and help the topcoat stick.
Do I need to sand plaster before painting?
Light sanding is recommended after patching to smooth edges and remove powdery dust. Avoid aggressive sanding that could damage the surface. Always wipe away dust before priming.
Lightly sand patched areas and wipe away dust before priming.
What type of paint is best for plaster?
Use quality interior acrylic or latex paints. They provide good coverage, durability, and are less prone to cracking on plaster when applied over a proper primer.
Choose a good interior acrylic or latex paint for plaster with a bonding primer.
How long should I wait between coats on plaster?
Wait for each coat to dry according to the paint manufacturer’s recommendations, usually several hours, depending on temperature and humidity. Don’t rush to the next coat if the surface is not dry.
Let each coat dry fully according to the can instructions.
What should I do about moisture problems in plaster walls?
Identify and fix the moisture source before painting. Use a moisture meter to confirm readings are suitable for painting. In severe cases, consult a professional to address underlying dampness.
Fix the moisture source first and test the wall before painting.
Can I paint over lime plaster without sealing?
Lime plaster is porous and benefits from sealing with a bonding primer. This improves adhesion and moisture management, especially in high-traffic areas.
Seal lime plaster with a bonding primer before painting.
Watch Video
Quick Summary
- Wait for complete drying and curing before painting.
- Prime with bonding primer for best adhesion on plaster.
- Repair damage and sand for a smooth base before painting.
- Choose breathable, high-quality paint suitable for plaster.
- Inspect and test areas to avoid future failures.