When Can You Paint Over Caulk? A Practical Guide
Learn when you can paint over caulk, how to prep, primer needs, and tips for durable adhesion. A practical, home DIY guide from PaintQuickGuide.

Yes, you can paint over caulk once it’s fully cured and dry to the touch. Latex caulk typically dries within 24 hours, while silicone often needs longer and a compatible primer. Start with a clean, smooth surface, ensure it’s dry, and then apply a primer if needed before painting for best adhesion.
When can you paint over caulk: timing and readiness
Painting over caulk hinges on proper cure and surface readiness. The key question, when can you paint over caulk, isn’t just about time but also about the material’s chemistry. Latex (acrylic) caulk generally dries to the touch within around 24 hours in normal humidity, while silicone-based caulk can take longer—often 24 to 72 hours or more depending on airflow and temperature. Before you pick up a brush, verify that the caulk is fully cured and not tacky to the touch. If you press on the caulk and it feels soft or leaves a fingerprint, give it more time. Surface preparation, including a light cleaning to remove soap scum or dust, is essential because contaminants can interfere with paint adhesion.
Quick checks before painting
- Clean the area with mild detergent and water; let it dry completely.
- Inspect the seal: is the bead smooth and even, or does it have cracks or gaps that need recaulk? If cracks exist, re-caulk before painting.
- Perform a tack test by lightly touching the caulk with a finger: if it doesn’t smear, it’s closer to ready. For silicone, expect longer cure times and plan accordingly.
Why cure time matters for adhesion
Cure time affects how well paint bonds to caulk because uncured caulk can off-gas, shrink, or release solvents that disrupt primer and paint. A fully cured bead provides a stable, non-porous surface that may require a bonding primer to ensure paint sticks evenly, especially over silicone. Skipping cure-time checks often results in peeling, cracking, or uneven color down the line.
Surface preparation for the best finish
Even if the caulk is cured, surface preparation makes a big difference. Gently roughen the caulk edge with fine-grit sandpaper (around 180–220 grit) to create a micro-roughness that helps paint grip. Wipe away dust with a damp cloth and allow the area to dry. For silicone, a dedicated non-porous bonding primer can dramatically improve adhesion; for acrylic latex, a standard primer may suffice depending on surface conditions.
Picking the right paint system
Choose paints with the right chemistry for the surface. For latex or acrylic caulk, most interior and bathroom paints will work with minimal prep. When silicone is present, you’ll typically need a primer designed for non-porous surfaces and a paint that’s compatible with that primer. Always test a small patch first to confirm adhesion and finish before committing to a full coat.
Environmental considerations and safety
Ventilation matters when painting near caulk in bathrooms or kitchens. Open a window or use a fan to control fumes, especially with solvent-based primers. Wear gloves to protect skin and follow the manufacturer’s safety instructions for any primer or paint products. Proper disposal of any used materials is also important for home safety and environmental health.
Final tip: test before full coverage
After cure and prep, apply a small test stripe of your paint and primer (if used) on a discreet section of the caulk bead. If adhesion is solid after a 24–48 hour test period, you can proceed with the full project. If you notice peeling or poor bonding, reassess the caulk type and primer choice before continuing.
Tools & Materials
- Mild detergent and warm water(For cleaning the surface before painting)
- Fine-grit sandpaper (180–220 grit)(To create a micro-roughness for adhesion)
- Lint-free cloths(For wiping dust and moisture)
- Bonding primer (for non-porous surfaces)(Required if caulk is silicone or other non-porous material)
- Caulk (matching color)(Re-caulk if you see cracking or gaps after testing)
- Latex or acrylic interior paint (color as desired)(Choose a finish suitable for the space (eg, satin or eggshell for bathrooms))
- Paint brushes or rollers(Use appropriate nap length for smooth edges)
- Painter’s tape(Helpful for crisp edges around fixtures)
- Gloves and ventilation mask(Protection during prep and painting)
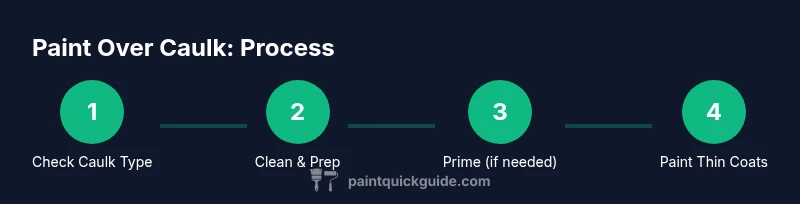
Steps
Estimated time: 30-60 minutes (hands-on), plus 24–72 hours cure time depending on caulk type
- 1
Assess caulk condition
Inspect the bead for cracks, gaps, or crumbling edges. If there are issues, recaulk before painting. Confirm the caulk type (latex vs silicone) to plan primer needs and cure times.
Tip: Document any damaged sections to ensure you address them before painting. - 2
Clean the area
Wipe the area with a mild detergent solution and rinse with clean water. Let it dry completely to avoid moisture trapping under paint.
Tip: Use a microfiber cloth for a thorough, lint-free clean. - 3
Roughen the caulk edge
Gently sand the caulk bead with fine-grit sandpaper to create a micro-rough surface for better paint adhesion. Wipe away dust afterward and let dry.
Tip: Avoid over-sanding into surrounding tiles or wall surfaces. - 4
Apply primer (if needed)
If the caulk is silicone or otherwise non-porous, apply a bonding primer and allow it to dry per the product instructions before painting.
Tip: Follow the primer’s recoat window to avoid over-drying or poor adhesion. - 5
Paint in thin coats
Apply a thin first coat and let it dry. Add a second coat for uniform coverage. Lightly feather the edges to blend with surrounding surfaces.
Tip: Do not flood the caulk with thick coats; build color gradually. - 6
Test and cure
Wait for the recommended cure time, then perform a touch test and inspect adhesion. If everything looks good, finish with any additional coats as needed.
Tip: Keep the area ventilated during curing and avoid cleaning with harsh solvents for at least 24 hours.
Your Questions Answered
Can I paint over silicone caulk?
Yes, but you typically need a bonding primer formulated for non-porous surfaces. After priming, use a compatible latex or acrylic paint and apply in thin coats for best adhesion.
Yes. Use a non-porous bonding primer first, then paint in thin coats for reliable adhesion.
How long should I wait before painting after applying caulk?
Latex caulk usually cures to the touch in about 24 hours, while silicone caulk may take 24–72 hours or longer depending on humidity and temperature. Always test for dryness and tack before painting.
Wait until the caulk is fully cured and dry to the touch, then test for tack before painting.
Do I need to prime caulk before painting?
Priming is often essential on non-porous caulk like silicone. Acrylic latex caulk may not require primer, but priming can improve adhesion in challenging areas. Follow the primer’s instructions for your surface.
Priming is usually required if the caulk is non-porous like silicone; check the primer directions.
What happens if I paint over uncured caulk?
Painting over uncured caulk can trap solvents and moisture, causing peeling, cracking, and uneven finishing. Wait for full cure and test readiness first.
If the caulk isn’t fully cured, you’ll likely get peeling and a poor finish. It’s best to wait.
What tools help with painting over caulk?
Use fine brushes or small rollers for precise edges, painter’s tape for clean lines, and a damp sponge for smoothing caulk edges after application if needed.
Small brushes or rollers plus tape help you get clean edges and a smooth finish.
Can I repaint caulk in the future if it peels?
If caulk peels, you may need to remove the damaged bead, re-caulk, and re-prime before repainting. Proper cure, adhesion testing, and technique are key to longevity.
If peeling occurs, recaulk, re-prime if needed, and repaint after proper curing.
Watch Video
Quick Summary
- Confirm caulk type and cure time before painting
- Prepare the surface thoroughly for best adhesion
- Use primer for non-porous caulk and apply in thin coats
- Test adhesion on a small area before full coverage
- Ventilate and follow safety guidelines during painting