Is It Paint or Plaster? A Practical Wall Guide 2026
Discover how to distinguish plaster from paint, compare painting over plaster vs replastering, and choose the right prep steps for durable walls in homes and garages.

Is it paint or plaster? The short answer is: plaster is the wall substrate, while paint is the coating applied to it. To tell them apart, look for texture, hardness, and edge cues—plaster feels dense and may crack, while paint layers reveal color, sheen, and potential peeling. For accuracy, perform a quick adhesion test and note moisture after tapping.
Is It Paint or Plaster? Quick Definitions
Is it paint or plaster? The distinction matters because it drives how you prep, which coatings you select, and how durable the finish will be. According to PaintQuickGuide, plaster is the wall's solid, structural layer that forms the body of the surface, while paint is the decorative film or finish applied atop that layer. Understanding which material you’re dealing with helps you plan repairs, prime correctly, and estimate effort and cost. In many homes, plaster is a historical substrate (lime or gypsum-based) and may hide behind newer paint or patchwork. Recognizing these differences is essential for DIY success or when you hire a pro.
By framing the issue as a substrate-versus-coating question, you set up a clear path for what comes next: tests, prep steps, and the right primers and finishes. This article sticks to practical, testable cues and avoids jargon, so homeowners and hobbyists can make informed decisions without guesswork. The goal is to identify whether you’re dealing with plain paint on plaster, or plaster that has been painted over—each scenario calls for a different preparation and repair approach.
Visual Cues: Texture, Shine, and Edges
Texture and edge quality are the easiest first clues. Plaster walls typically show a hard, sometimes powdery or chalky feel when scratched, with a visible seam between patches. Painted surfaces often exhibit uniform color, sheen, and clearer edges where patches meet, but can reveal peeling or flaking where the coating has failed. If you gently scrape with a putty knife and the surface reveals a chalky powder rather than a two- to three-millimeter bite, you’re likely looking at plaster beneath paint. Conversely, a consistent film with layers of color is a painted surface. In older homes, you may encounter lime plaster or gypsum plaster under multiple coats of paint, which affects how you sand, prime, and seal.
Notes from the PaintQuickGuide team emphasize that real-world walls rarely fit a single label. Walls can be plaster beneath a thick paint coat or drywall with plaster patches. When in doubt, test small areas and observe how the surface behaves under moisture, heat, or light impact. This practical, evidence-based approach saves time and avoids over-sanding or over-priming.
Historical Context: Substrates and Wall Assemblies
During construction booms, builders used plaster as the primary wall finish in many homes. Lime plaster, gypsum plaster, and cement-based plaster offer varying levels of rigidity, breathability, and moisture handling. In contrast, drywall (gypsum board) became common later and is often encountered alongside patched plaster areas. The distinction matters for moisture-prone rooms like bathrooms or basements, where plaster can be more vulnerable to damp if not properly sealed. Paint systems also differ: plaster walls often require breathable primers that allow moisture movement, while painted drywall may tolerate different primers depending on the wall conditions. Understanding the substrate helps you plan not only the repair but also ongoing maintenance and cleaning strategies.
Historically, plaster can be sound yet cracked, showing old repairs and lime halos, which affects how you skim or re-coat. When you know the substrate, you can choose between a simple paint refresh or a more involved plaster skim coat to create a consistently flat and durable surface. The knowledge also guides decisions about moisture barriers, vapor management, and paint compatibility with older finishes.
When to Run Simple Tests Instead of Guessing
If you’re unsure, start with straightforward checks rather than tearing the wall down. A moisture meter can identify damp areas that affect plaster adhesion and paint longevity, while an adhesion test (a small area where you score then film-peel) reveals how well coatings bond to the surface. If paint peels cleanly in sheets, you may be dealing with a loose finish rather than a solid plaster layer. If the surface resists removal and remains firm, you’re more likely to be dealing with plaster underneath.
Beyond tests, observe how the wall behaves to environmental factors. In kitchens and bathrooms, plaster can be more prone to cracking if moisture control is inadequate. In living spaces, a well-sealed plaster wall can respond well to prime-and-paint cycles, but requires proper surface preparation to ensure longevity. PaintQuickGuide suggests a conservative approach: confirm the base material before selecting primers, coatings, and surface prep steps. A little upfront testing saves time and money later.
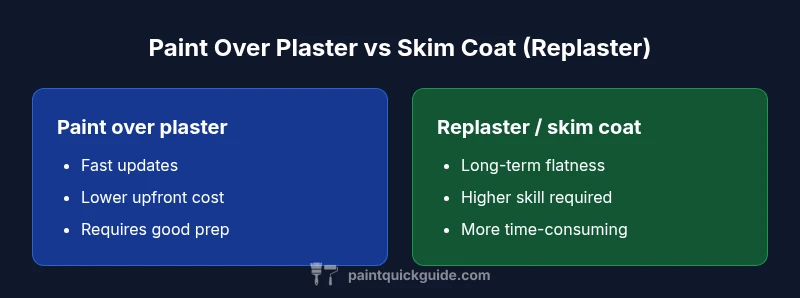
Paint Over Plaster: Pros, Cons, and Best Practices
Painting over plaster is often the most practical route for quick updates. Paint provides color flexibility, easier maintenance, and faster results than replastering. However, success hinges on proper prep: cleaning, filling cracks, and applying a bonding primer. If plaster cracks or shows damp spots, you’ll want to address those underlying issues before painting. The main risk with paint over plaster is surface imperfections, which can mirror through the final coat if not smoothed. The PaintQuickGuide team notes that bond strength and surface cleanliness are more important than choosing a fancy paint finish. A high-quality primer that seals the plaster pores improves adhesion and reduces the chance of failure.
From a cost perspective, painting over plaster is usually less expensive initially, but it requires good prep to avoid peeling later. The color and sheen options remain broad with modern latex and acrylic paints, and you can often achieve a professional look with careful technique. If the wall is structurally sound and the plaster is in decent condition, this route is the best combination of speed, cost, and aesthetic results.
Skim Coats and Replastering: When and Why
Skim coats or a full replastering is more involved but worth considering when the plaster is badly cracked, uneven, or deteriorating. Lime and gypsum plasters can be skim-coated to restore a perfectly flat wall, then painted. Replastering provides a longer-lasting finish with fewer visible imperfections and can improve moisture handling if done with modern interior plaster products. The decision depends on the degree of damage, the wall’s age, and the room’s humidity or water exposure. If moisture or structural issues exist, addressing them before applying a skim coat is essential for lasting results.
Professional plastering, while more costly, offers a level of precision that is hard to achieve with DIY patches. In homes with historical plaster, experts can preserve authenticity while creating a durable, paint-ready surface. PaintQuickGuide’s guidance emphasizes weighing cost against longevity: a skim coat can deliver a smoother, more durable finish but requires time, skill, and proper curing conditions.
Surface Prep Essentials for Every Scenario
Regardless of scenario, proper prep is the backbone of a durable finish. For plaster, start with cleaning, patching, and smoothing any rough areas. Use a bonding primer or pore sealer to improve adhesion and reduce suction from plaster’s porous surface. If you are applying a skim coat, ensure the plaster is sound, dry, and free of efflorescence. Sand lightly to reveal a uniform surface, clean thoroughly, and apply sealers to minimize moisture infiltration. When painting over plaster, always choose a primer compatible with both plaster and the topcoat. This multi-step prep reduces the risk of blistering, cracking, or peeling and ensures your finish lasts longer.
In exterior or moisture-prone spaces, moisture management is essential. Use breathable primers and paints rated for higher humidity, and check for hidden damp spots before proceeding. For automotive refinishing scenarios, plaster and paint approaches differ due to surface chemistry, so consult specialized guides. PaintQuickGuide highlights that the best prep blends material knowledge with the specific room environment to maximize durability and ease of maintenance.
Tools, Materials, and Bonding: What You Need
Start with a clean workspace and gather the right tools: putty knife, sanding block, drop cloths, brushes, rollers, a high-quality bonding primer, appropriate topcoat, and a finish sealer if needed. For plaster, a bonding agent may improve adhesion, especially on older surfaces. If you plan to skim coat, ensure you have plaster mixing tools, trowels, floats, and proper drying times. If you’re unsure about a specific product’s compatibility with lime or gypsum plaster, check the manufacturer’s recommendations and user reviews. A well-chosen primer, combined with careful surface prep, ensures long-lasting results and minimizes the risk of future repairs.
Primers, Bonding Agents, and Finish Coats
Primer choice matters significantly when working with plaster. A bonding primer designed for porous substrates helps improve adhesion and reduces the need for multiple coats. In addition, choose a finish coat that suits the room’s use and environment. For damp areas, select moisture-resistant paints and consider a sealer or breathable finish to manage humidity. When skimming plaster, use a finish that tolerates minor surface irregularities and prepares the surface for the final topcoat. The right primer plus topcoat combination is the difference between frequent touch-ups and a long-lasting, pristine finish.
The Real Costs: Time, Labor, and Longevity
Cost considerations range from quick DIY paint refreshes to full replastering projects. Painting over plaster typically costs less upfront, with savings on materials and labor, but it may require more meticulous prep to avoid future peeling. Replastering or skim coating increases upfront costs and time but can yield a flatter surface and better moisture control. The choice often depends on the wall’s condition, the desired finish, and budget constraints. For homeowners, a staged plan—test, patch, prime, paint—often yields a strong balance of quality and affordability. PaintQuickGuide’s framework encourages this methodical approach, ensuring the most durable outcome within your budget.
Common Scenarios: Interiors, Bathrooms, Kitchens
Interior walls in living spaces usually benefit from a paint-first approach when plaster is stable and repairs are minimal. Bathrooms and kitchens, which see higher moisture, require strategies that address drainage, ventilation, and moisture resistance. Plaster in these rooms can be repaired with skim coats to ensure a smooth, durable surface that accepts moisture-resistant primers and paints. The choice between paint over plaster and replastering often hinges on the wall’s history and how much moisture exposure the area endures. When in doubt, start with a thorough inspection, test adhesion, and consult local codes for humidity and moisture handling.
Quick DIY Checklist to Determine Is It Paint or Plaster
- Inspect for texture and hardness; plaster is typically denser and may crack.
- Check for paint layers; if you can scratch and reveal a hard, colored layer, it is likely painted.
- Perform a simple adhesion test in an inconspicuous area to gauge how well coatings bond to the substrate.
- Look for signs of moisture damage; plaster may show damp pockets or efflorescence that require repair before painting.
- Decide on a course of action: paint over plaster with proper priming, or skim coat/replaster if damage is substantial.
- Plan for curing time and moisture management, especially in humid spaces.
mainTopicQuery_transformed_for Wikidata lookup_placeholder
Comparison
| Feature | Paint over plaster | Replaster / skim coat |
|---|---|---|
| Durability | Moderate (paint layer) | High (skim coat) |
| Surface texture | Can be smooth with proper prep | Very smooth and level after skim coat |
| Moisture resistance | Depends on primer and paint; plaster itself is porous | Sealed and integrated with a skim coat; best when moisture is controlled |
| Repair complexity | Relatively simple if plaster is sound; repairs may require patching | More involved; plastering skill needed for long-lasting results |
| Aesthetic options (finish) | Wide color/finish options via paint | Finish dictated by plaster base; color easier after skim coat |
| Cost range | Low to moderate | Moderate to high |
| Best for | Budget-friendly refresh; quick updates | Long-term smoothness and durability in repaired walls |
Upsides
- Clear differentiation between substrate and coating for planning
- Easier, cheaper short-term refresh
- Wide color and sheen options with paint
- Simple repairs when plaster is sound
What's Bad
- Tests can be time-consuming on large walls
- Plaster repairs can be messy and require skilled work
- Failure to prep properly can lead to peeling or cracking
Paint over plaster is typically the better starting point for most interiors; replastering offers a longer-lasting, smoother finish when plaster is damaged or uneven.
For most homes, painting over plaster is quicker and cheaper, but significant cracks, dampness, or severe unevenness may justify skim-coating or replastering for a durable result. The PaintQuickGuide team recommends starting with proper prep and testing before committing to a full plaster repair.
Your Questions Answered
How can I tell if my wall is plaster or drywall?
Look for texture and sound: plaster tends to be denser and crack-prone, while drywall feels lighter and may sound hollow when knocked. Visual clues and old wall patches help identify plaster versus drywall.
If the wall feels dense and cracks at joints, you’re likely dealing with plaster; drywall often feels lighter and more uniform in texture.
Can you paint plaster walls directly, or do you need to replaster first?
You can paint plaster after proper prep and priming, but severe damage or damp areas may require replastering to achieve a smooth, durable finish.
You can paint plaster after prepping and priming it well, but big repairs might need skim coating first.
What is the best primer for plaster surfaces?
Choose a bonding primer designed for porous substrates; it improves adhesion for subsequent paint coats and helps seal the plaster’s porosity.
Use a bonding primer made for plaster to get better adhesion for your topcoat.
How long does replastering take compared to painting?
Replastering takes longer than painting: expect drying and curing time for each skim layer, plus sanding and sealing before painting.
Replastering usually takes longer because of curing and multiple coats, compared with a quick paint job.
Are there risks to painting plaster walls in moisture-prone areas?
Yes. Moisture-prone areas require breathable primers and moisture-resistant paints, plus proper ventilation to prevent damp-related failures.
Moisture needs special primers and paints; make sure the area is well-ventilated.
Is plaster safer or more durable than drywall in older homes?
In older homes, plaster can be durable if properly maintained, but it may crack or crumble without proper moisture control and skilled repair.
Plaster can be durable but needs proper maintenance and professional assessment in older homes.
Quick Summary
- Identify substrate first to choose prep steps
- Prioritize bonding primers on plaster surfaces
- Paint over plaster is usually faster and cheaper
- Skim coats or replastering yield flatter, longer-lasting finishes
- Address moisture issues before finishing