How to Fix a Paint Scratch: Step-by-Step Guide
Learn practical, budget-friendly steps to repair paint scratches on walls and cars. Color-match, apply touch-up, and seal for durable results with tips from PaintQuickGuide.

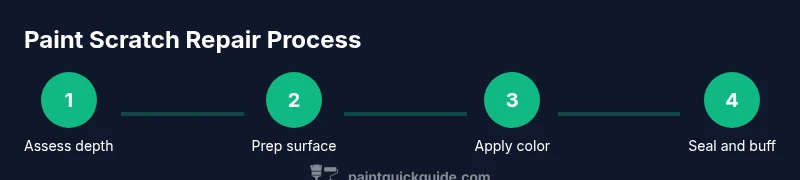
You can repair a paint scratch on walls or vehicles by cleaning the area, matching color, applying touch-up paint, and sealing with a clear topcoat. This guide provides a practical, beginner-friendly method with safety tips, time estimates, and affordable materials. According to PaintQuickGuide, a careful approach yields durable, nearly invisible results.
Understanding paint scratches on different surfaces
Paint scratches happen when the surface coating is breached, exposing the primer or underlying material. On interior walls, scratches are usually shallow and can often be improved with color-matched touch-up paint and a light blend. On vehicles, especially those with clear coats, scratches may cut through multiple layers and require precise color matching, light sanding, and a clear protective layer. The goal is not to achieve perfection in a single pass but to blend the repair with surrounding areas so the scratch becomes barely noticeable. When you see a paint scratch, assess depth, finish (matte, satin, gloss), and the surrounding texture. This context determines whether you’ll need light sanding, glaze, or a full recolor.
Matching color and finish
Color matching is the most critical step in fixing a paint scratch. For walls, you’ll usually need a small amount of the same base paint and a compatible glaze or finish if the wall has a special sheen. For cars, you must identify the exact base color and the clear coat. Start by testing the color on a hidden area or behind a door edge. If you’re unsure, mix a tiny amount of tint into a drop of paint and apply to the test spot, then compare under different lighting. In both cases, the finish matters: a glossy floor-to-wall edge or a satin car finish will affect how well the repair blends. Keep in mind that outdoor car finishes may fade over time, so the shade might look slightly different in bright sun.
Prep and cleanup
Preparation is essential for durable repairs. Remove dust and oils from the scratch with a mild soap solution and rinse with clean water. For automotive surfaces, wipe with isopropyl alcohol to remove grease and wax residues. Dry the area completely before applying any paint. Lightly scuff the scratch with a fine-grit sandpaper (if depth is felt) to create a tooth for the new paint to grip. For walls, avoid aggressive sanding—most interior scratches only require taping and light buffing around the edges. Wipe away any debris and mask nearby areas to prevent accidental paint transfer.
Tools and materials you’ll need (overview)
Having the right tools reduces headaches. You’ll typically need a color-matched touch-up paint, fine brushes or applicators, painter’s tape, microfiber cloths, mild soap, water, isopropyl alcohol, fine-grit sandpaper (optional for deeper scratches), a clear topcoat or glaze, and a soft polishing cloth. For cars, you may also want a rubbing compound and a dedicated automotive polish. For walls, a small amount of glaze can help blend the repaired area with the surrounding texture. Always work in a well-ventilated area and protect surrounding surfaces with drop cloths or masking tape.
Step-by-step approach for interior walls—part 1: prep and test
Begin with a clean, dry surface. Test your color accuracy on an inconspicuous area, such as inside a closet door edge, before touching the scratch directly. If you’re unsure about the color, purchase a color-matching tester or order a small sample pot. This initial test helps you avoid over-coloring and ensures a closer blend. Once you have a satisfactory test, gently de-dust the area to ensure the paint adheres properly.
Step-by-step approach for interior walls—part 2: application and blend
Apply the paint in thin layers, allowing each layer to dry fully according to the manufacturer’s guidance. Use a fine brush or a microfiber-telt applicator to minimize brush strokes. Feather the edges beyond the scratch to blend with the surrounding texture. If your wall has a glaze or satin finish, apply a light glaze layer after the paint dries, using a dampened sponge to streak softly for a seamless look. Finally, inspect under multiple lights to ensure the repair is visually quiet.
Step-by-step approach for automotive scratches—part 1: assess and prep
Car scratches may require more care. Clean the area with soap and water, then wipe with automotive grade alcohol to remove oils. If the scratch is deep, you may need to lightly sand with very fine grit paper (e.g., 1500-2000 grit) to smooth the edge without removing too much paint. Wipe away dust and recheck the depth. Always buff away any residue so the paint will adhere evenly.
Step-by-step approach for automotive scratches—part 2: color, coat, and cure
Apply the base color in multiple ultra-thin layers, allowing each layer to dry. After the color matches, apply a clear topcoat or glaze to protect the repair and restore gloss. Do not rush drying times—rushing can cause peels or uneven texture. Finish with a careful polish to blend the repaired area with the surrounding paint. Allow the surface to cure fully before washing or exposing it to moisture.
Safety, cleanup, and final inspection
Always work in a well-ventilated area and wear a mask or gloves if recommended by the product. Dispose of rags safely, and avoid open flames when using solvents. After the repair, wipe the area with a clean microfiber cloth to remove dust and fingerprints. Inspect the repaired surface at different angles and lighting to ensure the scratch is blended and the finish is uniform.
Tools & Materials
- Color-matched touch-up paint (wall or automotive)(Choose exact shade or order a tester pot.)
- Fine brushes or applicators(Use tiny brushes for precise edges.)
- Painter’s tape and drop cloths(Protect surrounding areas.)
- Microfiber cloths(Lint-free wiping and blending.)
- Mild soap and water(For initial cleaning.)
- Isopropyl alcohol (70% or higher)(Degrease automotive surfaces.)
- Fine-grit sandpaper (optional, 1500-2000 grit)(For deeper scratches on cars.)
- Clear topcoat or glaze(Seal and blend the repair.)
- Rubbing compound or automotive polish(Optional final finish for cars.)
- Masking film or nitrile gloves(Safety and cleanliness.)
- Soft polishing cloth(Final buff to blend edges.)
Steps
Estimated time: 1-2 hours (plus curing time per product instructions)
- 1
Prepare workspace and surface
Clear the area, cover nearby surfaces, and ensure the surface is dry. Cleaning removes dust and oils that could prevent adhesion. A clean start improves color matching and final appearance.
Tip: Ventilate well and wear a mask if using solvents. - 2
Test color on a hidden area
Apply a small amount of your chosen color to a discreet spot to verify match under different lighting. If it looks off, adjust shade slightly before touching the scratch.
Tip: Use a tester pot or small sample to avoid waste. - 3
Clean and prep the scratch
Wipe with mild soap solution or isopropyl alcohol to remove residues. For deeper automotive scratches, lightly scuff the edge with fine sandpaper to help paint adherence.
Tip: Wipe away any dust before painting. - 4
Apply color in thin layers
Dip a fine brush and apply a razor-thin coat over or into the scratch. Let each layer dry fully before applying the next to avoid runs and buildup.
Tip: Thin layers beat thick ones for even blending. - 5
Blend edges and texture
Feather the edges beyond the scratch so the repair blends with surrounding texture. For walls, a light glaze can improve blend; for cars, a light polish helps even gloss.
Tip: Keep a damp sponge handy to soften edges. - 6
Seal and protect the repair
When the color is dry, apply a clear topcoat or glaze to protect the repair and restore gloss. This step prevents future chipping and helps color stay stable.
Tip: Don’t rush the curing time—check product instructions. - 7
Final inspection and cleanup
Inspect under multiple lights, wipe with a clean cloth, and remove masking tape. Clean tools and dispose of waste materials properly.
Tip: If you notice slight shade differences, a second ultra-thin layer may help.
Your Questions Answered
What is considered a paint scratch and can I fix it at home?
A paint scratch is a superficial breach of the topcoat where underlying layers may be exposed. Many minor scratches can be improved at home with color-matched touch-up paint, careful layering, and a finish coat. Deeper damage or color mismatch may require professional help.
A paint scratch is a shallow chip in the topcoat that most people can fix at home with the right color match and a clear topcoat.
Can I use regular wall paint to fix an automotive scratch?
It’s not ideal. Wall paint differs in durability and color properties from automotive finishes. If you must, use automotive color-matching products whenever possible, and be prepared for a shorter-lived repair. For best results, use the correct automotive touch-up color and clear coat.
Wall paint isn’t ideal for cars; use automotive color-matching products when possible.
How do I choose the right shade for matching?
Start with the exact shade from the existing surface and test on a hidden area. If a perfect match isn’t possible, aim for a shade slightly lighter and blend it with a glaze or polish. Lighting can dramatically affect perceived color, so test under multiple lights.
Test the shade in different lights and blend with glaze if needed.
What drying times should I expect between coats?
Follow the product’s label for drying times, typically ranging from 30 minutes to several hours. Do not apply a subsequent coat until the previous layer is dry to avoid smudging or lifting.
Wait for the previous coat to dry fully before applying the next.
Is it safe to use auto touch-up kits on walls?
Auto touch-up kits are designed for car finishes and may not perform well on walls. For interior surfaces, use wall-specific touch-up paints. If you switch surfaces, test on a hidden spot first.
Car touch-up kits aren’t ideal for walls; use wall paint for interiors.
When should I call a professional?
If the scratch is deep, widespread, or affects the integrity of the surface, or if you cannot achieve a satisfactory color blend after several attempts, seek a professional repaint. A pro can ensure color accuracy and a durable finish.
Call a pro if the scratch is deep or hard to match.
Watch Video
Quick Summary
- Choose exact color match for best results.
- Apply paint in thin, even layers for blending.
- Allow proper drying time between coats.
- Seal after color to protect and finish.
- Test first in a hidden area to avoid visible mistakes.