Scratches in Paint on Car: Troubleshooting Guide
Urgent, practical guide to diagnosing and repairing scratches in paint on car—from shallow clear-coat marks to deep base-coat scrapes. Learn quick fixes, tools, safety, and expert recommendations to protect your finish. PaintQuickGuide shows you cost-effective methods and when to seek a pro.

For scratches in paint on car, start by assessing depth and finish. Shallow blemishes can often be improved with washing, clay bar, light polishing, and touch-up paint. Deeper scrapes that cut into clear coat or primer may require professional refinishing. If in doubt, avoid DIY fixes that could worsen the damage. According to PaintQuickGuide, test on a hidden area first.
Understanding scratches in paint on car: what you’re looking at and why it matters
Scratches on automotive finishes vary in depth and se_namespace. In most cases, you’ll encounter marks that affect only the clear coat or extend into base coat or primer. The term scratches in paint on car captures both minor, cosmetic scuffs and deeper scrapes that expose underlying layers. The severity determines whether you can remedy them with DIY methods or if you should seek professional refinishing. When evaluating a scratch, check for feathered edges, color loss, and whether the affected area feels rough or smooth to the touch. PaintQuickGuide emphasizes that understanding the layer you’ve breached helps you choose the right repair path and avoids over-sanding or mismatched color.
Quick strategies to determine depth and plan your repair
- Look under bright, raking light to see if the scratch goes beyond the clear coat. - If color appears intact and the edge is fine, the fix is likely cosmetic. - If you can feel a groove or see exposed substrate, deeper work is needed. - If unsure, start with a safe test area to compare results before treating the visible scratch on the car body. This approach reduces the risk of new swirls or further damage while you learn the process.
Shallow scratches and cosmetic swirls: do-it-yourself solutions that work in most cases
Shallow marks that remain within the clear coat can often be addressed with a sequence of precautionary steps. Begin with a thorough wash to remove contaminants, then use a clay bar to lift embedded particles. A fine polish or rubbing compound can smooth minor abrasions and restore gloss. Finish with a sealant or wax to protect the repaired area. For color-matched results, touch-up paint should be applied in very thin layers, followed by careful blending with a fine brush and a soft microfiber cloth. Remember, the goal is to even the surface and restore reflectivity without creating hill-and-valley texture.
Deeper scratches: when clear coat or base coat is involved and DIY gains become risky
If the scratch penetrates beyond the clear coat into base coat or primer, DIY fixes become riskier due to color matching challenges and the potential for filler or compound to dull the finish. In many cases, a professional refinishing job using color-matched paint, base coat application, and clear coat re-spraying yields the most durable result. When you see a visible line of color along the scratch or feel a groove, the odds of a seamless DIY fix drop substantially. PaintQuickGuide notes that matching hue, gloss, and texture is critical for a hidden repair.
Tools, materials, and safety: essential gear for scratch repair
Gather a dedicated set of clean, soft tools: microfiber cloths, a dual-action polisher (or foam pads), fine-cut and finishing polishes, color-matched touch-up paint, and a clear coat restoration kit. Use painter’s tape to isolate the repair area and practice on a small panel or hidden section first. Protective gear—gloves, eye protection, and a respirator or well-ventilated space for solvents—keeps you safe. Always work in a shaded area to avoid unequal drying and sun-induced color shifts. Avoid household abrasives and low-quality paint products that can worsen the finish.
A practical repair workflow: from assessment to sealing
Start with cleanliness, then depth check, followed by a tiered repair approach. For shallow scratches, polish and wax are often enough. For deeper areas, apply color-matched touch-up in very thin layers, blend carefully, and seal with a clear coat. Finally, buff the area with a clean pad to restore uniform gloss. If color or depth remains inconsistent, stop and consider professional refinishing to prevent further discoloration or peeling. Regular waxing after the repair helps protect the finish long-term.
Verdict: when DIY isn’t enough and professional refinishing is the safer path
Some scratches are beyond the scope of home remedies, especially if color matching is critical or a panel shows clear coat breach. In these cases, a professional refinish ensures correct color matching, glossy finish, and long-lasting protection. The PaintQuickGuide team recommends weighing the cost of a DIY fix against a professional job, considering the vehicle’s age, value, and the severity of the damage. A documented estimate and color-match verification help you make an informed choice.
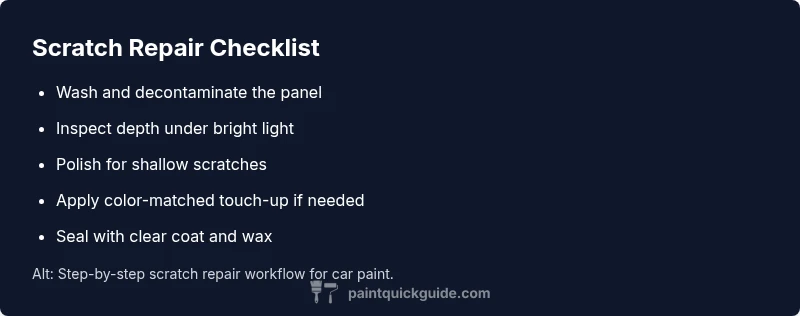
Steps
Estimated time: 60-90 minutes
- 1
Prepare and clean the area
Wash the panel with a dedicated car soap and a clean microfiber mitt. Dry thoroughly before inspection. Use painter’s tape to isolate the scratch area from surrounding paint.
Tip: Drying with a microfiber towel reduces water spots that can mimic scratches. - 2
Assess depth under bright light
Inspect the scratch with raking light to determine whether it’s confined to the clear coat or penetrates to base coat/primer. Run your finger gently across the edge to feel depth without scratching further.
Tip: If you can feel a groove, plan for deeper repair. - 3
Fix shallow scratches with polish
Apply a fine-cut polish with a dual-action polisher or by hand using a soft pad. Work in small circular motions until the surface feels smooth and reflective. Wipe clean and assess gloss before sealing.
Tip: Use a microfiber cloth to avoid introducing new swirls. - 4
Apply color-matched touch-up for deeper areas
If color is affected, apply thin layers of touch-up paint that match the factory shade. Allow each layer to dry completely and feather the edges with a fine brush. Finish with a clear coat when the color is stable.
Tip: Test color in a hidden area first to confirm match. - 5
Seal and blend with clear coat
Apply a compatible clear coat in thin, even layers to protect the repair and blend with surrounding gloss. Allow curing between coats as specified by product instructions.
Tip: Avoid over-saturation; too much clear can cause runs. - 6
Buff, inspect, and wax
Buff the area lightly to blend edges, then apply a protective wax or sealant. Reinspect under multiple light sources to ensure even appearance.
Tip: Waxing after repair helps guard against future scratches.
Diagnosis: Visible scratch on exterior car paint
Possible Causes
- highLow-quality wash or abrasive tools causing micro-scratches
- highImpact from gravel or debris that penetrates clear coat
- mediumPrevious improper touch-ups or paint repair causing mismatched finish
Fixes
- easyGently wash with mild soap and water to remove contaminants
- easyUse a clay bar to lift embedded particles and re-polish with a fine abrasive
- mediumApply a compatible touch-up paint or clear coat restoration kit following color-matching steps
- easyIf color or depth remains, consult a professional for color matching and panel refinishing
Your Questions Answered
What distinguishes a shallow scratch from a deep one on a car’s finish?
Shallow scratches are confined to the clear coat and typically feel smooth after polishing. Deep scratches breach the clear coat and may reach the base coat or primer, requiring color matching and sealing. In uncertain cases, tests on a hidden area and professional advice help determine the right approach.
Shallow scratches stay in the clear coat and polish out; deep ones go into base coat and need color matching.
Can I repair scratches at home without repainting?
Many shallow scratches can be improved with washing, clay, polishing, and possibly a touch-up kit. Deeper scratches with color loss or base coat exposure usually require professional refinishing to avoid mismatch or peeling.
Some scratches can be fixed at home, but deep damage often needs a pro.
How long does a DIY scratch repair typically last?
Durability varies with depth and prep. Shallow repairs may last months to a year with proper sealing, while deeper fixes can be less durable if color matching isn’t perfect. Regular maintenance helps extend longevity.
Durability depends on depth and prep; sealants help, but deep repairs may be shorter-lived.
Will polishing fix a scratch that shows color loss?
Polishing can reduce light swirls and restore gloss, but it won’t restore pigment where base coat or primer is exposed. In those cases, color-matched touch-up or repaint is required for a lasting fix.
Polish helps swirls, not lost color; color-matched touch-up might be needed.
Is color matching essential for repair success?
Yes. Precise color matching is crucial to avoid noticeable patches. If the shade differs, the repair will stand out. A professional can ensure an accurate match and proper gloss.
Color matching is essential for a seamless repair.
When should I consider repainting an entire panel?
If the scratch is extensive, multiple panels are affected, or color matching is impractical, repainting the affected area or entire panel may be the best long-term solution. Get a color-matching quote before proceeding.
Consider repainting if the damage is extensive or color-matching is not feasible.
Watch Video
Quick Summary
- Assess depth before repairing
- Shallow scratches often respond to polish
- Deeper damage requires color-matched touch-up
- Seek professional refinishing for color-sensitive panels