Paint for Treated Wood: A Practical Guide
Learn how to properly paint treated wood with primer, compatible paints, and best practices to prevent peeling and ensure lasting durability for decks, fences, and trim.

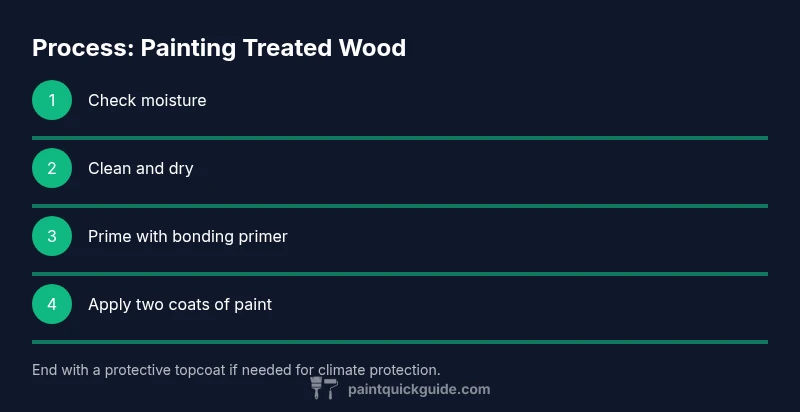
Learn how to paint treated wood effectively, including prep, primer selection, and finish choices. Start by confirming the wood is dry (moisture under 20%), sanding lightly, and cleaning dust. Use a bonding primer designed for treated lumber, then apply two coats of exterior acrylic latex paint for durability and easy maintenance. Follow with a compatible topcoat to seal and protect against weather.
Why paint for treated wood matters
Painting treated wood isn’t just about aesthetics; it protects the lumber from the elements and extends the life of outdoor structures like decks, fences, and exterior trim. For homeowners, understanding how to paint for treated wood reduces peeling, cracking, and moisture intrusion. According to PaintQuickGuide, success hinges on two critical factors: proper surface preparation and a compatible primer that adheres to pressure-treated lumber. The unique chemistry of treated wood includes extractives that can interfere with adhesion, so choosing the right primer and paint is essential. When done correctly, a painted surface can resist weather, UV exposure, and seasonal humidity longer than untreated surfaces. In this guide, we walk through how to approach a project from prep to finish, with practical tips and real-world examples focused on paint for treated wood.
In practical terms, think of your project as a two-stage process: surface readiness and coating performance. Surface readiness means cleaning, drying, and de-activating any tannins or chemicals that might bleed through the finish. Coating performance means selecting a primer and a topcoat that work together to form a durable film. For most residential projects, a breathable acrylic latex system with a bonding primer yields reliable results on treated lumber. PaintQuickGuide’s approach emphasizes using products that are specifically labeled for pressure-treated wood and exterior use, ensuring compatibility with the wood’s chemistry and local climate conditions. By prioritizing compatibility and moisture management, you maximize the lifespan of paint on treated wood and reduce maintenance intervals.
Color and finish choices also matter. Lighter colors reflect more sunlight, reducing heat buildup that can cause warping or surface checking, while darker colors may show dirt more readily. Satin and semigloss finishes offer a balance of aesthetics and cleanability and are generally more durable in outdoor settings. If you’re painting interior-grade treated wood (e.g., under covered porches), you may choose slightly different products, but the same prep principles apply. This section sets the stage for selecting primers, paints, and finishing coats that hold up to your climate and application.
taggingNoteImplementationssubscribersNoteHintsYouShouldKnowThisBlockNotesImportantConsiderationsforTreatedWoodPaintingOnly
Tools & Materials
- Breathable exterior latex paint(Choose 100% acrylic for durability and moisture resistance; avoid 100% alkyd emulsions for heavy moisture areas.)
- Bonding primer compatible with treated wood(Select a primer labeled for pressure-treated lumber and weather exposure; oil-based primers offer strong adhesion, but water-based bonding primers are common for DIY projects.)
- Fine-grit sandpaper (120-180 grit)(Lightly scuff the surface to improve adhesion without gouging the wood.)
- Cleaners (wood cleaner or mild detergent)(Use a cleaner to remove dirt, mildew, and tannin bleed before painting.)
- Tack cloth or clean rag(Used to remove dust after sanding and cleaning.)
- Paint trays and rollers/brushes(Use high-quality synthetic brushes and rollers suited for latex paint; cover rollers with germ-free liners between coats.)
- Drop cloths or plastic sheeting(Protect surrounding surfaces from spills and drips.)
- Safety gear (gloves, goggles, respirator or mask)(Protect from fumes, dust, and splashes; coves winds and ventilation considerations.)
- Moisture meter (optional but recommended)(Check moisture content; aim for below 20% before painting.)
Steps
Estimated time: 2-4 hours (plus curing time)
- 1
Assess moisture and wood condition
Check that the wood is dry and sound. If moisture is above 20% or surfaces feel damp, delay painting and allow more drying time. This avoids trapped moisture that can cause blistering or peeling later.
Tip: Use a moisture meter for accurate readings; ensure humidity is not high during application. - 2
Clean the surface thoroughly
Wipe down with a wood cleaner or mild detergent to remove dirt, mildew, and extractives. Rinse with clean water and let dry completely before proceeding. A clean surface improves primer adhesion and paint longevity.
Tip: Rinse and air-dry in a shaded area to prevent rapid surface drying that can cause uneven film formation. - 3
Lightly sand to promote adhesion
Gently sand with 120-180 grit to scuff the surface, removing old coatings and smoothing rough areas. Wipe away dust with a tack cloth or damp rag.
Tip: Avoid deep gouges; the goal is a micro–roughness that improves bonding, not a new wooden texture. - 4
Remove dust and debris
After sanding, thoroughly remove all dust using a tack cloth or a clean, dry rag. Dust can create crusty spots beneath the finish and lead to non-uniform coats.
Tip: Work in a dust-free environment or cover large areas to minimize airborne particles. - 5
Apply bonding primer for treated wood
Coat the surface with a primer labeled for pressure-treated lumber; allow proper dry time as specified on the product label. Primer lays a consistent foundation and blocks tannins that can bleed through the topcoat.
Tip: If using oil-based primer, ensure adequate ventilation and clean brushes properly; water-based primers are easier to clean but may require longer recoat times. - 6
Apply the first coat of paint
Apply a thin, even first coat with a quality brush or roller, following wood grain directions. Let the coat dry per manufacturer recommendations before assessing coverage.
Tip: Avoid heavy coats that trap solvents; thin coats dry faster and reduce drips. - 7
Apply a second coat for durability
Apply a second coat to reach full color and consistent coverage. Two coats are typically sufficient for exterior treated wood, with an optional third for high-traffic areas.
Tip: Maintain a wet edge and regulate temperature and humidity to prevent film defects. - 8
Cure, inspect, and protect
Allow the finish to cure fully before light use. Inspect for missed spots and touch up as needed. Consider adding a topcoat or sealant if your climate demands extra protection.
Tip: Cure times can vary; plan for several days of limited use after final coat.
Your Questions Answered
What is treated wood and why is it different from regular lumber?
Treated wood has been impregnated with preservatives to resist rot, insects, and decay. These chemicals can interfere with paint adhesion, so choosing the right primer and coatings is essential to achieve a durable finish.
Treated wood is lumber treated with preservatives to resist rot and pests; it requires special primers and paints to adhere well.
Do I always need a primer when painting treated wood?
Yes. A bonding primer designed for pressure-treated lumber helps the paint adhere and blocks tannins that can cause staining or peeling. Primer improves coverage and reduces the number of paint coats needed.
Yes, primer is important for treated wood to ensure paint sticks and lasts.
Can I use latex paint on treated wood?
Yes, most exterior latex paints work well on treated wood when used with a compatible primer. Choose 100% acrylic for durability and flexibility in outdoor conditions.
Yes, exterior latex is common when paired with the right primer.
How long should the paint cure before exposure to rain or heavy use?
Cure times vary by product, temperature, and humidity. Follow label guidance; typically, you should avoid heavy use for at least 24-48 hours after the final coat, and longer in cool or humid climates.
Check the product label, but plan for at least a day of cure before rain or heavy use.
Is there a weather window ideal for painting treated wood?
Yes. Choose dry, mild days with low humidity and temperatures between 50-85°F (10-29°C). Avoid painting in direct sun, high wind, or on surfaces that are too cold or damp.
Paint on a dry, mild day for best results.
Watch Video
Quick Summary
- Prepare treated wood with moisture checks and cleaning.
- Use a bonding primer compatible with treated lumber.
- Apply two thin coats of exterior latex for best durability.
- Let primer and topcoat dry fully between coats.
- Inspect and maintain coatings to maximize lifespan