Can You Paint Pressure Treated Wood? A Step-by-Step Guide
Learn how to paint pressure treated wood successfully: wait times, prep steps, primer choices, and topcoat options for durable exterior finishes that withstand sun, rain, and moisture.

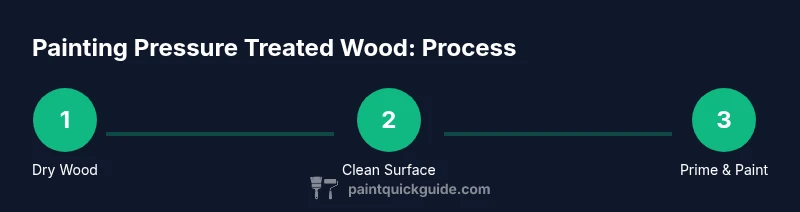
Yes, you can paint pressure treated wood. Before painting, let the wood dry completely, clean away dust, sand rough spots, and seal any end grain. Use a stain-blocking exterior primer and a high-quality acrylic exterior paint, applying two coats for durability. This approach prevents moisture intrusion and extends the life of the finish.
The Basics: Can You Paint Pressure Treated Wood?
Pressure treated lumber is designed to resist rot and insect damage, making it a common choice for decks, fences, and outdoor structures. The short answer is yes: you can paint pressure treated wood, but success depends on moisture content, cleanliness, and using the right coatings. According to PaintQuickGuide, proper prep and product choices are key to long-lasting painted pressure treated wood. The wood must be dry enough to accept coating, and you should select primers and finishes that are compatible with treated lumber. If you paint too soon, you risk peeling, blistering, and accelerated wear. The decision to paint also hinges on climate, exposure, and the project lifespans goals. Before you pick colors, inventory the area, check the wood age, and note any prior coatings or sealers. A good painter mindset is to treat PT wood like a porous, thirsty surface that needs time to breathe between moisture events. Start with a clear plan for surface prep, primer, and topcoat that matches the environment—exposure, wind, sun, and humidity all matter.
Moisture, Dry Time, and Waiting Periods
Understanding moisture is the foundation of a durable finish. Pressure treated lumber absorbs and releases moisture, and coatings adhere best when the wood is in balance with the surrounding air. There is no universal clock that tells you exactly when PT wood is ready for primer; the time varies with species, drainage, rainfall, and sun exposure. A practical approach is to perform a simple moisture check: the surface should feel dry to touch and show no noticeable sweating on a warm, dry day. If in doubt, postpone staining or painting until you can no longer observe moisture film on the surface after a few days of dry weather. The goal is to paint when the wood’s moisture content is low enough to allow the film to form without trapping moisture beneath it. Weather patterns can shift quickly, so monitor the forecast and avoid applying primer or paint if rain or heavy dew is expected within 24-48 hours. For outdoor projects, late spring through early fall often offers the most reliable conditions.
Primer, Paint, and Sheen Choices
Choosing the right products matters as much as the prep. For painted PT wood, you’ll typically want an exterior-grade acrylic latex paint with good UV resistance rather than interior paints. A stain-blocking primer is essential; it helps seal the porous surface and anchors the topcoat for better adhesion. Some projects benefit from a bonding primer designed for difficult surfaces; these products grip the rough texture of pressure treated lumber that may carry residual moisture or extractives. When selecting sheen, choose a mid-level gloss such as satin or eggshell for outdoor surfaces; these finishes balance aesthetics with washability and moisture resistance. Avoid alkyd or oil-based paints for most exterior PT wood, unless your climate and conditions strongly favor them and you are prepared for longer cure times and meticulous cleanup. If you’re painting on a deck or a boardwalk, consider a low-sheen finish that hides mildewed patches and minimizes glare. Shade and pigment choice also influence durability; lighter colors reflect heat and help reduce surface expansion and contraction. In all cases, follow the primer and paint manufacturer’s recommendations for surfaces that originate from treated lumber.
Surface Preparation: Cleaning, Sanding, and Protection
Surface prep is where most projects succeed or fail. Start by removing dirt, mildew, and previous coatings with a stiff brush and a cleaning solution (such as a mild detergent or a cleaner recommended for PT wood). A pressure washer can speed up the job, but avoid blasting the wood so aggressively that you raise the grain or gouge the surface. Rinse thoroughly and allow surfaces to dry completely; unfinished wood that remains damp will trap moisture under the primer. Lightly sand glossy areas and rough spots to create a tooth for the primer; use a medium-grit sandpaper (around 120-150 grit) and wipe away dust with a tack cloth. Protect adjacent surfaces with painter’s tape and drop cloths, and seal end grains with a penetrant or primer if needed to reduce excessive water uptake. Before you apply primer, ensure there is no sheen left from cleaning, as glossy residues can interfere with adhesion. Finally, inspect joints and cracks; fill them with a compatible exterior caulk to prevent water intrusion behind the finish.
Step-by-Step Painting Process (Overview)
While the full step-by-step guide follows a structured sequence, here’s the high-level plan you’ll implement: 1) Confirm dryness and environment; 2) Clean and dry; 3) Sand to create surface tooth; 4) Mask trim and protect surroundings; 5) Apply primer; 6) Apply first coat of paint; 7) Inspect, touch up, and apply second coat; 8) Allow cure and perform light maintenance checks after exposure to the elements.
Finishing Details: End Grain, Caulking, and Sealing
End grains on PT wood absorb moisture quickly and are common sources of failure if not properly sealed. Apply primer or a wood conditioner to end grain before painting to reduce soaking. Use exterior-grade acrylic caulk to seal gaps and joints; smooth it with a caulk tool or finger to ensure a tight seal. Some projects benefit from a clear sealant on end grains before painting; otherwise rely on your primer to seal the ends. After final coats, inspect for runs or sags and use a light sanding to refresh any uneven areas before final cure.
Maintenance and Longevity
Painted PT wood benefits from routine cleaning and annual inspection. Wash with a gentle detergent and rinse; avoid high-pressure washing that can lift paint. Re-coat every few years depending on exposure; sun, rain, and temperature fluctuations affect the lifespan. Keep planed boards and joints sealed; replace any warped boards as needed.
Common Mistakes to Avoid
Common mistakes include painting PT wood that is not fully dry, skipping the primer, choosing the wrong sheen, or failing to seal end grains. Another frequent error is applying paint in sites with poor ventilation or in temperatures that are too hot or too cold, which can cause premature peeling or cracking. Take your time with prep, test a small area, and adhere to manufacturer recommendations for primers and topcoats.
Tools & Materials
- Exterior-grade wood cleaner or TSP substitute(Follow label directions; use gloves and eye protection.)
- Pressure washer or stiff-bristle brush(Only use gentle settings if you opt for a washer.)
- Drop cloths or plastic sheeting(Protect nearby surfaces and soil.)
- Sandpaper, 120-150 grit(Lightly scuff glossy areas to improve adhesion.)
- Putty knife or scraper(Remove loose paint and repair joints.)
- Painter’s tape(Mask trim and edges to keep lines clean.)
- Stain-blocking exterior primer(Seal porosity and improve topcoat adhesion.)
- Exterior acrylic latex paint(Choose a product with UV and moisture resistance.)
- Paint roller (9-inch) and tray(For large flat areas.)
- Angled brushes (2-4 inches)(Edges, corners, and detailed work.)
- Exterior caulk or sealant(Seal gaps to prevent water intrusion.)
- Work gloves and safety glasses(Protect hands and eyes.)
- Wood conditioner (optional)(Optional for very porous end grains.)
Steps
Estimated time: 4-8 hours
- 1
Check moisture and plan timing
Assess whether the wood is dry enough for coatings. A moisture meter helps, but in general wait until the surface feels dry to the touch and shows no dampness. Consider climate and sun exposure when planning the project.
Tip: If moisture is uncertain, delay painting until a warm, dry window opens. - 2
Clean the surface thoroughly
Remove dirt, mildew, and previous coatings with a stiff brush and an appropriate cleaner. Rinse well and allow complete drying before sanding.
Tip: Rinse from top to bottom to avoid streaks; allow 24 hours of drying on calm days. - 3
Sand glossy areas to create tooth
Lightly sand any glossy or rough spots to improve primer adhesion. Wipe away dust with a tack cloth before priming.
Tip: Avoid heavy sanding that can gouge the wood; you only need a smooth, dull surface. - 4
Mask and protect surrounding areas
Cover adjacent siding, plants, and soil with drop cloths. Seal joints with painter’s tape to keep straight edges.
Tip: Use wide masking tape on irregular surfaces for a clean line. - 5
Apply primer to seal the surface
Brush or roll on a stain-blocking exterior primer, paying attention to end grains and joints. Allow the primer to dry per manufacturer guidelines.
Tip: Ensure primer coverage is complete in previously grainy areas for even paint grip. - 6
Apply first coat of exterior paint
Use long, even strokes to distribute pigment. Maintain a consistent want-into-wet edge to avoid lap marks.
Tip: Keep a wet edge and avoid overworking a single area. - 7
Apply second coat and inspect
After the first coat cures, apply a second coat for durable coverage. Inspect for thin spots and touch up as needed.
Tip: Two coats deliver better UV resistance and durability. - 8
Cure and perform final maintenance
Let the finish cure fully before heavy use. Schedule periodic checks for peeling, cracking, or fading and touch up as needed.
Tip: Clean annually and recoat every few years depending on climate.
Your Questions Answered
Can pressure treated wood be painted immediately after installation?
No, moisture must dissipate before painting; painting while wet or damp can cause peeling and poor adhesion.
Wait for the wood to dry before painting; otherwise the finish might peel off.
What primer should I use on pressure treated wood?
Use a stain-blocking exterior primer compatible with treated lumber to seal the surface and improve adhesion of the topcoat.
Choose a stain-blocking exterior primer for best results on treated wood.
Can I stain PT wood instead of painting?
Yes, staining is an option if you want to show wood grain; otherwise, follow the painting steps for durable coverage.
Stains work if you prefer the wood grain; if not, paint using proper prep.
Is spray painting suitable for pressure treated wood?
Spray painting can work but may cause uneven coats on textured PT wood; rolling or brushing gives more control for even coverage.
Sprays can be used, but rollers or brushes give better control on wood surfaces.
How long will painted PT wood last?
Duration depends on prep, product quality, climate, and maintenance; expect to refresh periodically based on exposure.
Durability varies; maintenance and climate determine how often you recoat.
Do I need to seal or clear coat under paint?
A quality primer typically suffices; you usually do not need a separate sealer under paint.
Primer plus paint is generally enough for protection.
Watch Video
Quick Summary
- Prep thoroughly: dry, clean, and sand for adhesion
- Prime with stain-blocking primer before painting
- Apply two coats of exterior paint for best durability
- Control weather windows to avoid moisture problems