Can You Paint Tile? A Practical DIY Guide
Learn how to repaint tile in kitchens, bathrooms, or floors with proper prep, primers, and tile-safe paints. This comprehensive guide covers surface prep, suitable coatings, application techniques, and maintenance for durable, long-lasting results.

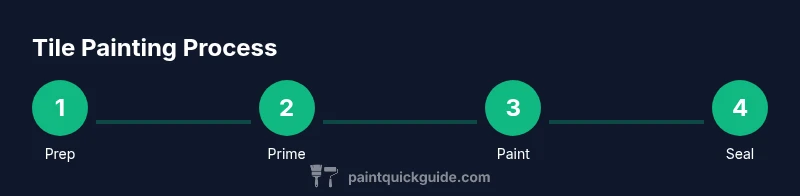
Yes. You can paint tile with the right prep, primer, and tile-safe paint. This guide explains how to prep glazed ceramic, porcelain, or quarry tile, choose durable coatings, and seal the finished surface. Expect a long-lasting result when you thoroughly clean, etch, prime, and apply multiple thin coats, plus a final sealant. Follow the steps below for best results.
Can You Paint Tile? Practical Insight
Can you paint tile? For many homeowners, the answer is yes, with the right prep and products. This section sets the stage for a durable, long-lasting finish on common interior tiles found in kitchens, bathrooms, laundry rooms, and entryways. The PaintQuickGuide team emphasizes that success comes from honest surface assessment, selecting enamel or epoxy-tile paints, and following a disciplined sequence: cleaning, etching or abrading, priming, painting, and sealing. Different tile types—glazed ceramic, porcelain, and quarry tile—respond differently to coatings, so set expectations accordingly. This guide will outline exact steps, recommended primers, and topcoats that promote adhesion and moisture resistance. You’ll also learn how to test a small area first and then scale up. By the end, you’ll know which tiles qualify, what tools you’ll need, and the general timeline to expect. The guidance here aligns with PaintQuickGuide recommendations for reliable results.
Tile Painting: Where It Shines and Where It Falls Short
Tiles in high-moisture zones (like showers) can benefit from specialized coatings, but not all tiles are ideal candidates for painting. Porous, unglazed alternatives may require different prep or be better left as-is. In this guide, we focus on glazed ceramic, porcelain, and quarry tiles commonly found in homes. Understanding your tile’s glaze, porosity, and wear pattern helps you decide whether painting is the best option. Remember: the goal is to improve appearance without compromising surface integrity or hygiene. PaintQuickGuide analysis shows that well-prepped surfaces plus high-quality enamel or epoxy paints can deliver durable results if expectations are realistic and maintenance is consistent.
Brand Insight and Practical Scope
In practice, painting tile is a feasible DIY upgrade when you’re patient and meticulous. The PaintQuickGuide team stresses the importance of choosing products designed for tile, performing a proper etch or abrade step on glazed surfaces, and allowing full cure between coats. If you’re painting floors or wet areas, plan for extra breathing room and consider a protective topcoat suitable for moisture and wear. A thoughtful approach to prep, timing, and testing will pay off with a refreshed surface that remains easy to clean and visually appealing for years.
Planning Your Project: Qualify the Tile and Define the Finish
Before you buy supplies, inspect the tile for cracks, loose grout, or damage that could undermine adhesion. Decide whether you want a matte, satin, or high-gloss finish and whether the space will see frequent moisture or heavy use. A lighter, less porous tile may require fewer coats of primer and paint, while rougher tile surfaces will need more thorough abrasion and longer curing times between coats. Your plan should also include tape, drop cloths, and protective gear to keep surrounding surfaces clean and safe during the project.
Safety, Ventilation, and Environment
Work in a well-ventilated area and wear a mask if you’re using solvent-based primers or paints. Keep pets and kids away during prep and painting, and avoid walls or fixtures that aren’t part of the project. Proper ventilation helps manage fumes and ensures faster drying between coats. If you’re painting a high-traffic area, consider scheduling steps to minimize exposure and to check grip tests before resuming work. The overall process benefits from a calm, methodical pace rather than rushing through the steps.
Tools & Materials
- Tile-cleaner / degreaser(Strong enough to remove soap scum and kitchen grease)
- Warm water and sponge(For initial cleaning and rinse)
- Sponge with scrub pad(Non-abrasive for cleaning; avoid harsh tools)
- 120–220 grit sanding sponge or sandpaper(Lightly abrade glaze to improve adhesion)
- Plastic putty knife(For patching small cracks or flaws)
- Painter’s tape(Protect adjacent surfaces and grout lines)
- Drop cloths or plastic sheeting(Contain dust and drips)
- High-quality bonding primer for tile(Promotes adhesion to smooth tile surfaces)
- Tile-safe enamel or epoxy paint(Choose finish based on location (bathroom/kitchen) and wear)
- Clear sealing topcoat (polyurethane or epoxy)(Waterproof and abrasion resistance)
- Paint tray and micro-fiber rollers/brushes(Thin, even coats; avoid thick application)
- Respirator or mask and disposable gloves(Protect lungs and skin from fumes)
Steps
Estimated time: 24-48 hours total (including cure time)
- 1
Protect the area
Move furniture, remove fixtures where possible, and cover floors with drop cloths. Apply painter’s tape to grout lines and edges you don’t want coated. This initial protection minimizes cleanup and keeps non-target surfaces clean.
Tip: Use clear plastic to cover outlets and switch plates; label your protection for easy removal. - 2
Clean and inspect the tile
Thoroughly wash tile with a degreasing cleaner, rinse, and dry completely. Inspect for cracks or loose grout; repair as needed before painting to prevent future peeling.
Tip: If grout is damaged, seal it first or regrout after painting to keep a clean appearance. - 3
Roughen glaze for adhesion
Gently abrade glazed surfaces with 120–220 grit sandpaper to create micro-abrasions. Wipe away dust with a damp cloth and let dry before priming.
Tip: Avoid over-sanding; you just need a light scuff to improve bonding, not remove the glaze. - 4
Apply bonding primer
Apply a thin, even coat of tile-bonding primer. Allow it to dry per manufacturer guidelines; this step is critical for long-term adhesion.
Tip: Use a high-quality brush for corners and a roller for flat surfaces to avoid lap marks. - 5
Paint with thin coats
Apply the first coat of tile enamel or epoxy using long, even strokes. Let it dry completely before applying a second coat. Multiple thin coats beat one thick coat for durability.
Tip: Work in small sections to maintain a wet edge and minimize lap lines. - 6
Seal the surface
Once color coats have cured, apply a compatible clear topcoat for moisture resistance and wear protection. Follow with another light cure period before use.
Tip: Choose a sealant compatible with your chosen paint and intended use (bathroom versus kitchen). - 7
Cure and test
Allow the project to cure fully before exposure to moisture or heavy traffic. Test a small area with light abrasion after 24–48 hours to ensure coating integrity.
Tip: Avoid cleaning the area vigorously for at least 72 hours after final cure.
Your Questions Answered
Can you paint over tile?
Yes, many tiles can be successfully painted after proper cleaning, etching, and priming. Some tiles may require replacement rather than painting if the surface is deeply damaged or very porous. Always test on a small area first to verify adhesion and color stability.
Yes, you can paint many tiles, but test a small area first to ensure the paint sticks and stays even.
What kind of paint is best for tile?
Choose enamel or epoxy paints designed for tile and moisture-prone areas. These formulations adhere well to prepared tile surfaces and resist moisture and wear better than standard wall paints.
Use enamel or epoxy tile paint for better adhesion and durability.
Do I need to etch or abrade tiles before painting?
Yes. A light abrasion or etch helps the primer bond to glossy or glazed tiles. Without this step, coatings may peel or wear unevenly over time.
Yes, roughen the surface a bit so the primer sticks reliably.
Will painted tile wear away in high-traffic areas?
Durability depends on prep, product choice, and maintenance. In bathrooms and kitchens, a quality primer, enamel, and topcoat with proper cure time significantly improves longevity.
If you prep well and choose the right products, painted tile can last well in busy zones.
Is tile painting suitable for bathroom tiles?
Yes, with moisture-resistant primer and paint, plus a suitable topcoat. Ventilation is critical to prevent moisture buildup during curing.
Yes, bathrooms can work with the right moisture-resistant coatings.
How long does tile paint last before needing touch-ups?
Longevity varies with use and care. Expect occasional touch-ups in high-use areas, and re-sealing when wear becomes visible.
Durability depends on use; you may need touch-ups over time.
Are there fumes to worry about during painting tile?
Yes, especially with solvent-based primers or paints. Use proper ventilation, masks, and follow product warnings.
Yes—ventilate well and wear a mask to stay safe.
Can I DIY tile painting on a floor?
Floor tile painting is possible but requires durable products, thorough prep, and longer cure times. Consider heavy-traffic areas carefully and choose a robust topcoat.
You can DIY floor tile, just pick the right products and give it time to cure.
Watch Video
Quick Summary
- Prepare surface thoroughly with cleaning and abrading.
- Use a bonding primer and tile-safe paint for best adhesion.
- Apply multiple thin coats for even color and durability.
- Seal and cure properly before heavy use.
- The PaintQuickGuide verdict: meticulous prep yields lasting tile transformations.