How to Keep Paint from Chipping Off Plastic
Learn practical steps to prevent paint from chipping on plastic surfaces. This PaintQuickGuide how-to covers prep, priming, flexible coatings, application, and long-lasting finishes for durable DIY plastic painting.

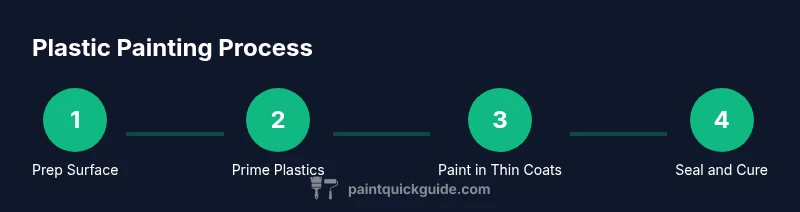
According to PaintQuickGuide, you can prevent paint from chipping off plastic by proper surface prep, a compatible primer, and flexible topcoats. Start with a clean, dry surface, lightly scuff with fine sandpaper, and remove dust. Apply a dedicated adhesion primer for plastics, then several thin coats of flexible paint. Use non-solvent cleaners, work in 60–75°F, and finish with a UV-resistant sealant for durability.
Why Plastic Surfaces Chip and How to Stop It
Plastic surfaces chip and peel when coatings fail to bond to the material's low surface energy, when plastics flex or heat, or when cleaners leave residues. The result is micro-cracks that grow into visible chips. The key to preventing this is a predictable, repeatable prep and coating system: start with compatible materials, ensure clean surfaces, and use primers and topcoats formulated for plastics. According to PaintQuickGuide, adhesion and elasticity are the two main levers for success on plastic substrates. When these are addressed, you’ll see dramatically fewer chips and longer-lasting color on bumpers, dashboards, consumer housings, and outdoor plastic parts.
This is especially true for surfaces exposed to temperature fluctuations, sunlight, or frequent handling, where micro-motions and flexing stress can reveal weak adhesion. A well-designed system also considers chemical exposure from cleaners and environmental contaminants. With the right combination of surface prep, primer, and topcoat, you create a resilient barrier that resists cracking and delamination even during daily wear.
Surface Preparation: Clean, Dry, and Mechanical Keying
Before you apply any coating, the surface must be clean, dry, and prepared to accept the next layer. Begin with warm, soapy water to remove oils and fingerprints, then rinse and dry completely. Isopropyl alcohol can help remove stubborn residues, but avoid leaving any film. In addition to cleaning, mechanical keying—lightly scuffing the surface with a fine-grit sandpaper or abrasive pad—creates microscopic “tooth” for the primer to grab. Use only enough pressure to roughen the surface without creating deep scratches that can trap air or moisture. Wipe away all dust with a tack cloth. The goal is a micro-rough surface without removing the plastic’s shape or gloss. PaintQuickGuide emphasizes that proper surface preparation is the foundation of lasting adhesion for plastics.
Additional practical tip from field testing: ensure corners and edges receive the same prep treatment as flat areas, as chips often start at sharp transitions where adhesion is weakest.
Choosing the Right Primer for Plastics
Not all primers play nicely with plastic. Look for adhesion primers labeled for plastics or for low-energy substrates. These primers flex with the plastic and create a compatible interface for subsequent paint coats. Apply a thin, uniform coat and let it dry fully before adding another. If you’re working with very hard, smooth plastics, consider a primer with a slight solvent action to slightly melt the surface, improving bond. Always follow the manufacturer’s recoat times and ventilation requirements. A well-chosen primer reduces the risk of peeling when the plastic expands and contracts in heat or cold. PaintQuickGuide analysis shows that adhesion improves when primers designed for plastics are used, especially on low-energy substrates.
Remember to test any primer on a small, inconspicuous area first to confirm compatibility with your plastic type.
Selecting Paint Types and Finishes for Plastic
Flexible acrylics or urethane-based paints generally perform better on plastic than rigid solvent-borne coatings. Choose products marketed as “plastic compatible,” “flexible,” or designed for automotive plastics if you’re coating automotive parts. Matte, satin, or low-gloss finishes tend to hide micro-chips better than high-gloss options when the surface moves. For exterior plastics, UV-stabilized formulations help prevent chalking and color fade. Avoid epoxy-only systems unless the plastic will not flex. By selecting the right base and finish, you create a layer that resists cracking and peeling under normal use. The right finish also helps resist humidity and grime accumulation, which can otherwise compromise adhesion over time.
Application Techniques: Thin Coats, Tools, and Timing
Apply paint in multiple ultra-thin coats rather than one thick layer. Thin coats cure more evenly, reduce runs, and improve adhesion at the interface. Use a quality brush, roller, or spray equipment suitable for plastics, and maintain consistent distance and motion to avoid heavy buildup. Allow each coat to dry to a tack-free state before applying the next. If you’re spraying, keep the nozzle at the manufacturer’s recommended distance and use light passes for a smooth, even film. Sand lightly between coats if needed and wipe away dust. The goal is a flexible, continuous film that resists cracking as the plastic flexes.
Keep temps in the recommended range to avoid rapid solvent evaporation, which can cause micro-cracking at the film edge. If your kit includes a retarder or flow enhancer, add per the instructions to avoid orange peel texture.
Protective Topcoats and Curing Practices
Finish with a flexible, UV-resistant topcoat to seal in color and add abrasion resistance. If the paint is a solvent-based system, ensure proper ventilation and a safe curing environment. Cure times vary; avoid heavy handling until the coating is fully tack-free and cured according to the product label. Some plastics require a clear sealant with antioxidant properties to resist yellowing and hazing. After curing, inspect for missed spots and touch up as needed. A well-sealed surface remains chip-resistant through routine use. UV protection extends the longevity of color, especially on outdoor plastics exposed to sun exposure and weathering.
Troubleshooting and Maintenance for Longevity
If chips appear, assess the underlying cause: inadequate adhesion, incompatibility, or surface damage from impact. Resolve by scuffing, re-priming, and reapplying thin coats. Regular cleaning with non-abrasive cleaners and avoiding harsh solvents helps preserve the finish. For outdoor plastic, consider periodic reapplication of topcoat to maintain gloss and color. Keep a small repair kit handy for quick fixes, and store pigments and primers away from heat. The PaintQuickGuide team recommends documenting your process and logging coat failure modes to optimize future projects.
Tools & Materials
- Cleaning supplies (mild dish soap + water)(Use mild detergent to remove oils)
- Isopropyl alcohol (70% or higher)(For degreasing before priming)
- Fine-grit sandpaper (320-400 grit)(Lightly scuff plastic to improve adhesion)
- Adhesion primer for plastics(Choose a primer designed for hard plastics)
- Flexible acrylic enamel or urethane topcoat(Select a flexible, plastic-friendly paint)
- Masking tape and protective coverings(Protect edges and surrounding areas)
- Soft lint-free cloths, tack cloth(For dust removal and final wipe)
- Paint spray gun or aerosol spray can(Optional; spray offers uniform thin coats)
Steps
Estimated time: Estimated total time: 2-6 hours (prep and painting), plus cure time per product guidelines
- 1
Identify plastic type and compatibility
Determine the plastic family (ABS, polycarbonate, PVC, etc.) and check primer compatibility. If unsure, test a small area with the chosen primer and paint. This helps prevent adhesion failure in the long run.
Tip: Always start with a spot test to verify bonding behavior. - 2
Clean and degrease thoroughly
Wipe the surface with warm soapy water, then rinse and dry completely. Use isopropyl alcohol to remove any remaining residues. A clean, residue-free surface is essential for good adhesion.
Tip: Avoid leaving soap films; they can weaken bonding if not fully rinsed. - 3
Scuff-sand to create adhesion key
Lightly scuff the area with fine-grit sandpaper to create micro-roughness. Do not over-sand—maintain the plastic’s original shape and gloss where possible. Remove all dust with a tack cloth before priming.
Tip: Target edges and corners where chips often start. - 4
Apply adhesion primer for plastics
Spray or brush a thin, uniform layer of primer formulated for plastics. Allow full flash and dry time per the label. Additional thin coats may be necessary for difficult substrates.
Tip: Keep coats light to avoid pooling and solvent sheen. - 5
Paint in thin coats
Apply multiple ultra-thin coats rather than one thick layer. Allow each coat to dry to a tack-free state. If spray, maintain consistent distance and use light passes for a smooth finish.
Tip: Between coats, wipe with a tack cloth to remove dust. - 6
Seal and cure
Finish with a flexible, UV-resistant topcoat and let it cure fully per the product instructions. Avoid handling until cured to prevent marring or premature chipping.
Tip: Check cure times; warmer room temperatures can accelerate drying but watch for defects.
Your Questions Answered
What is the best primer for plastic surfaces?
Use an adhesion primer specifically formulated for plastics to ensure bonding on low-energy substrates. Test compatibility on a hidden area first.
Use a plastic-specific adhesion primer and test a hidden area first.
Can I use latex paint on plastic?
Yes, with a plastic-compatible primer. However, consider using flexible enamel or acrylics to reduce cracking as the plastic moves.
Yes, with the right primer; flexible enamel is often a better choice.
Do I need to sand plastic before painting?
Lightly sanding improves adhesion by creating a micro-rough surface. Avoid deep scratches that can trap moisture or cause scuffing.
Yes, just lightly sand to create a rough surface.
How long should I wait between coats?
Follow the product instructions for dry-to-touch times. In general, wait until a tack-free state before applying the next coat.
Wait until tack-free according to the product label.
Is a UV sealant necessary?
A UV-resistant topcoat helps prevent color fade and chalking on sun-exposed plastic. It also adds abrasion resistance.
Yes, a UV-resistant topcoat helps longevity.
What maintenance keeps the finish from chipping long-term?
Regular cleaning with gentle cleaners, avoiding harsh solvents, and periodic re-coating as needed keep the finish resilient against chips.
Clean gently and re-coat as needed to stay chip-resistant.
Watch Video
Quick Summary
- Prepare thoroughly for strong adhesion
- Choose plastic-specific primers for best results
- Apply thin coats for durability
- Seal with UV-resistant topcoat to prevent fading
- Follow cure times to maximize longevity