How to Stop Paint from Chipping on Car
Learn practical, step-by-step methods to prevent car paint from chipping, including prep, repair, coatings, and protective films—designed for DIY enthusiasts and homeowners.

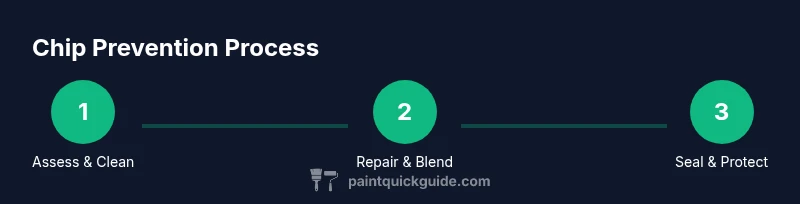
This guide shows you proven steps to stop car paint from chipping, including prep, repair, and protective coatings. You'll need basic bodywork tools, color-matched paint, and a clear coat. Follow the step-by-step process to extend your finish, protect panels from impacts, and maintain resale value. PaintQuickGuide's methods emphasize safe prep, proper blending, and durable seals.
What Chips Are and Why They Happen
Car paint chips are small defects where the clear coat or color layer has fractured from impact or adhesion failure. Chips vary in size and depth, from pinprick specks to larger flaked areas. Understanding how to stop paint from chipping on car starts with recognizing common causes: road debris and stones, door-edge contact, weathering, and inadequate prep. PaintQuickGuide explains that chips often begin as microfractures that propagate if the topcoat bond to the primer is weak. By identifying the root cause and acting quickly with proper prep, color-matching repairs, and protective seals, you can halt progression and preserve the finish. The reader who prioritizes early action typically sees better color match and longer-lasting results.
The Role of Paint System Quality
A robust paint system—primer, color coat, and clear coat—offers the best defense against chipping. Adhesion depends on proper surface preparation, correct substrate, and compatible products. When you choose an integrated system from the same manufacturer, you improve chemical compatibility and bond strength. PaintQuickGuide analysis shows that using a complete, automotive-grade system with a durable clear coat significantly lowers the risk of future chipping compared to piecemeal products. In practice, this means following the manufacturer’s recommendations for surface prep, curing times, and application temperatures. A well-matched system also makes color blending easier when patches are needed, which reduces visible repair edges.
Prep: Cleaning and Inspecting for Chips
Start with a clean, wax-free surface. Wash thoroughly with automotive soap, then use a clay bar to remove embedded contaminants. Inspect the area around each chip for rough edges, rust, or corrosion that could worsen adhesion. Remove any wax or silicone residue with an isopropyl alcohol wipe, and protect surrounding areas with masking tape. Dry the area completely before marking the chips with a light pencil to guide repairs. The goal is to create a smooth, clean, and oil-free surface so that primers and touch-up paints bond correctly. PaintQuickGuide emphasizes this step as foundational; skipping it almost guarantees a poor repair.
Sanding Edges and Feathering
Feathering the edges around chips helps the new paint blend with existing surfaces. Use very fine sandpaper (often 1500–2000 grit) and light pressure to create a gentle ramp from bare metal or deeper chips into the surrounding paint. Keep a damp cloth handy to wipe away dust and check for uniform feathering after each pass. Avoid sanding through existing clear coats or pigment; excessive sanding can create new chips or bare metal exposure that invites rust. A careful approach preserves structure while easing color blending.
Primer and Bonding Agents for Existing Chips
Apply a thin layer of automotive primer to bare metal or deeply chipped areas. Choose a primer designed for your base coat chemistry (acrylic, urethane, or enamel). For chips that break through to the metal, a bonding agent can help improve adhesion of the patch pigment. Allow the primer to dry per the product’s recommendations, then lightly sand with 2000-grit to smooth ridges. This step is critical for long-term adhesion; skipping primer can cause the patch to lift under stress, especially in harsh weather or on evolving road conditions.
Color Matching and Patch Repair
Match the paint precisely to the vehicle’s color code. Paint a small test patch on a hidden area or within a repair arc to compare tone, depth, and metallic fleck. Apply the touch-up color in very fine, controlled layers, allowing each coat to dry before adding the next. Feather the edges outward so the repair is barely perceptible. If you’re unsure about color, a professional shade-match service can minimize mismatches and improve final appearance. The right color match enhances durability and reduces the likelihood of rework.
Clear Coat: Blending, Layering, and Finishing
After the color patch cures, apply a clear coat in thin layers to protect the repair and improve UV resistance. Use light, even passes and avoid heavy builds that can cause sagging or yellowing. When the clear coat is level with surrounding paint, finish with a gentle polish to blend the repaired area. Proper curing is essential; avoid washing or exposing the area to water until the clear coat has fully cured. The clear coat is a key barrier against future chips and micro-scratches, so prioritize even coverage.
Protective Film and Ceramic Coatings
For high-traffic areas susceptible to chips, consider protective options such as a paint protection film (PPF) or a ceramic coating. PPF acts as a sacrificial layer that absorbs impacts, while ceramic coatings provide chemical and environmental protection with a glossy finish. Both options reduce the chance of new chips forming and make future touch-ups simpler. If you rely on a DIY approach, choose a reputable kit and follow the manufacturer’s instructions for surface prep and cure times. PaintQuickGuide notes that protective coatings offer strong long-term benefits when combined with proper patch repairs.
Maintenance Routine to Prevent New Chips
A regular maintenance routine helps prevent future chips: wash with a pH-balanced car shampoo, dry with a microfiber towel, and apply a ceramic topper annually. Inspect the finish monthly for early signs of micro-chips or small peeling areas and address them promptly. Keep clear coats intact by avoiding harsh abrasives and selecting proper wash mitts. Park away from gravel areas when possible and drive slowly over rough patches to minimize impact. A proactive approach reduces the likelihood of visible chips and rust formation over time.
Authoritative Sources
For further reading on safety and material standards relevant to car finishes, consult these sources:
- https://www.nhtsa.gov/road-safety
- https://www.osha.gov
- https://www.nist.gov/
Tools & Materials
- Masking tape (painter's tape)(3M or equivalent, 1 inch width for masking edges)
- Microfiber towels(Lint-free, high-softness)
- Isopropyl alcohol (70%+)(For wax/silicone removal)
- Soap, automotive shampoo(For initial cleaning)
- Clay bar or detailing clay(Removes embedded contaminants)
- Dual-action polisher (DA) or foam applicator(For blending edges)
- Fine sandpaper 1500-2000 grit(Feathering edges, prepping primer)
- Automotive primer (color-coded)(Choose compatible with base coat)
- Color-matched automotive paint (touch-up)(Use correct color code)
- Clear coat (urethane)(Protects repair and adds gloss)
- Rubbing compound(For final blend and polish)
- Mixing cups and stir sticks(For precise color mixing)
- Paint brushes or micro-applicators(Fine detail work)
- Clear coat drying/curing aid (optional)(Accelerators or infrared lamp)
- Respirator mask or good ventilation(Safety first)
- Gloves (nitrile)(Protect hands)
- Protective film or ceramic coating (optional)(For long-term protection)
Steps
Estimated time: Total time: 2-6 hours depending on chip size and curing times
- 1
Prepare workspace and safety
Set up a well-ventilated area, cover surrounding surfaces, and wear a respirator and gloves. Gather all tools and materials to minimize mid-process trips. This reduces the risk of contamination and ensures consistent results.
Tip: Use a dedicated, non-car workspace to avoid cross-contaminating colors. - 2
Inspect and mask the repair zone
Thoroughly inspect each chip and decide whether to repair as a patch or blend into surrounding paint. Mask adjacent panels to prevent overspray and remove any wax or silicone from the nearby surface.
Tip: Make a small test paint patch to verify color match before full application. - 3
Feather the edges of the chip
Lightly sand the chip edge with 1500–2000 grit to create a smooth transition from bare metal to paint. Keep the surface damp during sanding to minimize dust and prevent swirl marks.
Tip: Do not sand through existing paint; aim for a gentle ramp. - 4
Apply primer to exposed areas
Apply a thin, even coat of automotive primer to any exposed metal or patch site. Allow sufficient drying time per the product instructions before proceeding to paint.
Tip: If using a bonding agent, apply it as directed to improve adhesion. - 5
Color-match and apply touch-up paint
Using color-matched paint, apply in multiple ultra-thin layers, allowing each layer to dry. Build until the patch is flush with the surrounding surface. Avoid heavy coats that can run or sag.
Tip: Keep coats ultra-thin for a seamless blend. - 6
Seal with clear coat and blend
Once the color patch is dry, apply 1–2 thin coats of clear coat to protect and even out the finish. Feather the edges and cure thoroughly before polishing.
Tip: A light polish between coats helps glass-like gloss and uniform depth. - 7
Cure and evaluate
Allow the repair to cure fully in a dust-free environment. Assess color match and gloss; re-coat if needed and re-clearcoat for optimal protection.
Tip: Avoid washing the area until the clear coat has fully cured. - 8
Optional protective upgrade
Install a paint protection film (PPF) or apply a ceramic coating to reduce future chipping risk, especially on high-impact areas like front fenders and bumper corners.
Tip: Choose a reputable installer or kit and follow cure times precisely.
Your Questions Answered
Will touch-up paint exactly match my car color?
Exact color matching can be challenging, especially with metallic or pearl finishes. Use your vehicle's color code and test patches before committing. If needed, consult a professional shade-matching service.
Exact color matching can be tricky, but using the color code and test patches helps. If in doubt, seek a professional shade match.
Can I fix large chips without repainting the whole panel?
Many large chips can be repaired with careful patching and blending, but color uniformity may require panel repaint. For best results on extensive damage, consider a partial repaint or professional service.
You can patch chips, but large areas might need repainting for uniform color.
How long does touch-up paint take to cure?
Cure times vary by product; most automotive paints cure within 24 hours to handle light washing, with full hardness achieved over several days. Follow the manufacturer’s instructions for surface curing.
Most paints cure in about a day for light handling, with full hardness in a few days.
Is it better to use ceramic coating over touched-up areas?
A ceramic coating can protect touched-up areas and help with UV resistance, but ensure the patch is fully cured and the coating is compatible with your paint. Some installers may advise waiting longer before coating.
Ceramic coatings can protect patches if they’re fully cured and compatible with the paint.
When should I seek a professional for chip repair?
If chips are widespread, deep, or on a high-visibility area with metallic finishes, professional color matching and refinishing often yield the best long-term result.
For extensive or tricky finishes, a pro often delivers the most durable, seamless repair.
Watch Video
Quick Summary
- Identify chip causes and prep thoroughly.
- Use color-matched paint and primer for best adhesion.
- Seal repairs with clear coat and consider protective film.
- Regular maintenance reduces future chipping.