Paint for Plastic Siding: Practical How-To Guide
A practical, step-by-step guide to painting plastic siding with durable, exterior-ready finishes. Learn prep, primer needs, paint types, tools, technique, and maintenance to extend your siding's life.

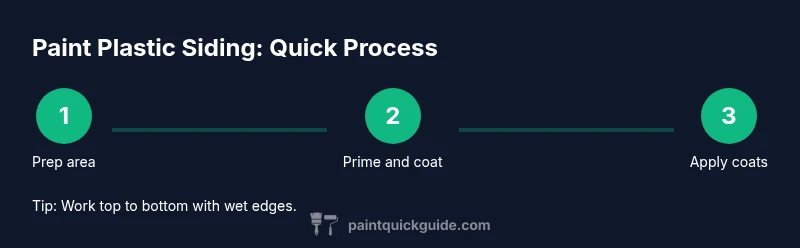
Goal: successfully paint plastic siding with a long-lasting, smooth finish. You’ll need exterior-grade acrylic paint labeled for plastic, a compatible primer if required, and proper cleaning. Wash the siding, remove flaking paint, and let it dry. Apply two thin coats, allow 4–6 hours between coats, and let the final coat cure 24–48 hours before exposure.
Why paint for plastic siding matters
According to PaintQuickGuide, painting plastic siding can refresh your home's exterior and protect it from weathering when you use the right products and technique. Plastic siding, including vinyl and PVC, expands and contracts with temperature changes, so a flexible, exterior-grade acrylic paint is essential. A proper paint job can resist fading, cracking, and mildew, while keeping maintenance relatively low. In this block, we’ll cover the factors that make a coating durable, including material compatibility, surface prep, and long-term care. By choosing the right paint for plastic siding, homeowners can dramatically improve curb appeal without frequent repairs.
Beyond appearance, the right finish also contributes to energy efficiency and weather resistance. The PaintQuickGuide team emphasizes selecting products that offer UV protection and elasticity to handle seasonal movement. Practically, this means prioritizing dedicated plastics coatings and following label directions for surface prep and curing times. This approach helps you avoid peeling or cracking that plague cheaper paints on flexible siding.
Choosing the right paint and primer for plastic siding
When selecting paint for plastic siding, look for exterior-grade acrylic latex paints labeled specifically for plastic or vinyl surfaces. These products are formulated to remain flexible as the siding expands and contracts with temperature shifts. Avoid interior wall paints or oil-based enamels, which can become brittle and peel. Some vinyl siding brands require a bonding primer to help the coating adhere; others bond directly. Always read the label to confirm whether a primer is recommended or required.
Colorfastness, mildew resistance, and UV blockers are important considerations. For durability, choose a finish in satin or semi-gloss that’s easier to clean and resists dirt buildup. If you’re unsure, a small patch test will reveal how well the paint adheres to your specific siding material. This decision directly affects long-term maintenance and the overall look of your home.
Prep work that ensures lasting adhesion
Preparation is the single most important step in a successful paint job on plastic siding. Start by inspecting the surface for loose paint, cracks, and mildew. Remove loose material with a plastic scraper and wipe the area clean. Wash the entire siding with a mild detergent solution to remove dirt, grease, and chalky residue. Rinse thoroughly and allow to dry completely before proceeding. For glossy or very smooth sections, lightly scuff with fine sandpaper to improve bonding. Mask adjacent surfaces with painter’s tape and cover plants and walkways with drop cloths.
Proper prep minimizes peeling and ensures the coating bonds well on plastic, which is less forgiving than wood or masonry.
Application techniques: brushes, rollers, and sprayers
You have options for applying paint to plastic siding, but consistency matters more than the method. Use a high-quality brush or a short-nap roller (3/8
Tools & Materials
- Exterior-grade acrylic paint labeled for plastic siding(Choose durable, fade-resistant formula; satin or semi-gloss finishes recommended for easier cleaning.)
- Plastic-compatible bonding primer (if recommended by the paint label)(Not all products require primer; follow the manufacturer's guidance.)
- Plastic-safe cleaner and degreaser(Mild detergent or specialty cleaner; avoid harsh solvents.)
- Soft-bristle brush, sponge, or microfiber rollers(Use 3/8” to 1/2” nap for vinyl; keep roller clean.)
- Masking tape, drop cloths, and plastic sheeting(Protect windows, doors, and surrounding surfaces.)
- Nitrile gloves, safety glasses(Personal protection.)
- Paint trays, stir sticks, and strainers(Stir paint thoroughly; strain before pouring.)
- Ladder or extension pole(Safe height for reaching siding; ensure stability.)
- Sandpaper (120–220 grit)(Lightly scuff glossy areas to improve adhesion.)
- Paint sprayer (optional)(For large areas; requires masking and ventilation.)
Steps
Estimated time: 8-12 hours active, plus 24-48 hours curing
- 1
Protect the work area
Mask off nearby plants, windows, outlets, and surfaces you don’t want painted. Use drop cloths on the ground and masking tape along trim to prevent splatter.
Tip: Apply mask first, then set up drop cloths to keep work flowing. - 2
Prepare the surface
Inspect siding for cracks or loose material. Plan repairs before coating to avoid trapping damage under paint.
Tip: Tackle repairs with a flexible filler and smooth flush to the surrounding area. - 3
Clean and degrease
Wash the siding with a mild detergent solution to remove dirt, grease, and mildew. Rinse thoroughly and allow to dry completely.
Tip: Work from bottom to top to prevent dirty water running over finished sections. - 4
Repair and sand rough spots
Fill minor cracks, smooth edges, and lightly sand glossy areas to improve bonding. Wipe away dust after sanding.
Tip: Don’t sand too aggressively; you want micro-scratches, not deep grooves. - 5
Prime the surface (if required)
If the paint label calls for bonding primer on plastic, apply a thin, uniform coat and let it dry per manufacturer instructions.
Tip: Test adhesion on a small patch before full coverage. - 6
Stir and strain the paint
Stir thoroughly to achieve a consistent pigment dispersion. Strain to remove any lumps or debris.
Tip: Avoid whipping air into the paint; keep strokes smooth. - 7
Apply the first coat evenly
Use long, even strokes with a wet edge to avoid lap marks. Maintain consistent pressure and speed.
Tip: Pause at window frames to avoid heavy buildup. - 8
Apply the second coat and inspect finish
Allow the first coat to dry per label, then apply a second coat. Check for color consistency and adhesion, touching up as needed.
Tip: If color shows through, apply a third ultra-thin coat only where needed. - 9
Cure and clean up
Let the coating cure for 24–48 hours before heavy use or rain exposure. Clean brushes and tools with the recommended solvent.
Tip: Ventilate the area during curing to speed drying.
Your Questions Answered
Can I paint plastic siding without primer?
Some plastics accept latex paint directly, but many vinyl siding projects benefit from a bonding primer if the label requires it. Always follow the product’s instructions and perform a patch test before full application.
Some plastics can be painted without primer, but always check the label and test a small patch first.
What kind of paint works best on plastic siding?
Exterior-grade acrylic latex paint labeled for plastic or vinyl is typically the best choice. It remains flexible, resists fading, and cleans up with soap and water.
Exterior acrylic latex paint labeled for plastic is usually your best option.
How long will the paint last on plastic siding?
Durability depends on preparation, product quality, and climate. With proper prep and two coats, expect improved longevity and easier maintenance compared to cheaper coatings.
With proper prep and two coats, you can expect longer-lasting results than cheaper coatings.
Can I spray paint plastic siding?
Spray painting is possible for large areas, but requires masking, proper ventilation, and multiple thin coats to avoid runs. Technique and equipment quality affect results.
Yes, you can spray paint, but take care with masking and apply several thin coats.
Can I paint over old plastic siding paint?
You can often paint over existing paint if it adheres well. If the old paint is peeling or chalking, remove or sand it before applying a fresh coat and consider primer if recommended.
Yes, as long as the old paint sticks well; otherwise, prep is needed.
Do I need to seal plastic siding after painting?
Sealing is not typically required for latex paints on plastic siding, but you should seal the work area with masking tape and thoroughly clean tools. Follow the paint label for any additional sealant recommendations.
Sealing isn’t usually required with latex paints on plastic siding, but follow the label.
Watch Video
Quick Summary
- Prepare the surface thoroughly before painting.
- Choose exterior acrylic paint labeled for plastic siding.
- Mask and protect surroundings to prevent staining.
- Apply two thin coats, not a single thick coat.
- Allow adequate cure time between coats and after final coat.