Is It OK to Paint Over Wallpaper? A Practical Guide for Homeowners
Learn whether you can paint over wallpaper, how to prep, prime, and paint for a durable finish. Practical steps, tools, and safety tips for homeowners and DIYers.

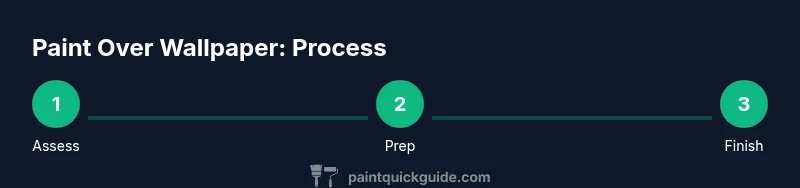
You can paint over many wallpaper surfaces, but success hinges on prep, wallpaper type, and the right primers. Start with a quick adhesion test and thorough cleaning, then choose a bonding primer and a quality latex paint. Gather scrapers, sandpaper, painter’s tape, drop cloths, and a two-coat finish. If wallpaper is peeling or has hazardous adhesives, remove or seal before painting.
Is It OK to Paint Over Wallpaper? A Practical Assessment
If you’re considering a quick refresh, painting over wallpaper can be a viable option. The question often asked is is it ok to paint over wallpaper, and the short answer is: it depends. The surface must be sound, clean, and well-adhered. A full prep plan will save you from future peeling and uneven color. According to PaintQuickGuide, success hinges on wallpaper type, adhesion, and overall condition. Start by identifying whether your wallpaper is vinyl-coated, paper-backed, or fabric-textured, because each responds differently to paint and primer.
Next, perform a simple adhesion test: gently lift a small corner near a seam with a putty knife and press it back. If the wallpaper or adhesive lifts easily, you should not paint over it without removing or treating the surface first. On the other hand, if the panel is firmly attached and the surface feels stable after a quick wipe, you can proceed with a rigorous cleaning and proper priming. Finally, factor in environment: kitchens and bathrooms require moisture-resistant finishes, while living rooms benefit from breathable paints to prevent mold or odor buildup. In short, yes in many cases, but only with careful prep and the right products. This article will walk you through the exact steps to decide, prep, and apply paint safely.
Wallpaper Types and How They Affect Painting
Wallpaper comes in several varieties, and each type takes paint differently. Vinyl wallpaper—especially heavier vinyl—tavors a sealing primer to improve adhesion and even out sheen. Paper-backed wallpapers are more sensitive to moisture; they often require gentler cleaning and a bonding primer to prevent peeling. Textured or fabric-backed wallpapers can trap dust and oils, which means you’ll want to use a cleaner that does not break down the adhesive and a primer that blocks stains and seals tiny fibers. According to PaintQuickGuide analysis, using a high-quality bonding primer before applying color improves the likelihood of a durable finish across common household surfaces. Always test a hidden patch before committing to the full area, and tailor your primer choice to the wallpaper type and room conditions. The goal is a uniform surface that accepts paint evenly and resists moisture and humidity.
Surface Prep Before You Paint
Preparation is where most DIY projects either succeed or fail. Start with a thorough cleaning to remove dust, dirt, and cooking oils that can interfere with adhesion. Use a mild detergent solution and a non-scratch sponge, then rinse and allow to dry completely. Inspect seams and edges; tape off any areas you don’t want painted and repair damaged spots with a lightweight patch if needed. Perform a second adhesion test after cleaning: if edges lift with the tape test or seams lift when slightly lifted, you should consider removing the wallpaper or applying a bonding primer designed for tougher substrates. Lightly scuff glossy surfaces with 120-180 grit sandpaper to provide a tooth for the primer, then wipe away dust with a damp cloth. Ensure the room is well-ventilated and at a stable temperature; humidity can affect drying times and adhesion. A well-prepared base will reduce the risk of peeling, cracking, or color inconsistency after painting.
Primers and Sealers: The Right Tools for the Job
Choosing the right primer is essential when painting over wallpaper. A high-quality bonding primer or shellac-based primer can create a sealed, stable surface that minimizes peeling and helps color deposition. For kitchens or bathrooms with higher moisture, a stain-blocking primer can also help keep odors and water marks from showing through the paint. Apply primer in thin, even coats and let it dry according to the manufacturer’s instructions. If you’re unsure about adhesion or stain issues, test a small area before proceeding. After priming, inspect the surface for any remaining loose edges or glossy patches; these spots may need a light sanding and another primer coat to ensure a uniform finish. Once the primer has cured, you’re ready to apply your chosen topcoat.
Paint Selection: Sheen, Type, and Coverage
Most wall surfaces respond well to water-based latex or acrylic paints when primed properly, but your wallpaper choice can influence the final result. For living spaces, an eggshell or satin finish provides a durable, washable surface with moderate sheen. For kitchens and bathrooms, choose moisture- and mold-resistant formulas; consider a satin or semi-gloss finish that cleans easily. Oil-based paints are less common now due to odor and cleanup challenges, and some modern primers are incompatible with oil paints over wallpaper. Use high-quality, low-VOC products for a healthier indoor environment. Color coverage will depend on wallpaper color, pattern density, and the number of coats, but plan for at least two coats after priming. If your wallpaper is very dark or patterned, a tinted primer can help reduce the number of topcoats needed.
Tip: Always test your color on a small patch before committing to the entire room.
Application Techniques: Tools, Methods, and Tips
With surface prep complete, choose the right tools and technique for a smooth, even finish. A 3/8-1/2 inch nap roller works well on most flat wallpaper surfaces, while a microfiber roller can help reduce lint transfer on textured wallpaper. Cut in at corners and around trim with a high-quality angled brush, then use a light, consistent rolling motion to avoid showing lap marks. Back-rolling after you apply the topcoat can help even the paint layer on irregular seams. Maintain a wet edge to prevent lap lines, and avoid overworking the same area, which can lift adhesive and re-wet the surface. Allow each coat to dry fully before applying the next one; humidity and temperature can impact drying time. If you notice bubbles or peeling after drying, stop and reassess your prep and primer.
Safety tip: Wear a mask and ensure good ventilation when sanding or applying primers to minimize inhalation of dust and fumes.
Common Pitfalls and How to Avoid Them
Paint projects over wallpaper are notorious for peeling, uneven color, and long curing times if you skip steps or rush the job. Common mistakes include skipping the adhesion test, skipping primer, applying too-thick coats, and not letting coats dry completely. Another frequent problem is using a paint with poor coverage or low durability on a wallpaper surface, which leads to early wear. To avoid these issues, follow a strict sequence: test adhesion, clean and dry, prime with a bonding primer, apply at least two thin coats of topcoat, and keep the area well-ventilated. If you’re painting in a humid space, consider a dehumidifier to speed up curing between coats. Remember that different wallpaper types respond differently to moisture and heat, so adjust your approach accordingly.
Quick Troubleshooting and Maintenance After Painting
If you notice minor imperfections after painting, address them quickly. For small scuffs or spots, a light touch-up with a matching brush can often fix the issue without a full repaint. If bubbles appear, gently lift the affected area with a putty knife and reapply primer and paint, making sure to reseal that spot. For larger sections lifting at seams, you may need to re-prime and recoat or, in extreme cases, remove the wallpaper and start over. Maintain your painted walls with gentle cleaning using a soft cloth and mild detergent; abrasive cleaners can wear the finish and damage the wallpaper underneath. For moisture-prone rooms, ensure adequate ventilation to minimize future issues, and inspect periodically for signs of peeling or mold.
Authoritative Sources
When in doubt, consult credible references to supplement your knowledge. These sources provide foundational guidance for painting preparation, finishing, and safety:
- https://www.osha.gov
- https://www.bhg.com
- https://www.thisoldhouse.com
Tools & Materials
- Putty knife or scraper (5–6 inch blade)(Use a metal or plastic blade depending on wallpaper rigidity)
- Sponge or microfiber cloth(For cleaning and drying between steps)
- Mild detergent or sugar soap(For initial cleaning of wallpaper surface)
- Bucket and warm water(Mix cleaning solution)
- Painter's tape(Protect adjacent surfaces and trim)
- Drop cloths or plastic sheeting(Cover floors and furniture)
- 120–180 grit sandpaper(Lightly scuff glossy surfaces for primer grip)
- Adhesion primer/bonding primer(Recommended before topcoat)
- Shellac-based or acrylic-based primer(Alternative for stubborn stains)
- High-quality latex/acrylic paint(Choose finish based on room (eggshell, satin))
- Paint tray and liners(For even distribution of paint)
- Paint rollers (3/8–1/2 inch nap)(For flat surfaces; adjust nap for texture)
- Angled sash brush(Cuts in around trim and corners)
- Putty or spackle for minor repairs(Only if wallpaper edges need sealing)
- Masking film or additional drop cloths(Extra protection for ceilings and fixtures)
Steps
Estimated time: 4-6 hours
- 1
Test adhesion and plan
Begin with a small test area. Use a putty knife to gently lift a corner near a seam; if it doesn’t lift easily, adhesion is good and you can proceed. Plan your primer choice based on wallpaper type and room moisture.
Tip: Document results with photos to guide your full-area approach. - 2
Clean surface thoroughly
Wipe wallpaper with a mild detergent solution, then rinse with clean water. Allow to dry completely before priming. Cleaning removes oils that can hinder primer adhesion.
Tip: Avoid soaking the paper; excessive moisture can loosen adhesives. - 3
Repair and smooth seams
Scrape loose edges and fill gaps with patch or spackle as needed. Lightly sand any patched areas to create a smooth, uniform surface. Wipe away dust before priming.
Tip: Don’t over-sand glossy surfaces; you only need a light tooth for primer to grip. - 4
Prime the surface
Apply a bonding primer or shellac-based primer in a thin, even coat. Let it dry fully as per product instructions. This base reduces stain bleed and improves paint adhesion.
Tip: Use long, even strokes and avoid over-working primer in one area. - 5
Seal problem areas
If you detected stains or odors, apply a stain-blocking primer in separate passes to prevent bleed-through. Allow to dry completely between coats.
Tip: Ventilate well during drying to speed up cure time. - 6
Apply the first topcoat
Pour paint into the tray, load the roller evenly, and apply using a W-pattern to ensure even coverage. Maintain a wet edge to prevent lap marks. Let the first coat dry before evaluating coverage.
Tip: Keep coat thin to reduce textureing issues over seams. - 7
Inspect and sand if needed
Once the first coat is dry, inspect for thin areas or seams showing through. Lightly sand any raised spots and wipe away dust before the second coat.
Tip: Use a light touch—the wallpaper underneath can telegraph through thick layers. - 8
Apply the second coat and cure
Apply a second thin coat for full color and uniform finish. Allow the room to cure fully before placing furniture back or cleaning the surface.
Tip: Avoid heavy use for 24–48 hours depending on humidity.
Your Questions Answered
Can you paint over wallpaper without removing it?
Yes, if the wallpaper is firmly attached, clean, and free of peeling edges. Use a bonding primer and a quality topcoat. If there are large areas of peeling, remove or reattach and seal before painting.
Yes, you can, but only if the wallpaper is firmly attached and properly prepped with primer to ensure the paint adheres well.
How do I tell if wallpaper is vinyl or paper-backed?
Vinyl wallpaper tends to be more durable and often has a plastic feel. Paper-backed wallpaper is thinner and more prone to tearing when wet. A quick moisture test and feel can help determine the type.
You can tell by touching and considering how it reacts to moisture; vinyl feels plastic and resists moisture more than paper-backed.
Which primer works best on wallpaper?
A bonding acrylic primer or shellac-based primer is generally the best option for wallpaper. They improve adhesion and block stains that could show through the paint.
Bonding primers are usually the safest bet for this job.
What if bubbles appear after painting?
Stop, let the surface dry, then re-prime and recoat the affected area. Check for moisture sources and ensure proper ventilation during drying.
If you see bubbles, pause, dry, and re-prime; fix underlying moisture if present.
How long does it take to finish painting over wallpaper?
Expect several hours for prep, primer, and two coats, plus drying time in a well-ventilated space. Realistic planning helps avoid rushed errors.
Plan for several hours plus drying time, depending on room size and humidity.
Is removing wallpaper ever necessary before painting?
Not always. If wallpaper is in good condition, not textured, and adheres well, painting can work. Severe damage, persistent peeling, or glossy finishes may require removal.
In many cases you can paint over wallpaper, but not if it’s peeling or damaged beyond simple repairs.
Watch Video
Quick Summary
- Assess wallpaper type and adhesion before painting.
- Prep thoroughly—clean, repair, and sand as needed.
- Choose the right primer for adhesion and moisture resistance.
- Use the correct paint type and finish for the room.
- Test areas first and allow proper drying between coats.