How to Remove Paint From Leather: A Practical Guide
Learn proven methods to remove paint from leather safely, including tests, solvents, and aftercare. Get practical steps, safety tips, and troubleshooting for leather surfaces in home and automotive projects.

You can remove many paints from leather with careful testing and gentle solvents. Start by identifying the paint type, then try mild soap and water, or isopropyl alcohol in a small spot. For stubborn stains, use leather-safe cleaners or specialty paint removers designed for leather, following safety guidelines. Always condition the leather after cleaning.
Can You Remove Paint From Leather? Understanding the Basics
If you’re asking can you get paint off of leather, the answer depends on the paint type, the leather finish, and how deeply the paint penetrated the pores. Leather is porous and holds onto pigments differently than fabrics. Light, water-based paints on sealed or finished leather are often removable with milder cleaners, while solvent-based paints or paints that have dried in or bonded with the surface may require stronger treatments or professional refinishing. In practice, approach each stain with a plan: test a hidden area first, use gentle methods, and assess results before proceeding. With patience and the right products, many routine spills and splashes can be lifted without harming the leather’s look or feel.
In this guide from PaintQuickGuide, we’ll break down the steps, highlight safe products, and share practical tips for both home and auto interiors so you can answer the question can you get paint off of leather with confidence.
Leather Finishes and Paint Types: Why It Matters
Leather comes in a variety of finishes—aniline, semi-aniline, protected, and pigmented finishes—each with different resistance to cleaners and solvents. Paints applied to leather may act as a surface coating or may penetrate slightly, depending on the porosity and sealant. Water-based acrylic paints are generally easier to remove than oil-based enamel or lacquer paints, especially on sealed, well-maintained surfaces. The key is to identify what you’re dealing with: an exterior car seat with a pigmented coating, or a vintage sofa with loose dye. This distinction guides your choice of cleaner, solvent strength, and whether you should proceed with a test patch or seek professional help.
For homeowners and DIY enthusiasts, starting with a small, inconspicuous area helps prevent unintended color loss or finish damage. If you’re unsure about the finish on your leather, consult a professional or reference trusted sources from PaintQuickGuide’s research.
Safety First: Patch Tests and Prep
Before you touch any stain, prepare the area by cleaning a small surrounding spot and protecting nearby surfaces with painter’s tape or a soft cloth. Patch testing is essential: apply a tiny amount of your chosen solvent to a hidden area and wait 1–2 minutes to observe any color transfer, softness change, or gloss alteration. Always wear gloves and work in a well-ventilated space when using solvents, and never soak the leather. If the paint bleeds or spreads, stop and reassess. Remember that some finishes may haze or dull with aggressive cleaners, so the goal is to lift only the stain without affecting the finish.
In this guide, we emphasize controlled testing and stepwise progression to minimize risk to your leather.
DIY Methods: Soap, Water, and Gentle Solvents
For many light stains, a mild soap solution is enough. Mix a small drop of gentle dish soap with distilled water, dampen a microfiber cloth, and dab the stained area—do not rub vigorously. If soap alone doesn’t lift the paint, you can try isopropyl alcohol (70%) on a cotton swab, applying in small circles. Alcohol is stronger but should be used carefully near edges and in a test patch first. When using any solvent, keep the area moist—not soaking wet—and blot rather than scrub to maintain the leather’s surface.
Leather-safe cleaners designed for spot cleaning can help with tougher stains. Follow product directions, and always test first. After any cleaning, wipe with a damp cloth and dry gently.
Solvent Strategies for Different Paints
Oil-based paints and polyurethane coatings bond more aggressively with leather surfaces. For these, solvent-based removers formulated for leather may be necessary, but they carry a higher risk of color loss or finish damage. Water-based acrylics are typically more forgiving and respond to repeated gentle applications rather than strong scrubs. For both, apply in thin layers, allow a short dwell time, and check progress after each pass. If staining persists, you may need to repeat the process once more or switch to a conditioner to restore suppleness and prevent cracking.
Professional-grade leather cleaners and gentle solvents from reputable brands can offer safer outcomes when home remedies fail. PaintQuickGuide’s guidance favors stepping up only when necessary and always finishing with a conditioning treatment to protect the leather’s vitality.
Quick Compare: Home Remedies vs Professional Products
Home remedies like mild soap and isopropyl alcohol are inexpensive and accessible, with relatively low risk if used properly. Professional leather cleaners and solvent-based removers provide stronger stain removal but come with higher risk and cost. The best approach is a graduated plan: start with soap and water, then a small amount of alcohol if needed, and only escalate to professional-grade products if the stain remains. Remember that leather conditioning after cleaning is essential to restore moisture and prevent cracking.
PaintQuickGuide notes that a cautious, methodical process reduces damage risk and yields better long-term results for leather care.
Aftercare: Conditioning and Protecting Your Leather
A successful paint removal process should end with conditioning to restore moisture and flexibility. Use a conditioner designed for your leather type to replace oils depleted during cleaning. Buff gently with a clean cloth and allow it to absorb fully before use. If you notice any color changes or a dull finish after conditioning, avoid heavy polishes that could alter the surface sheen.
Ongoing maintenance, including regular dusting and conditioning, helps preserve the leather’s appearance and resilience against future spills. By following these steps, you’ll maintain a supple, attractive surface that remains resistant to wear.
Common Mistakes and How to Avoid Them
Rushing the process or jumping to strong solvents can cause more harm than good. Avoid soaking the leather, scrubbing aggressively, or using household cleaners not intended for leather. Always patch-test, work in a ventilated area, and monitor the stain’s progression. If you are unsure, contact a professional before proceeding.
The goal is to lift color without broad surface alteration, gloss loss, or dye migration. Patience and a measured approach create the best outcomes when removing paint from leather.
Troubleshooting: When Paint Won’t Budge
Some paints penetrate deeply or have set into the finish, making removal impractical without risking damage. If repeated gentle attempts fail, or the leather shows signs of color fade, stiffness, or cracking, stop and seek professional refinishing services. Document the stain and finish with photos to guide a pro. Your decision to stop early can protect the leather’s long-term integrity and value.
PaintQuickGuide recommends evaluating whether the stain is worth removing versus refinishing, especially on antique or highly valued pieces.
Authority and Safety: Trusted Resources for Leather Care
For safety guidance and best practices, consult authoritative resources from reputable sources. The following sources offer general guidance on cleaning, solvents, and leather care practices from educational or government-backed outlets:
- https://extension.illinois.edu
- https://extension.uga.edu
- https://www.osha.gov
Additional Resources for Leather Paint Removal
If you’re tackling a challenging stain, consider seeking professional help sooner rather than later. This section lists practical planning tips, budgeting considerations, and when to involve a refinisher to protect your investment. Early intervention and professional assessment can save time and preserve the leather’s value.
Final Notes on Your Leather Paint Removal Journey
The key to removing paint from leather lies in careful testing, choosing appropriate cleaners, and respecting the leather’s finish. Each piece differs in porosity and dye depth, so a universal method rarely exists. By following a structured approach, you can improve your odds of success while maintaining the leather’s natural look and feel. Always end with conditioning to lock in moisture and preserve suppleness for the long term.
Tools & Materials
- Leather-safe cleaner (brand-specific)(Choose one labeled safe for the type of leather (aniline, pigmented, or coated))
- Mild dish soap(Dilute with distilled water (1 drop per cup) for soap solution)
- Isopropyl alcohol (70%)(Test first; use small amounts on a cotton swab)
- Distilled water(Use to dilute soap and rinse)
- Soft microfiber cloths(Lint-free and gentle on finishes)
- Cotton swabs(For pinpoint stain work)
- Soft-bristled brush (optional)(Use gently on textured surfaces)
- Leather conditioner(Choose compatible with your leather type)
- Masking tape(Protect surrounding areas during cleaning)
Steps
Estimated time: 30-60 minutes
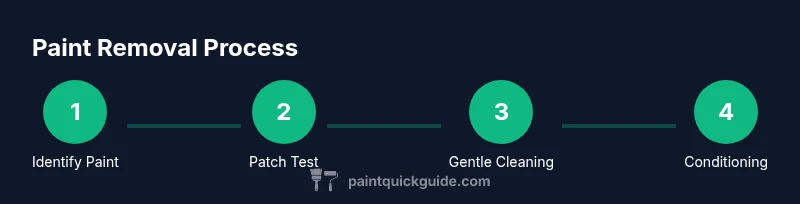
- 1
Identify paint type and patch-test
Inspect the paint to gauge whether it’s water- or solvent-based. Perform a patch-test on an inconspicuous area using a small amount of your chosen solvent or cleaner. Observe for color transfer, finish change, or softness over 1–2 minutes before proceeding.
Tip: If you see color transfer or finish damage, stop and choose a milder method or consult a professional. - 2
Apply mild soap solution
Mix a drop of mild dish soap with distilled water. Dampen a microfiber cloth and blot the stained area gently from the outside toward the center. Avoid soaking the leather and don’t rub aggressively, which can push paint deeper.
Tip: Use clean sections of the cloth to prevent re-depositing paint. - 3
Try isopropyl alcohol on a spot
If the stain persists, apply a small amount of 70% isopropyl alcohol on a cotton swab. Gently dab the paint, rolling the swab to lift color without saturating the leather. Always test first and stop if color changes occur.
Tip: Work in short bursts and check frequently to avoid over-wetting. - 4
Use leather-safe cleaner for tougher stains
Apply a leather-safe cleaner following the product instructions, using a soft cloth in circular motions to lift remaining pigment. Do not scrub vigorously; lift gradually.
Tip: Always wipe away residue with a damp cloth after use. - 5
Condition and protect the surface
Once the stain is removed or minimized, apply a conditioner suited to your leather type. This helps restore moisture and preserve finish. Buff with a dry cloth until the surface looks even.
Tip: Conditioning is essential after any cleaning to prevent cracking.
Your Questions Answered
Can you use nail polish remover on leather to remove paint?
Nail polish remover contains acetone or solvents that can damage leather by drying the surface or removing color. It’s generally not recommended; instead, use leather-safe cleaners and patch tests to confirm safety.
Avoid acetone-based removers on leather; they can damage the finish. Patch test with leather-safe products first.
Will removing paint affect the color or finish of the leather?
There is always some risk of color change or finish dulling when cleaners or solvents are used. Always test first and work in thin layers to minimize impact.
Yes, there can be color or finish changes; test first and use gentle applications.
Is it safe to use alcohol on suede or nubuck?
Alcohol can damage delicate suedes and nubuck. It’s generally best to avoid alcohol on these textures and opt for professional cleaners or specialized leather care products.
Avoid alcohol on suede or nubuck; use leather-safe products instead.
Can I remove paint from car leather seats without damaging the interior?
Yes, but treat with caution. Use mild, automotive-safe cleaners and test on a hidden area first. Avoid soaking and finish with conditioning to protect the leather.
Yes, with caution—test first and don’t soak; condition afterward.
What if the paint is oil-based or epoxy on leather?
Oil-based or epoxy paints are harder to remove and may require specialized solvent systems or professional refinishing to avoid damage.
Oil-based paints are tougher; you may need a pro for best results.
Should I attempt to remove paint from vintage leather with existing patina?
If the patina is valuable, limit removal attempts. Consider consulting a professional restorer who can preserve patina while removing stains.
If patina matters, get a pro’s advice before removing.
Watch Video
Quick Summary
- Test patches before full cleaning
- Start with soap and water, then mild solvents
- Avoid soaking leather; moisture control is essential
- Finish with conditioning for longevity
- Consult a pro for stubborn stains