When Painting How Long Between Coats
Discover how long to wait between coats for latex and oil-based paints, plus environmental tips, dryness tests, and practical steps to achieve a durable, smooth finish.

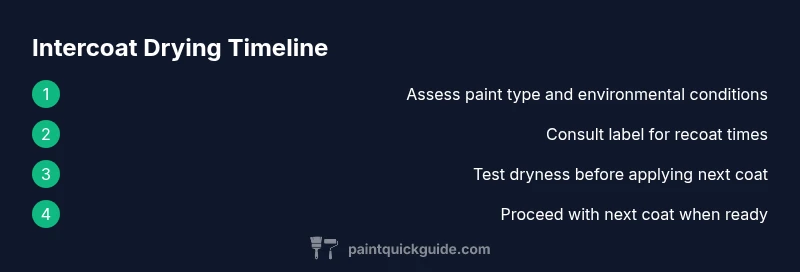
Waiting between coats depends on paint type and conditions. For latex (water-based) coatings, recoat after 2-4 hours in dry, moderate humidity. Oil-based paints typically require 6-8 hours, and some specialty finishes may need longer. Always follow the can label and perform a simple dryness test. Environmental factors can shorten or extend these times, so adjust for temperature and airflow.
Why wait between coats matters
Intercoat waiting times are not arbitrary; they ensure solvent evaporation, binder set, and surface tension recovery so the next coat bonds well. If you skip or shorten the wait, you risk a prolonged cure time, poor adhesion, and a finish that peels, sags, or forms bubbles. The reason is simple: each coat adds a new layer that needs to breathe as solvents leave and the film forms. The PaintQuickGuide team emphasizes that the exact wait depends on paint type, surface temperature, humidity, and airflow. In controlled interior spaces, you can often recoat latex within a few hours; in damp basements or hot sun, things slow down. Always plan as if you’re building a small timeline: you may finish one day and complete the second coat the next morning if you’re painting an entire room. For best results, keep a visible clock or timer nearby to track elapsed time precisely.
Drying times by paint type
Paints are engineered with different drying profiles. Latex or water-based paints typically dry to the touch quickly and can often be recoated after a short wait, though precision depends on the pigment, binder, and film thickness. Oil-based enamels form a tougher film but require longer recoat times. Some fast-dry formulations exist, but you must still respect the manufacturer’s guidance. A general rule of thumb is: latex 2-4 hours, oil-based 6-8 hours, with longer times in high humidity or cooler temperatures. Specialty finishes such as enamels or high-solids coatings may require different windows. Always read the label and perform a dryness test before starting a second coat, even if the general guidance suggests a short wait.
Environmental factors that affect drying
Drying time is not a fixed number; it shifts with temperature, humidity, air movement, and airflow. Warmer rooms with good circulation dry faster, while damp or poorly ventilated spaces slow solvent evaporation and film formation. Ideal interior conditions are moderate temperature, low humidity, and steady airflow across the surface. If you’re painting a kitchen or bathroom, use exhaust or portable fans to replace humid air with drier air. Humidity above 60% can noticeably extend wait times, while drafts can help but may lead to dust deposition if the space isn’t clean.
Surface preparation and coat adhesion
Before applying a new coat, ensure the previous layer is materially ready: the surface should be clean, dust-free, and dry. Light sanding between coats is common on glossy surfaces to create micro-abrasions that improve adhesion; always remove sanding dust with a tack cloth or vacuum. If the first coat shows dust nibs or holidays, lightly sand, wipe, and recheck dryness. Skipping proper prep invites adhesion failures that surface as peeling or dull spots after regaining full cure. Remember: preparation is as important as timing for a durable finish.
How to test if a coat is ready
A simple tack test—the surface should feel dry but not chalky under light pressure—helps confirm readiness. Wipe a small area with a clean cloth; if color lifts or smudges, wait longer. A more robust approach is the moisture test: gently press a finger or fingernail on an inconspicuous area and observe if it leaves a mark or indentation; if it does, wait until the surface is firm. If you can press with your knuckles and it feels tacky, give it more time. Always verify before applying the next coat to avoid issues like cracking or poor adhesion.
Recoating different surfaces: walls, trim, cabinets
Walls: latex or acrylic paints usually recoated after 2-4 hours under typical indoor conditions. Trim and cabinets: enamel or oil-based finishes often need longer windows, sometimes 6-8 hours or more, due to higher film thickness and solvent content. Surfaces like metal or plastic may require longer or specific primers. Adjust timing based on the surface finish and manufacturer recommendations. If you use a waterborne enamel on trim, test readiness the same way you would on walls, but anticipate longer wait times if the temperature is cooler or humidity is high.
Practical timelines: example scenarios
Scenario A: A 12' x 12' room with two latex coats on the walls. After the first coat, you wait 2-4 hours before applying the second coat, depending on humidity. If you’re doing edge work near windows, you might extend the wait a little to ensure edges dry fully. Scenario B: A kitchen with oil-based trim enamel. Plan for a longer wait, typically 6-8 hours or more, especially if the space is cool or humid. In both cases, monitor the surface with a dryness test and don’t rush to the next coat.
Tips for speeding up drying safely
- Improve ventilation with fans directed across the surface and away from you to speed solvent evaporation. - Keep doors open to increase cross-breeze but shield from dust. - Use a dehumidifier in damp rooms to lower humidity and accelerate drying. - Maintain a stable room temperature within the paint’s recommended range; avoid rapidly heating the space with space heaters. - Protect freshly painted surfaces from direct sunlight that can cause uneven drying and edge checks.
Common mistakes to avoid
- Rushing coatings or ignoring manufacturer times, which can lead to peeling or sagging. - Painting in high humidity or extreme temperatures without adjusting wait times. - Skipping prep, such as cleaning and sanding, which undermines adhesion. - Applying thick coats instead of thinner, even coats; heavy film takes longer to dry and cures unevenly. - Not testing dryness; assuming readiness can cause a poor finish that needs rework later.
Tools & Materials
- Paint (latex/water-based and/or oil-based as needed)(Choose the correct type for the surface; consider finish (matte, satin, gloss).)
- Paint brushes and rollers(Roller nap: 3/8" for walls; thinner for trim; use angled brushes for edges.)
- Paint tray and liners(For rollers; keep liners to reduce cleanup time.)
- Painter's tape(Protect edges; remove tape while still slightly tacky for clean lines.)
- Drop cloths(Cover floors and furniture; use heavy-duty fabric or plastic.)
- Sandpaper or sanding block (medium grit)(Lightly rough glossy surfaces between coats to improve adhesion.)
- Vacuum or tack cloth(Remove dust before applying the next coat.)
- Ventilation options (fans, open windows, dehumidifier)(Ensure safe use and avoid directing air at freshly painted edges.)
- Timer or clock(Track wait times accurately to avoid premature recoats.)
- Surface cleaner(Ensure surfaces are clean and free of oils and dust.)
- Personal protective equipment (gloves, goggles)(Safety first when handling solvents and paints.)
- Humidity and temperature meter(Helpful for adjusting wait times in variable conditions.)
Steps
Estimated time: 8-16 hours
- 1
Plan and check labels
Review the paint label for the recommended recoat time and surface-specific notes. Confirm the room temperature and humidity are within the paint’s ideal range before starting. Gather your tools and lay out drop cloths to keep the work area clean.
Tip: Always trust the label more than memory when it comes to recoat windows. - 2
Prepare the space and surface
Remove furniture or cover it, clean surfaces, and patch any holes with spackling. Lightly sand glossy areas to create a grip for the next coat. Wipe away dust with a tack cloth before you begin painting.
Tip: Clean surfaces first; dust particles will cause texture and adhesion issues. - 3
Apply the first coat
Apply an even coat using the appropriate technique for the surface (brush for edges, roller for flat areas). Maintain a consistent pace to avoid lap marks and ensure a uniform film thickness.
Tip: Maintain a wet edge to prevent visible lines between strokes. - 4
Wait and test readiness
Monitor the surface for dryness; perform a tack test on an inconspicuous area. If the surface still feels tacky, allow more time before recoating. Use a timer to track the exact wait period advised by the label.
Tip: Timing can vary with humidity; always test rather than assume. - 5
Lightly sand between coats if needed
If the first coat shows dust nibs or minor imperfections, gently sand with fine-grit paper and wipe away dust. This helps the next coat adhere and reduce texture. Do not over-sand; the goal is a smooth surface.
Tip: Wipe with a tack cloth to avoid embedding fine dust into the finish. - 6
Apply the second coat
Apply a second coat with the same care as the first, watching for drips and maintaining even coverage. Keep a steady hand and cross-hatch if needed to blend edges. Recheck the surface after a short rest if the label allows.
Tip: Use a consistent tool, paste the paint to edges first, then fill the field. - 7
Inspect and plan the next steps
Assess the finish after the second coat (and any additional coats if required). Verify there are no holidays, sags, or color inconsistencies. If a third coat is needed, repeat the wait-and-test process before proceeding.
Tip: Document the time taken and environmental conditions for future projects.
Your Questions Answered
How long should I wait between coats for latex paint?
Most latex paints recoat after 2-4 hours in dry conditions, but always check the label. If humidity is high, extend the window and test dryness.
Latex usually needs about two to four hours between coats, but check the label and test dryness if the room is humid.
Can I speed up drying between coats?
Yes—improve ventilation, manage humidity, and keep the space at a steady, suitable temperature. Avoid direct heat or drafts that cause dust issues.
You can speed it up with good ventilation and stable temperature, but avoid direct heat or dusty drafts.
Is it okay to sand between coats?
Light sanding between coats is common on glossy surfaces to improve adhesion. Use fine-grit paper, then wipe away dust before the next coat.
Yes, light sanding helps adhesion; wipe off the dust before recoating.
What about oil-based paints?
Oil-based coats typically require 6-8 hours before recoating, longer in humidity or cooler conditions. Always follow the label for the exact window.
Oil-based finishes usually need six to eight hours, but check the label in your environment.
How long until the paint fully cures?
Most paints reach full cure after 24-48 hours for walls, with enamel finishes sometimes taking longer. Avoid heavy use or cleanup until cured.
Full cure is usually 1-2 days; avoid heavy use until fully cured.
Watch Video
Quick Summary
- Plan wait times around paint type and environment.
- Test dryness before recoating to avoid finish problems.
- Follow label instructions rather than relying on memory.
- Prepare surfaces and keep dust out of the workspace.
- Use ventilation and controlled conditions to optimize drying.