Spray Machine for Paint: A Complete DIY Guide
Learn how to choose, set up, and safely operate a spray machine for paint. This PaintQuickGuide guide compares HVLP, LVLP, and airless systems, covers prep, application, cleanup, and maintenance for home and auto projects.

By the end of this guide, you’ll know how to select the right spray machine for paint, set it up for your project, and apply coatings evenly with proper safety. You’ll also understand maintenance, cleanup, and cost considerations for home and auto refinishing. We’ll compare HVLP, LVLP, and airless options, explain material compatibility, nozzle sizes, and technique tips to prevent runs and overspray.
Why a spray machine for paint matters
If you’re tackling walls, cabinets, or a car body, a spray machine for paint can dramatically speed up coverage and deliver a smoother, factory-like finish compared with brushes or rollers. The right sprayer reduces roller lines, improves atomization, and helps you apply thin, even coats that dry consistently. In this PaintQuickGuide article, we’ll walk through how to pick the best system for your project, how to prep properly, and how to operate safely and efficiently. The goal is to give homeowners and auto refinishing hobbyists practical, battle-tested steps that yield professional-looking results without breaking the bank.
Types of spray systems and how they work
Spray machines for paint come in several configurations, each with trade-offs for finish quality, material thickness, and ease of use. HVLP (high-volume, low-pressure) sprayers atomize paint with a high-volume air stream at lower pressure, producing fine finishes with minimal overspray. LVLP (low-volume, low-pressure) variants lean toward even finer control at the cost of painting speed. Airless systems push paint through a nozzle at very high pressure, delivering rapid coverage on larger surfaces but requiring careful technique to avoid pinholes and orange-peel effects. Understanding these differences helps you match a sprayer to projects like cabinets, walls, or automotive panels.
Surface prep and material compatibility for spray painting
Prep is as important as the sprayer itself. Clean and sand surfaces thoroughly, repair imperfections, and mask surrounding areas with painter’s tape and drop cloths. Thinning requirements vary by machine and material; always start with manufacturer-recommended ratios and test on a scrap piece. Not all paints are suitable for every spray system—waterborne enamels, Acrylics, and urethanes behave differently under atomization. A quick material compatibility check saves time, reduces waste, and prevents clogging that disrupts your workflow.
Setting up your sprayer: hoses, fittings, and air pressure
A successful setup requires clean lines and correct pressures. Attach the appropriate nozzle for your material and project, then connect hoses securely to minimize kinks. Calibrate the air pressure and material flow using a test panel. A good starting point for many waterborne paints is a lower pressure with a fine tip, increasing gradually as you observe spray consistency. Keep a spare nozzle and filters handy to address blockages quickly.
Basic spraying technique: movement, distance, and patterns
Maintain a steady, sweeping motion to avoid heavy buildup. Hold the gun at a consistent distance from the surface—usually around 6-8 inches for most consumer paints—and move in overlapping passes. Start with broad strokes to cover broad areas, then switch to finer passes to even out texture. Apply multiple light coats rather than a single thick coat to minimize drips, runs, and sand-throughs. Practice on scrap panels before committing to a live project.
Safety and ventilation essentials when painting with a spray machine
Ventilation is critical when spraying paints and finishes. Work in a well-ventilated area or outdoors with proper PPE: respirator or organic vapor respirator, chemical-resistant gloves, eye protection, and protective clothing. Keep flames and sparks away, as some finishes are flammable. Store solvents safely and clean equipment in a ventilated space to avoid fumes lingering in the work area.
Maintenance, cleaning, and troubleshooting
Rinse and flush the system with an appropriate cleaner after each use to prevent material buildup. Clean the nozzle, needle, and filters thoroughly; inspect seals for wear and replace damaged parts promptly. Common issues include clogging, uneven spray patterns, and pressure drops. Address these by checking for dry runs, filtered air supply, or thinning adjustments. Keeping a small toolkit and spare parts on hand minimizes downtime.
Cost considerations and budgeting for a spray setup
Budgeting begins with your project scope: small home repairs justify modest DIY sprayers, while large cabinets or car projects may require more capable units. Compare upfront costs, ability to spray different coatings, and long-term consumables like filters, hoses, and replacement tips. Remember that effective prep, precise technique, and proper ventilation influence overall costs by reducing wasted material and rework.
Practical tips for beginners: avoid common pitfalls
Start with a dedicated practice panel to dial in spray patterns before working on the actual project. Keep your spray pattern perpendicular to the surface, avoid over-application in one pass, and protect surrounding areas from overspray. Document the thinning ratios and settings that produce the best results for future projects. Small, incremental improvements compound into a professional finish over time.
Tools & Materials
- Spray gun (HVLP, LVLP, or airless)(Choose based on your project (HVLP for finishes; airless for rapid coverage).)
- Compressor or turbine system(Ensure appropriate CFM and pressure for your gun type.)
- Paint compatibility guides / thinning ratios(Follow manufacturer recommendations; have scrap material for test sprayers.)
- Protective equipment (respirator, goggles, gloves, coveralls)(Select organic vapor respirator for solvent-based finishes.)
- Masking materials (tape, paper, drop cloths)(Mask off edges, outlets, and adjacent surfaces.)
- Repair kit (nozzle tips, seals, filters, wrenches)(Keep a small set of common sizes.)
- Cleaning solvents and dedicated spray cleaner(Use recommended cleaner for your coatings.)
- Scrap panels or cardboard for test spraying(Test patterns before applying to project surface.)
- PPE storage and disposal containers(Safe storage for used rags and solvents.)
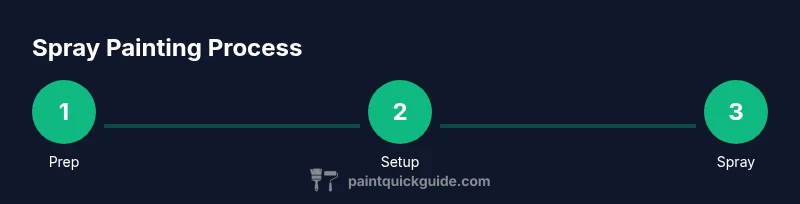
Steps
Estimated time: 2-3 hours (dependent on project size and drying times between coats)
- 1
Select the right system
Identify the project type (walls, cabinetry, or automotive). Compare HVLP, LVLP, and airless options, noting finish quality, material compatibility, and overspray control. Choose a model with adjustable fan patterns and a nozzle suitable for your coatings.
Tip: Test alternative nozzles on scrap material to observe changes in atomization and coverage. - 2
Prepare the workspace and materials
Set up masking, drop cloths, and ventilation. Clean the surface, repair imperfections, and mix or thin coatings per guidelines. Pre-filter the paint to remove particulates that could clog the nozzle.
Tip: Always test a small area before full coverage to confirm adhesion and finish quality. - 3
Assemble and calibrate the sprayer
Attach the correct nozzle, connect hoses securely, and set initial pressure to a conservative level. Run a quick purge to clear air and ensure even flow. Adjust the pattern by spraying on a test panel.
Tip: Document starting settings so you can reproduce results on the full project. - 4
Apply even coats with proper technique
Keep a steady distance from the surface and use overlapping passes. Begin with a light tack coat to reduce sags, then build up with additional light coats. Allow appropriate drying time between passes as specified by the coating.
Tip: Avoid crossing over the same area too quickly to prevent sags. - 5
Clean and maintain the system
Flush with the recommended cleaner immediately after spraying, then disassemble parts for thorough cleaning. Inspect seals and filters for wear, replace as needed, and store components in a dry, ventilated area.
Tip: Keep a maintenance log with cleaning intervals and part replacements.
Your Questions Answered
What is the difference between HVLP and airless spray machines?
HVLP uses high volume and low pressure for finer atomization and less overspray, ideal for finishes. Airless sprays at very high pressure and covers quickly, better for large surface areas but can require more technique control.
HVLP gives finer finishes with less overspray, while airless covers large areas faster but needs careful handling.
Can I use regular house paint in a spray machine?
Some paints are spray-friendly after thinning; always follow the coating manufacturer's guidance and test on scrap panels. Not all household paints are compatible with spray equipment.
Check the coating guidance and test on scrap before spraying your project.
How do I prevent paint runs and orange peel?
Use thin coats, maintain a steady distance, and overlap passes evenly. Reduce pressure if necessary and pace your passes to avoid buildup.
Thin coats and steady technique prevent runs and rough finishes.
Is masking off edges really necessary for small projects?
Yes. Even small overspray can mar adjacent surfaces. Invest time masking edges, outlets, and trim for a clean result.
Masking is essential to keep surrounding surfaces clean.
What safety gear is essential for spray painting?
Wear a respirator suitable for solvents, eye protection, gloves, and protective clothing. Ventilate the area well and store solvents safely.
Protect yourself with a proper respirator and PPE, and keep the area ventilated.
How often should I clean the spray gun?
Clean the gun immediately after use, then perform a thorough cleaning after a few sessions or when switching coatings.
Clean promptly after spraying to prevent clogging.
Watch Video
Quick Summary
- Choose the right spray system for your project.
- Prep surfaces thoroughly and test thinning ratios.
- Apply multiple thin coats for best finish.
- Maintain your equipment to prevent clogs and blemishes.
- Prioritize safety and ventilation throughout the process.