What to Spray Paint: A Practical Guide for Surfaces and Finishes
Discover what surfaces are ideal for spray painting, how to prep, and techniques for a durable, professional finish on home and auto projects.

In this guide you will learn what surfaces are suitable for spray painting, which paints and primers to choose, and how to apply thin, even coats for a durable finish. You’ll also see essential safety tips and how to plan a project from prep to cure. This quick answer sets you up for a detailed, hands-on tutorial.
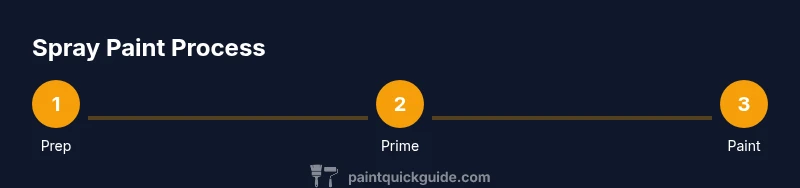
What surfaces work best for spray paint
Spray painting is a versatile finishing method, but success starts with choosing surfaces that hold coatings well. If you’re deciding what to spray paint, focus on surfaces that are clean, dry, and relatively nonporous. Metal, wood, hard plastics, coated plastics, glass, and ceramic are commonly spray-painted when properly prepped and primed. Fabric and some flexible materials require specialty products, or may be better suited to brush-on paints or fabric sprays. In practice, you’ll plan around porosity, adhesion, and finish requirements. According to PaintQuickGuide, surface compatibility, prior coatings, and substrate cleanliness determine adhesion, color fidelity, and curing behavior. Start with a quick surface audit: is the surface bare or already painted? Is it smooth or textured? Will the project live indoors or outdoors? These factors decide primer type, spray paint chemistry, and the number of coats needed. When you understand the material, you’ll choose the right primer, spray type, and finishing approach for a durable, professional result.
Choosing the right spray paint and finishes
The next step in deciding what to spray paint is selecting the right paint chemistry and finish. For most DIY projects, acrylic enamel, lacquer, and enamel-based sprays offer good color accuracy and durability on hard surfaces. Plastic surfaces often require primers designed for plastic adhesion; metal surfaces benefit from bonding primers to improve grip and corrosion resistance. Finishes range from matte to gloss, with satin serving as a versatile middle ground. If your goal is a resilient, automotive-like finish, you may combine multiple products: a suitable primer, a mid-coat spray, and a clear topcoat. Consider UV resistance for outdoor items and colorfastness for high-use pieces. Always test a small patch first to verify adhesion and color match before committing to the whole project. The PaintQuickGuide approach emphasizes consistency of finish and avoiding over-saturation that can cause runs or ghosting.
Surface prep and priming essentials
Prep is the most important step in achieving a smooth, durable finish. Begin by cleaning the surface to remove dust, grease, and wax. For glossy or nonporous surfaces, light sanding or scuffing with fine-grit paper improves adhesion. For metal and hard plastics, a degreasing wipe helps, followed by a quick rinse and dry. Use masking tape or masking film to protect adjacent areas and create sharp edges. Choosing a primer that matches both the substrate and the paint type is crucial: bonding primers for plastics, rust-inhibiting primers for metal, and stain-blocking primers for wood with prior finishes. Allow sufficient dry time between primer and paint, and sand lightly between coats for a glass-smooth result.
Primer types and adhesion
Primer choice directly affects how well paint sticks and how evenly color lays down. Bonding primers are ideal for hard-to-adhere plastics, while rust-inhibiting primers protect metal from corrosion. Wood often benefits from a pore-filling primer to minimize grain raising, while already-painted surfaces may need a light scuff and a primer-sealer to prevent bleed-through. If you’re spraying indoors, select low-odor, low-VOC primers that still provide good coverage. Always follow the primer’s dry times and re-sand lightly before applying paint. A well-chosen primer saves you time by reducing the number of paint coats required.
Technique for even coverage and color control
A steady hand and consistent technique yield professional results. Begin with light, even coats from a constant distance, typically around 6–12 inches from the surface, sweeping across in smooth, overlapping passes to avoid edge build-up. Apply multiple ultra-thin coats rather than one heavy coat to prevent runs and sags. Allow each coat to dry before the next application; the total cure time depends on the product and ambient conditions. If color matching is critical, test on a scrap piece or hidden area to confirm tone and finish. Practice on a spare panel to master spray patterns, distance, and speed before tackling your main project.
Safety, ventilation, and cleanup
Ventilation is essential when spray painting. Work in a well-ventilated area, ideally with an exhaust fan drawing fumes away from you, and wear a respirator or at least a properly fitted mask. Keep flammables away from heat sources, and store unused cans upright in a cool, ventilated spot. Protect the floor and surrounding items with drop cloths, and use masking tape to define edges. Clean spray tips promptly according to product guidelines, and dispose of cans at a proper recycling or hazardous waste facility. Safe practices protect your health and help you achieve consistent results.
Common mistakes and how to avoid them
Avoid common pitfalls by planning ahead. Don’t skip surface prep or primer, as this is where adhesion problems originate. Don’t rush coats; thin, evenly spaced layers outperform thick bursts. Don’t ignore temperature or humidity; high humidity can cause solvent entrapment, while heat can accelerate drying too quickly and lead to micro-cracks. Finally, avoid over-brushing: spray painting is about controlled, consistent application, not heavy hand. By following a tested sequence and keeping a clean, organized workspace, you’ll minimize errors and improve final appearance.
Tools & Materials
- Drop cloths or plastic sheeting(Protect floors and surrounding surfaces)
- Masking tape(Edge masking and surface protection)
- Masking film or brown paper(Better cover large areas)
- Degreaser/industrial cleaner(Remove oils and waxes before paint)
- Isopropyl alcohol or prep solvent(Wipe down after degreasing)
- Fine-grit sandpaper (220–400 grit)(Key for nonporous surfaces; smooths rough spots)
- Sanding block or sanding sponge(Even pressure and control)
- Spray primer (bonding or filler primer as appropriate)(Improves adhesion and surface evenness)
- Spray paints (color of choice)(Choose paints compatible with surface)
- Clear topcoat spray (optional but recommended)(Adds protection and sheen control)
- Respirator or suitable mask(Protect from solvent fumes)
- Nitrile gloves(Keep hands clean and safe)
- Ventilation fan or open outdoor space(Move fumes away from you)
- Soft lint-free cloths(Wipe and buff between coats)
Steps
Estimated time: 2-4 hours
- 1
Set up workspace
Choose a well-ventilated area and protect surrounding surfaces with drop cloths and masking materials. Arrange all tools within reach to minimize movement during painting. This upfront organization reduces mistakes and speeds up the job.
Tip: Test a quick spray on a scrap surface to confirm distance and pattern before starting the actual piece. - 2
Clean and prep surface
Wipe the surface with degreaser, then dry completely. For glossy surfaces, lightly sand to create tooth. Remove dust with a tack cloth and ensure the area is free of oils that could prevent adhesion.
Tip: Avoid washing with water right before painting on metals; moisture can cause adhesion issues and flash rust. - 3
Mask edges and openings
Apply masking tape and film to protect areas you don’t want painted. For intricate edges, use thinner tape or paper to reduce bleed-through. Double-check that all target areas are adequately protected.
Tip: Leave small gaps at corners to prevent difficult-to-clean paint from sealing into crevices. - 4
Apply primer
Shake the primer can well and test spray on scrap first. Apply a light, even coat, keeping the can roughly 6–12 inches away. Let the primer dry according to the product instructions and lightly sand if needed.
Tip: Multiple thin coats outperform a single heavy coat; this minimizes orange-peel texture. - 5
Test spray pattern
Before painting the main piece, spray on a test panel to confirm no drips, runs, or sagging. Adjust distance or speed if needed. This helps you avoid costly mistakes on the actual project.
Tip: Keep a consistent wrist motion and avoid stopping the spray mid-pass. - 6
Apply color coats
Apply the first light coat, overlapping slightly with each pass. Wait a short, recommended dry time, then apply additional thin coats until you reach the desired color and coverage. Inspect for even color and adjust technique if you see uneven areas.
Tip: Aim for 3–4 light coats rather than 1 heavy coat; this reduces runs and ensures color depth. - 7
Finish with topcoat and cure
If using a clear topcoat, apply after the color has cured to the recommended stage. Use short, even bursts to avoid solvent pooling. Allow full cure time in a dust-free environment before handling.
Tip: Place the piece in a warm, dry area during cure to maximize hardness and durability.
Your Questions Answered
Is spray painting suitable for all surfaces?
Spray painting works best on hard, clean, and dry surfaces. Some fabrics and flexible materials require specialty sprays. Always test adhesion on a hidden area before proceeding.
Spray painting is great for hard surfaces like metal, wood, and plastic, but check if your material needs a fabric or specialty spray first.
Do I always need a primer?
Primers improve adhesion and color uniformity, especially on plastics and metals. If the surface is old or glossy, priming is typically recommended.
Yes. A primer helps the paint stick better and look more even, especially on tricky surfaces.
Can I spray paint fabric?
Fabric spray paints exist, but many fabrics require a dedicated fabric dye or paint. For best results on textiles, choose products designed for fabric and follow heat- or cure-time recommendations.
There are fabric sprays, but use products specifically made for fabric for lasting results.
How long does spray paint take to dry?
Dry times vary by product and environment. Expect light coats to dry in minutes to an hour; full cure may take longer, depending on humidity and temperature.
Dry times depend on the product and conditions. Usually, coats dry fairly quickly, but full cure can take longer.
How should I dispose of spray paint cans?
Let cans exhaust completely, then recycle where allowed. Check local hazardous waste guidelines if a can still holds propellant or paint.
Let cans vent completely and follow local recycling or hazardous waste rules.
Watch Video
Quick Summary
- Prepare surfaces thoroughly for best adhesion.
- Choose primers and coatings compatible with the substrate.
- Apply multiple thin coats for a smooth, durable finish.
- Ventilate well and protect surrounding areas throughout.
- Always test on scrap material before final application.