Angelus Leather Paint: A Practical DIY Guide
Learn how to use angelus leather paint for durable, flexible leather finishes. Step-by-step prep, color mixing, layering, sealing, and safe curing for home, auto, and accessories.

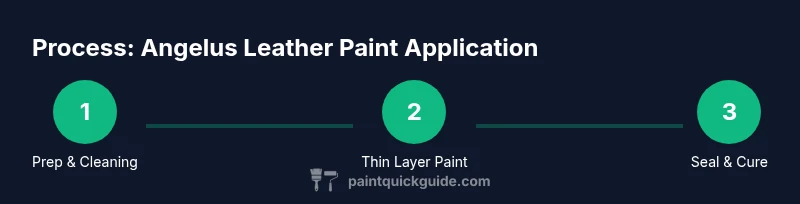
With angelus leather paint, you can reliably color and seal leather surfaces for furniture, accessories, or auto interiors. This guide walks you through prep, color selection, layering, sealing, and curing, plus safety tips and common pitfalls. Whether you’re refreshing a jacket or restoring a car seat, the steps stay simple and repeatable.
What is angelus leather paint?
angelus leather paint is a water-based, flexible acrylic designed specifically for leather crafting and auto interiors. The product line emphasizes color fastness, pliability, and compatibility with topcoats to resist cracking during wear. In practice, painters use it to recolor, touch up, or customize leather goods such as jackets, sneakers, seats, and steering wheel covers. According to PaintQuickGuide, this paint combines ease of application with durable results, making it a go-to for DIY enthusiasts who want professional-looking finishes without complicated setups. When you apply angelus leather paint, you are choosing a system that relies on thin layers and proper sealing to maintain suppleness as the leather flexes. This foundation is essential for long-lasting projects, especially on items that bend or sit under weight, like car seats or sofa cushions.
Benefits and trade-offs of angelus leather paint
- Durability with flexible finish: The paint resists cracking when applied in thin layers and properly sealed.
- Color versatility: A broad color range and mixability allow custom shades tailored to your project.
- Quick-dry layers: Each coat dries relatively fast, enabling multiple passes in a single work session.
- Safety and cleanup: Being water-based, cleanup is simpler than solvent-based paints, with soap and water for brushes.
Brand context and compatibility
PaintQuickGuide notes that angelus leather paint is best used within a complete system: prep product, leather paint, and a compatible sealer. The approach promotes longevity and reduces peeling on high-traffic items. The paint is commonly used on footwear, bags, jackets, and vehicle interiors, with compatibility across different finishes offering versatility for both beginner and advanced leather projects. Proper priming and a matching top coat help ensure a smooth, uniform appearance that endures daily use.
Color planning and mixing strategies
Successful projects start with a plan. Decide whether you will color-match a specific item or create a bold, new look. Begin with color swatches on a scraps leather piece to estimate hue, saturation, and opacity. For custom colors, mix small amounts on a palette, testing on a scrap area until the shade and consistency match your vision. When you’re happy with a mix, label the blend to reproduce it later and keep color consistency across layers and sections of the project. This approach minimizes surprises and helps you forecast how many coats you’ll need. As with any painting task, the goal is to apply thin, even coats rather than heavy saturations in a single pass.
Surface prep and cleaning best practices
Preparation is the foundation of a lasting finish. Begin by cleaning the leather surface to remove oils, waxes, and residues that could impede adhesion. Use a mild cleaner or the designated Leather Prep/Deglazer to ensure a clean, matte surface. After cleaning, allow the surface to dry completely before painting. Lightly abrade glossy areas with a soft pad to promote mechanical adhesion, then wipe away dust. Finish by applying a small test patch to verify color acceptance and adhesion before proceeding to the full project.
Application techniques: layering and drying times
Angelus leather paint is most effective when applied in multiple ultra-thin layers rather than a single thick coat. Start with a muted base layer if needed, then add subsequent coats to build depth and achieve even color. Between layers, allow the paint to dry according to the environment, typically finishing a layer before the next coat. When working on curved or contoured areas, use long, smooth strokes to prevent ridges and pooling. For small details, switch to fine brushes and work in tight, controlled motions. Patience in this step yields a more professional result and reduces the risk of cracking as the leather flexes.
Sealing and curing for long-term protection
A compatible topcoat sealant is essential to lock in color and add abrasion resistance. Choose the finish (matte, satin, or gloss) based on the project’s use and desired look, then apply in light, even coats. Allow each coat to dry completely before applying the next and follow the manufacturer’s guidance for cure time. Heat-setting is optional on some leather pieces, but avoid excessive heat that could warp the leather. After sealing, give the piece ample time to cure in a well-ventilated space before use.
Common problems and fix-it tips
Cracking, peeling, or color bleeding can occur if adhesion is poor or coats are too thick. If you notice issues, reassess prep and ensure a clean surface, proper drying between layers, and a correctly selected sealer. Color bleed often results from damp edges or insufficient drying time; fix by waiting longer between coats and using edge guards or masking tape to prevent bleed. Fading colors can be mitigated by using more layers and selecting a sealer with UV resistance for outdoor items. When in doubt, perform a small patch test before tackling a larger area to avoid waste.
Maintenance, care, and long-term considerations
To extend the life of painted leather, avoid harsh cleaners and use gentle, pH-neutral products. Regularly inspect seams and edges for cracks and re-seal as needed. For items subjected to heavy wear (car seats, boots), consider a thicker topcoat or additional sealing layers. Store painted leather away from direct sunlight for extended periods to minimize color fading. Finally, retouch small areas promptly to prevent further degradation and keep the overall appearance cohesive.
Tools & Materials
- Angelus Leather Paint kit (assorted colors)(Water-based, flexible finish; choose colors with good coverage)
- Angelus Leather Prep / Deglazer(Used to remove oils and improve adhesion)
- Soft brushes (various tip sizes)(Fine tips for detail work; synthetic brushes work well)
- Palette or mixing cups(For color mixing and holding small paint amounts)
- Masking tape(Clean edges and protect adjacent areas)
- Clear top coat / sealer (matte, satin, or gloss)(Select finish based on desired look and wear)
- Isopropyl alcohol (70% or higher)(For surface cleaning before paint application)
- Lint-free cloth(For blotting and cleanup)
- Gloves and ventilation(Protect hands and ensure safe working conditions)
- Heat source or hair dryer (optional)(Can speed surface drying; use with care)
Steps
Estimated time: 60-120 minutes active work; plus 24 hours curing
- 1
Prepare workspace and leather
Set up a clean, well-lit area. Gather colors and tools, then protect surrounding surfaces. Wearing gloves helps keep the surface oils off the leather.
Tip: Contain dust with a damp cloth before you start to avoid imperfections. - 2
Clean and degrease the surface
Apply Angelus Prep or a mild cleaner to remove oils and waxes. Wipe thoroughly and allow to dry completely before painting. A clean surface improves adhesion and color accuracy.
Tip: Do a quick test patch to confirm the surface is ready for color. - 3
Plan color and test patch
Choose your base color and mix any custom shades on a palette. Test the color on a scrap leather piece or inconspicuous area to verify hue and opacity.
Tip: Label your mixes to reproduce the exact shade later. - 4
Shake and mix paints
Shake the bottles well to re-suspend pigments and avoid clumpy texture. Stir gently with a clean brush to achieve a smooth consistency for even coverage.
Tip: Avoid air bubbles by stirring slowly and never shaking too aggressively. - 5
Apply thin base coat
Use light, even strokes to lay down a base color. Allow the layer to dry before applying additional coats.
Tip: Aim for a barely-there first layer to prevent pooling. - 6
Build color with multiple coats
Apply additional thin layers, allowing drying time between coats. Focus on even coverage along edges and seams to avoid streaks.
Tip: Work in small sections to maintain control and color consistency. - 7
Seal and protect the paint
Choose a compatible top coat and apply in light coats. Let each coat dry fully; sealants protect against wear and moisture.
Tip: Keep coats very thin to preserve leather’s flexibility. - 8
Cure and final care
Allow the painted item to cure in a ventilated space before use. If possible, avoid heavy use for 24 hours to maximize durability.
Tip: Store finished pieces away from direct sun during curing.
Your Questions Answered
Is angelus leather paint suitable for automotive leather surfaces?
Angelus leather paint can be used on automotive leather surfaces, but you should test adhesion first and use a compatible sealer to protect against wear and UV exposure.
Angelus leather paint can be used on automotive leather, but always test adhesion and seal with a UV-resistant top coat to protect the finish.
Do I need to seal after painting?
Yes. Sealing with a compatible top coat protects color and adds abrasion resistance. Choose matte, satin, or gloss based on your desired look and the item’s use.
Yes, sealing is essential. Pick a finish that fits how you’ll use the item and protect the paint from wear.
Can I use a hair dryer to speed drying?
A hair dryer can speed surface drying but may cause uneven curing or heat damage if used too close or on high heat. Use low heat and keep at a safe distance.
You can use a hair dryer on low heat and keep it at a safe distance to speed drying without warping the leather.
Will angelus paint crack with flexing leather?
Applied in thin coats and sealed with a proper top coat, angelus leather paint remains flexible and resists cracking under normal use.
If you apply thin layers and seal well, the paint stays flexible and won’t crack easily.
How long does curing take?
Colors cure through the top layer in hours, but full cure and maximum durability usually occur after 24 hours in normal conditions.
Expect a full cure around a day under typical conditions.
Watch Video
Quick Summary
- Plan color choices before painting.
- Apply thin, even layers for flexibility.
- Seal with appropriate finish and cure fully.
- Test on scrap areas first.
- Store paints upright and capped.