Angelus Paint: A Practical Guide for Home and Auto Refinishing
Learn how to use angelus paint for DIY projects, from surface prep to finishing. Practical tips, step-by-step guidance, and maintenance for long-lasting color on leather, fabric, and more.

In this guide, you’ll learn how to use angelus paint effectively for home and auto refinishing projects, with a focus on prep, color mixing, and protective sealing. You’ll discover which surfaces it works best on, how to apply multiple thin coats for a smooth finish, and how to care for painted surfaces over time. This overview highlights practical steps and essential tools.
Why Angelus Paint Stands Out for DIY Projects
Angelus paint is a popular choice for home and auto refinishing due to its versatility, especially for projects that involve leather, canvas, or other flexible surfaces. When you hear angelus paint, think of a water-based acrylic that dries with a durable, flexible film. DIY enthusiasts use it for sneaker customization, leather bags, and decorative accents on cars and motorcycles. The color range is broad, and the paints mix well to create custom shades. Because the formula stays pliable after drying, it resists cracking on curved or textured surfaces. For homeowners embarking on small refinishing tasks, angelus paint can offer a cost-effective alternative to professional coatings without sacrificing performance. The PaintQuickGuide team found that when projects require color customization and readiness to seal, angelus paint often delivers a balanced blend of ease-of-use and durability. This makes angelus paint a reliable starting point for DIY painters, hobbyists, and auto refinishing enthusiasts.
Choosing the Right Angelus Paint and Finishes
Choosing the right angelus paint involves understanding where you’ll apply it and what finish you want. Angelus offers paints designed for leather and fabric, with finishes ranging from gloss to matte and satin. For home projects with furniture or decorative accents, you may prefer a matte look to reduce glare, while sneakers or vehicle accents often benefit from a gloss layer for depth and protection. Mixing colors to create custom shades is straightforward, and you can blend two or more colors to reach a unique hue. The PaintQuickGuide approach emphasizes testing your chosen shade on a small sample area before committing to a larger portion. This minimizes surprises and ensures the final color matches your vision for angelus paint projects.
Surface Preparation for Angelus Paint on Different Materials
Surface prep is the foundation of a durable angelus paint finish. Start by cleaning the area to remove oils, dust, and wax. For leather and fabric, ensure the surface is dry and free of residues; for plastics or metals, scuff the surface lightly with a soft abrasive to improve adhesion. Mask off edges and seams with painter’s tape to keep lines clean. If working on glossy or very smooth surfaces, a light deglazing or light sanding can significantly improve hold. By investing time in prep, you reduce the risk of peeling, cracking, or dull color in angelus paint projects. The PaintQuickGuide team recommends documenting the prep steps you take, so you can repeat them consistently in future angelus paint tasks.
The Right Mixture: Mixing, Thinning, Layering Angelus Paint
For most angelus paint projects, small batches are best. Mix colors on a clean palette and adjust with a tiny amount of water or a thinning medium to achieve a smooth, brushable consistency. Thinning helps you build color in layers rather than pooling a single thick coat, which reduces sags and brush marks. When layering, apply thin coats and let each layer dry completely before the next. This approach with angelus paint yields even color distribution and minimizes streaks. Keep notes on the ratios you use for future projects to reproduce your custom shades reliably. This careful approach aligns with best practices for angelus paint in home and auto refinishing.
Application Techniques for Flawless Results
Different surfaces require different techniques with angelus paint. For leather, use long, continuous strokes to follow the surface grain; for fabric, use a slightly dabbing motion to avoid wicking. Edge control is essential to keep clean lines around seams and logos. Blending colors while wet can create subtle gradients and professional-looking results. When working on curved forms, rotate the object rather than the brush to maintain even coverage. Always test your technique on a scrap piece before applying to the final surface. The right technique with angelus paint helps you achieve a professional look without specialized equipment.
Finishing, Curing, and Maintenance of Angelus Paint
After applying angelus paint, sealing is often the next step to preserve color and resist wear. Choose a compatible sealant or top coat suitable for the surface you painted. Allow the coating to cure fully in a well-ventilated area, avoiding stress on the painted item during this period. Regular maintenance, such as gentle cleaning with mild soap and water, can extend the life of angelus paint finishes. For auto refinishing or frequent handling items, consider re-sealing periodically to maintain gloss or durability. Following these practices with angelus paint will help your projects resist fading and cracking over time. The PaintQuickGuide team's emphasis on proper curing and sealing makes a noticeable difference in long-term results.
Troubleshooting Common Issues with Angelus Paint
Even with careful prep and technique, issues can occur. If color looks uneven, add a light, even pass with a fresh coat after the previous layer dries. If edges lift or peel, reassess surface prep and consider applying a more compatible sealant. Salt and moisture can cause lifting or discoloration on certain surfaces; store items away from humidity and sunlight to preserve color. For stubborn cracking or chipping, a plan of additional thin coats and a revised sealing strategy often resolves the problem. Each issue is an opportunity to refine your method for angelus paint projects. PaintQuickGuide recommends keeping a small notebook of what works best for each material you work with.
Care and Storage for Angelus Paint and Finished Projects
Proper storage extends the life of angelus paint and the finished objects. Keep paints tightly closed and upright to prevent leaks and sediment. Store in a cool, dry place away from direct sunlight. Label colors and batch numbers if you’re mixing custom shades. After finishing a project, avoid exposing painted surfaces to harsh conditions until fully cured. Good storage practices help you reuse colors and maintain consistent results for angelus paint across multiple projects. Remember, the right care extends the lifespan of your work and keeps colors vibrant.
Tools & Materials
- Angelus paint set (assorted colors)(Acrylic, water-based, designed for leather, fabric, and certain plastics.)
- Fine detail brushes (sizes 0, 000)(Use synthetic bristles for precision on small areas.)
- Flat or round synthetic brushes(For broader coverage and even coats.)
- Palette or mixing cups(Small, disposable or reusable cups for color mixing.)
- Water container for brush cleaning(Keep water clean to avoid muddy colors.)
- Mild soap or gentle degreaser(Used for surface cleaning before painting.)
- Masking tape or painter’s tape(For clean edges and protecting adjacent areas.)
- Sealant spray or Angelus top coat(Choose a sealant compatible with your surface.)
- Gloves (optional)(Protect hands during long sessions.)
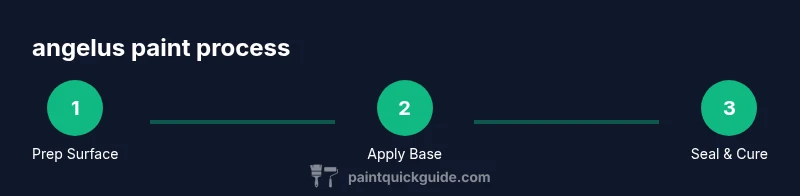
Steps
Estimated time: multi-hour process
- 1
Set up workspace and gather supplies
Clear a clean, well-lit area and lay down a protective mat. Gather all Angelus paints, brushes, water, masking tape, and the sealing product. Double-check that you have an example surface or scrap material for testing.
Tip: Organize colors by family (neutrals, bolds, metallics) to speed up your workflow. - 2
Clean and prep the surface
Remove dirt, oils, and wax from the surface with mild soap and water. Dry completely, then lightly scuff glossy finishes to improve adhesion. Mask off edges to protect neighboring areas.
Tip: A quick test on a scrap piece helps confirm the surface is ready for Angelus paint. - 3
Apply base or primer if needed
If your project requires a primer for adhesion or color depth, apply a thin, even layer and let it dry. For leather and fabric, often cleaning and light scuffing suffice without a primer.
Tip: Keep base coats thin to prevent cracking or dull finish. - 4
Mix and thin your colors
On a clean palette, blend your chosen Angelus colors for the target shade. Thin slightly with water or medium if needed to achieve a brushable consistency for multiple thin coats.
Tip: Test color on a scrap area to ensure it matches your vision. - 5
Apply thin, even coats
Paint in light, controlled strokes, following the surface contour. Allow each coat to dry before adding the next to prevent runs and heavy texture.
Tip: Maintain consistent brush pressure to avoid brush marks. - 6
Seal and cure the finished piece
Once color is complete, apply a compatible sealant for protection. Let the surface dry in a well-ventilated area until fully cured before use.
Tip: Ventilation matters—avoid inhaling fumes during sealing.
Your Questions Answered
What surfaces can I paint with Angelus paint?
Angelus paint works well on leather, fabric, and some plastics and metals with proper prep. Always test a small area first to confirm adhesion and color behavior on your specific surface.
Angelus paint works best on leather and fabric; test a small area first to confirm how it adheres and looks on your surface.
Do I need a primer when using Angelus paint?
Primer is helpful on slick or non-porous surfaces; for leather and fabric, thorough cleaning and light scuffing may be enough for good adhesion. If you’re unsure, apply a thin base layer and let it dry before painting over it.
Primer can help on slick surfaces, but for leather or fabric you often just clean and scuff before painting.
Can I mix Angelus colors to create custom shades?
Yes, you can mix Angelus colors to create custom shades. Mix small batches and keep notes so you can reproduce the exact color later.
Absolutely, mix small batches of colors to get your unique shade and write down ratios for future use.
Is Angelus paint durable outdoors or on vehicles?
Angelus paint is durable for everyday wear on sneakers and accessories. For outdoor or vehicle use, sealing and proper prep improve longevity, but exposure to harsh elements will affect durability over time.
It’s durable for everyday wear, but outdoor exposure benefits from good sealing and prep.
How should I store Angelus paints?
Store paints with lids tightly closed in a cool, dry place away from direct sunlight. Label colors and keep any mixing cups clean for next use.
Keep paints closed and in a cool, dry spot away from sun, and label colors for easy reuse.
Can I apply Angelus paint to metal or plastic surfaces?
Yes, with proper surface prep and a compatible sealant or primer. Always test a small area before committing to a large section.
Yes, but prep and seal appropriately, and test first.
Watch Video
Quick Summary
- Prepare surfaces thoroughly before painting.
- Use thin, even coats for smooth color build-up.
- Seal and cure properly to protect the finish.
- Test colors on scraps to achieve accurate shades.